Welcome back for another installment of my monthly Behind the Camera. It is here that I will talk about tips and tricks as well as other subjects that I might not get the opportunity to share in my other posts. Last month was a pretty involved one that took me several months to put together, but I guess that was fitting since it summarized 2022 in a single entry. This month I want to get back to a more normal type of entry and I figured that now was as good a time as any to talk about my studio.
Hold on a minute…I had to make a change or two to the studio which prevented me from actually getting this entry done in time for February 1st, which is why we are now at March 1st. Fortunately, I had several topics in the wings just waiting for a good month to discuss. I hope you joined me last time for a look at the beneficial reasons behind throwing 90% of your photos away. Now that we have that little hiccup in my plans out of the way, back to our slightly delayed monthly entry.
Yep, you might not know that I have a studio since the vast majority of what I do is landscape and decay photography which is mostly on location work. I’ve talked a good bit over the last year or so about how I have started to move into people photography and with that has come a lot of learning on lighting, set design, and posing. Since I have the room here at the house, it only made sense to utilize that space as a small studio. Well, as most know about me, I have a hard time doing things in moderation, and the studio has taken on a life of its own. Up until now, I have done a lot of talking about my process of learning the ways of portraiture and upgrading my gear to match how I want to shoot, but I haven’t really talked much at all about the studio itself. This month, I will be rectifying that oversight as it is well past time to formally introduce one of the newest aspects of my photography.
I guess before we get into the tour, I should give you a bit of background because the studio came to be largely because of chance. It all started back in 2020, as Covid was making its appearance here in the US. I had left my career as a police officer the year before and Toni and I were looking to build a new home that would be our retirement home. It all started out simple enough as we were looking for a small home in the mountains with a decent amount of land. We had picked out a builder and just had to figure out where to build. We both spent time looking on different real estate sites trying to find what land we would like. What we hadn’t really considered was that unimproved land is really hard to visualize without a house on it. We found lots of pictures of trees with different acreage values and started to find areas that we might want to build in. Of course, as we looked at these different tracts of land, there would be houses which popped up in the search from time to time. At least for me, it was much easier to visualize a house on a property when it was actually there. I saved a few that I liked, one of which was a home in Purlear, NC. It checked all of the boxes for me with a large yard, plenty of garage space, and a game room downstairs that I thought would make a great office for my new photography business. In my defense, the space didn’t look as massive as it actually was.
Well, I sent the link to Toni who really didn’t like the house at all because it looked quite plain. I can’t really argue with her on that, but I’m a plain kind of guy so that was an appealing aspect for me. Well, shortly thereafter, we were out in Wilkes County looking at land that we had been finding online. Again, each plot that we looked at was nothing but trees and it was nearly impossible for us to visualize what this was going to look like as a home. As the hours ticked by, we both got a little frustrated at looking at trees. I had recalled that there was a house that I had seen that was in the area of Purlear, which was near where we had ended up. I pulled it up and it was the very house that Toni didn’t like. Since we were close, we drove out there to take a look anyway. When we got there, she saw that there were dolphins imprinted along the driveway for the full length. Since she loves dolphins, that was the end of that discussion. A month later we were closing on the house. There were, of course, a few more details than that, but not many.
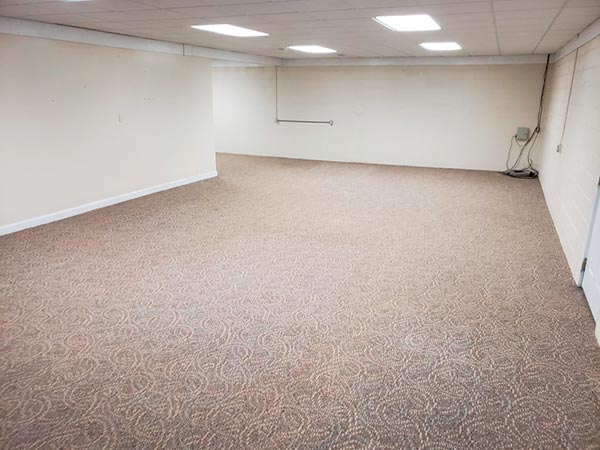
Now the game room that I mentioned is about 900 sq ft that happens to be a finished basement. It was packed when we toured the house, but after the previous owner moved out, this room became very large and empty. The walls were also a very light beige with a beige and blue carpet. The walls along the exterior walls of the house were cement block and the interior walls were drywall as was the attached full bath. It wasn’t all that inviting of a space, but it would give us a lot of flexible space within the home for different hobbies and such along with my editing station. Speaking of an editing station, I needed to get a desk set up. The one that I had been using at the previous house was kind of compact and designed to go in a corner. I didn’t want a corner desk for this large space because I needed to fill it somehow.
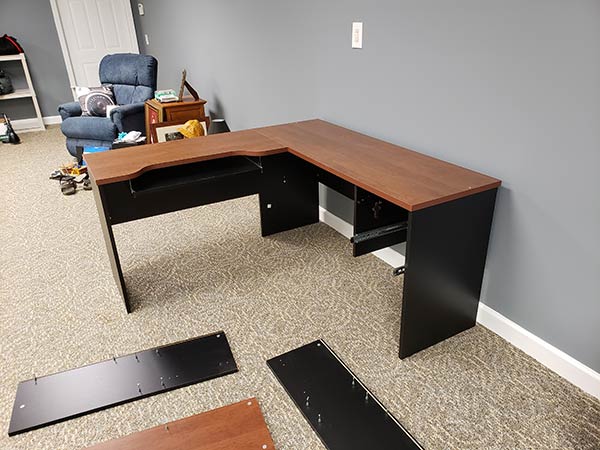
I got the biggest desk that I could find and built it. Ironically, it was a corner desk as well which was all I could find in large desks. That desk was still dwarfed by the size of the room, but it was made to where I could have it exposed on the outside which was an improvement over what I had before. The actual size was just a bit larger than what I had before, but it was a very usable space with drawers which my other did not have.
I ended up putting the printers on the opposite wall just to give a little balance to the space, not to mention I was out of electrical outlets around the desk at this point. The footprint of the basement was a “L” shape with the short side housing the full bath which was nice. Toni ended up taking that short side as her pastelling space in the house. It was still far from filled, even with a recliner and end table brought in for someplace to sit. I added bookcases, and even a CD rack (digital media without the need to stream for those younger folks), but still had a ton of room left wide open.
This was my office and where I ended up spending a good deal of my time. There were no windows, so I was totally blocked from the outside world, not even knowing if it was raining or sunny when I was in the office. If the lights were turned out, it was totally black as the only light that gets into the room was from a single window at the top of the stairs. Yep, no matter what time of day or night I was down here, the light was the same…florescent tubes overhead.
As you can see from the photo above, I did a bit of repainting to freshen things up. Since I was going to be doing editing down here, I wanted to have the most neutral colors possible to keep my eyes from introducing color casts in the edits. I went with roughly an 18% gray for the walls and a slightly darker shade of that gray for an accent wall on the side where the desk was and between the doorways. The white trim gave that bit of contrast that I needed, and the entire space looked much better than it had. I had the carpets deep cleaned to remove the stains from all the gaming equipment and the wood stove that was down here for a time.
Over time, Toni moved a rowing machine into the rear area of the office, so she was claiming roughly half of the space. In an ideal world, this would have been perfect as she could have spent time with me while I was editing or writing long winded blog articles (it happens occasionally, I’ve heard). The truth of the matter was she really didn’t like to come down here because there were no windows and she felt that it was too basementy. Essentially, I had all of this space downstairs all to myself and the desk that looked about the size of your high school desk that was attached to a chair when viewed in that big room. That was just how it was until I started to get into portraiture. When I got rolling with portraiture, I needed space to set up things like backdrops and lights. I ended up moving my camera equipment from the doorway back to the desk so that I had the room on that wall between the two doorways to place my subjects. That worked out well, but eventually I started to grow my light collection which came with light stands, and then there were lighting modifiers that had to be stored. All of a sudden, that huge space was starting to get a little cramped.

Since the row machine wasn’t being used anymore, I moved it into a closet and made that space storage for the stands and modifiers. I kept the strobe lights over with the camera on that shelf. As I got further into portraiture, I realized that I needed to change up the floor for things like seamless paper to keep them from getting crumpled under foot. Since the finished basement was the only carpeted room in the house, I needed to figure out a way to get a firm floor to avoid wrinkles with the seamless paper. Ideally, I would have done hardwood floors for the entirety of the studio, but the cost of that project was a little much at the time. My solution was to install a 10×10′ athletic floor which needed a place to live. Since I had the area between the two doorways cleared for use by the sitter, I decided to make that my stage. There was plenty of room as the wall between the doors was just at 12ft wide. I had a backdrop support kit placed next to the wall so that I could do different backgrounds right there. On the hard floor, I installed a vinyl backdrop floor so that the floor would actually look like a hardwood floor instead of gray plastic squares.
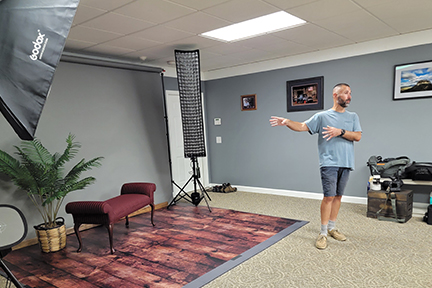
In this photo, you can see a set design on the stage. In this case, I have pulled down the seamless gray paper which is secured behind a bit of baseboard molding that I picked up at Lowes Hardware and stained. The idea is to create the illusion of a room in a home. At other times, I can use the gray paper to give me flexibility as I can color it with gels, keep it unlit and render it black, or I can overexpose it and make it white. It is one of my more flexible colors of paper, although I do currently have a pecan and evergreen tubes as well, for different color palettes. You can also see some of the props that I have picked up for use in the photos like the little bench and the potted plant.
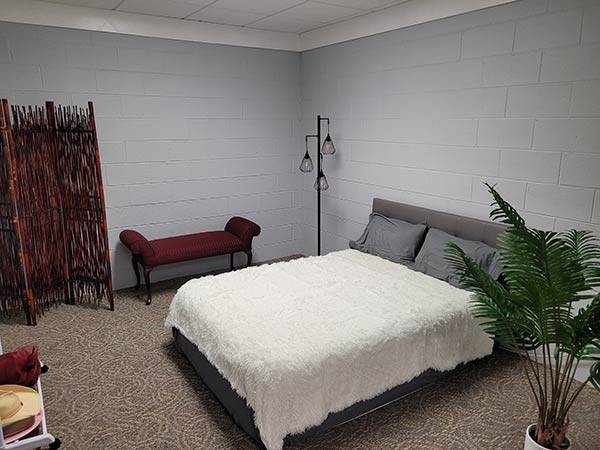
As more stuff got added and Toni started to encourage me to try boudoir photography, I actually started to outgrow the space that I had been working in. Since Toni wasn’t comfortable being downstairs alone, she wasn’t getting any pastelling done. She decided to move her art supplies up to the den and clear out that space in what was starting to be called the studio. That corner of the room was dedicated to the boudoir themed shoots, and I added a full-sized bed with a headboard placed there to give another set within the studio. The bed is actually a very nice air mattress that constantly regulates the amount of air that is in it to avoid deflation over time. There is a headboard mounted behind the bed as well to keep it from looking like an air mattress. This is actually quite handy as I can easily move the bed as needed for lighting or compositional concerns within the space. It can even be moved to the stage for a complete change of venue when needed. Ironically, this was the area that has delayed this entry because looking at the set here and seeing the current state of it being very similar, I decided that it just didn’t have the overall aesthetic that I was really wanting for this set. It needed a bit of an update, but I’ll get into that in a bit.
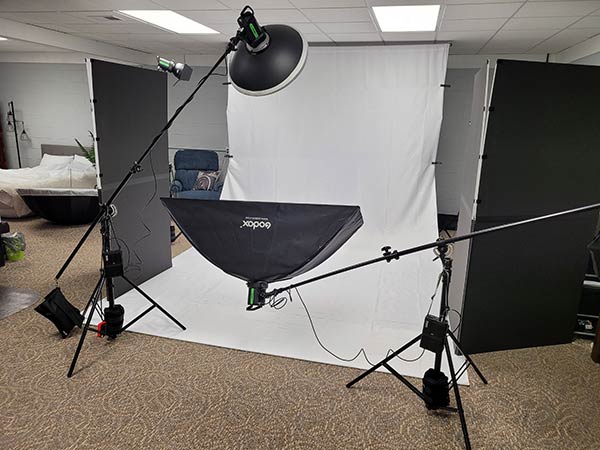
If you will recall, with the area toward the back where the row machine had been now empty, I was left with a storage area for my lighting and stands. In addition, I could use this area for another set space, if needed. I now had three areas of the studio that could all be used for different sessions. I had the main area, which was the stage, I had the boudoir area, and then I had the storage corner which is my flex space. I’ve used it to set up a whole different set with a complete background to be used during the same session when the stage had already been used. You can see in the photo above that I have set up a high key set for a portrait shoot that I did last Fall. Behind me, there was another set which was built with a green wall and the wooden faux floor. Because of the time that it takes to put these sets together, having the ability to run two, or even three complete sets at a time reduces the amount of time the client has to wait on me. The overall length of the space also allows me to shoot with narrower focal lengths that are typically better for perspective in portraiture. I have shot full length at 135mm in the studio which is pretty great considering most smaller studios have about half this space to work with. The only issue I have with the space is the 8ft ceilings which limits some of my lighting options as well as preventing me from shooting from low down for a full-length pose.
It seems that with each photo session that is shot in the studio I will find different aspects that I can improve on. As funds will allow, I will make those changes in order to better serve my clients. To give you an idea of what I mean, I started this entry at the beginning of January, and by the end of January, I had already brought in three pieces of furniture along with changing that boudoir set on the side of the studio. One of the pieces of furniture that I added was a Victorian chair which I picked up at a local antique store for just six bucks. It is a style that I have been after for a while and the price was too good to pass up on even though I was going to have to do something about the upholstery. As luck would have it, a deep clean was all that it needed to even the colors out and it was ready to go. I also picked up another stool which was shorter than the first one that I had purchased because I realized that the bar stool was just too tall to comfortably pose on. On the subject of furniture, in the early days of February, I found a great deal on a chaise lounge which I had a lot of posing ideas for. I’m really looking forward to getting to use that as a prop very soon for a client shoot.
The biggest change through the month was to pretty much completely revamp the boudoir set which, as you saw above, was a bit….shall we say too masculine with the concrete block walls and not too pretty carpet. I had been trying to figure out the best way to deal with the walls for a while, and I knew that I didn’t want to just have drywall put up because that would introduce other issues, not to mention costing a fortune for what I would gain. At least for right now, I am having to be very budget conscious when it comes to studio improvements because I honestly don’t know how sustainable the studio will be over time. Everything that I have been doing thus far, is reversable which is an important aspect for me. The solution for the block wall was a bit unorthodox, but I think serves the end result quite well. I decided to hang sheers from the trim at the top of the walls to the carpet. I was initially going to go with a deep color, like purple that would photograph black with a slight tint, but Toni convinced me to go with black sheers which are much more neutral, allowing me to introduce color strategically, based on the session and wardrobe. I have also realized that I can use speedlites with gels to introduce different colors on the walls. The sheers immediately softened up the walls which was wonderful while adding some soft textures to the hard lines. It was the perfect compromise to the space so that I could more effectively use it as intended.
I changed out the bed linens in favor of something a bit more upscale. I had been using a faux fur blanket for texture and softness, but Toni wasn’t thrilled with that, so it was replaced with a duvet cover in dark gray with a pinch pleated pattern for texture. There are now different sheet colors so that I can add strategic colors where needed. The headboard is the same as before, but I have added pegs to the back to push it from the wall so that the sheers aren’t crunched unnaturally. Since there is no way to affix the headboard to the air mattress, I needed to provide the illusion of an actual bed here which makes the headboard crucial. I think that the results work quite nicely and I will have a lot of flexibility in how I can shoot this space now.
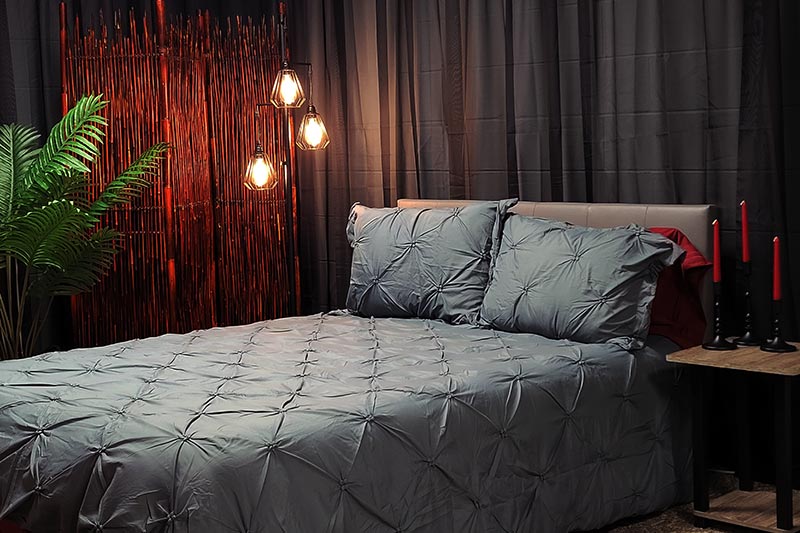
You can see from the quick cell photo that the space has changed greatly from how it looked to begin with. Even under the fluorescent lights with no strobes, this set looks good enough to make me consider using the practical lights along with a bit of flash in some cases. I’ve also added some candles to fill the top of the table that I recently picked up to complete the look and to add balance to the overall scene. I’m actually kind of glad that I started writing this entry back in January because Toni was out lining up some boudoir sessions for me and I might not have realized that this set was in such a pitiful state having only been used for a few test shoots to see what worked and what I needed to do to fix the problems. The new sessions prompted me to get on this quickly so that I was able to deliver a much better collection of photos to the clients.
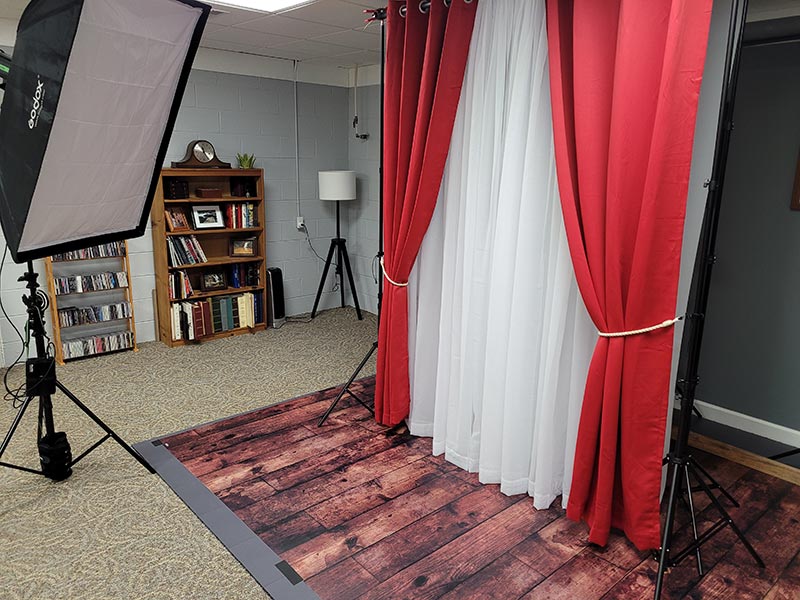
One of the hurdles I had to overcome with the studio being in a windowless room was to figure out how to bring a window into the mix for a set. I don’t really want to have a window to look out of, but there are times when I would like the opportunity to shoot a silhouette with window light. I was able to figure this solution out using two different background support stands. The one in the back has a roll of Translume on it which is a diffusion material that provides even light when illuminated by a bare flash head. This was where I got the light from. The other support stand held a rod with floor length sheers attached. There is another rod that is held in place by cable ties which holds a curtain set. The tie backs are secured to the support stand by clips and I have a very good solution for getting a window silhouette. The curtains are optional and just depends on the look that I’m going for. The length was chosen to cover from floor to ceiling so that for the photos, there is an illusion of a much higher ceiling. I have since worked it out to where I can use this set in addition to the larger stage which will give me the illusion of two walls making a corner of a room.
If nothing else, working in this studio space has made me very creative with how the sets can be designed to provide a completely different look. With every shoot that I do, I see areas for improvement, and I work towards making those improvements happen. I am happy to say that I can do anything from a simple headshot to a family portrait and have even had kid’s portraits done here. I can do fashion, boudoir, bodyscapes, and other fine art figure studies in the same space. I’m learning that my only limitation is my own creativity in set design. Things that I used to think were not possible down here have turned possible, and I’m getting to that point where I am impressing myself with some of the photos that are coming out of this space.
As you can see, the studio is in always in flux and I’m always making updates that I hope will benefit the client shoots. I am getting quite good as creating sets that photograph realistically while appearing cobbled together when looking at them in person. That is the beauty of photography when it comes to portraiture. I don’t have to actually have everything that it appears to be represented in the photos. I just have to angle the camera in a way that creates the illusion that the space continues on well past the frame of the image.
I think I’ve spent enough time talking about the studio and showing some of the progression photos from along the way. My initial idea for this entry was to have a video to share, where I actually take you through the space and talk about how things are used. I tried this alone at the beginning of January with limited success as I tried to record me talking about different things that I was wanting to point out. After seeing that wasn’t going to work, I enlisted the help of my photo wench to be the videographer as I walked through the space and shared some of what I currently have to work with. Here is the result of that video which should help put the previous ones into context.
As you can see, I have a lot of room to work with, and it is still really big when everything is put away. I mentioned starting out that the door coming into the studio is off of the garage which is not ideal, but I’ve changed that around to a positive in a way. How many studios do you know of that could offer covered parking for your shoot. Just think about it, you have your hair and makeup done and it is raining outside. I can’t help you at your home, but if we talk about it beforehand, I will have the garage empty and will have room for you to pull right in. That will make unloading the car much easier, and you won’t be out in the elements. Oil changes and details will be extra.
I’ll be the first to admit that this studio is not as well designed as a typical studio space in a commercial building, and I don’t have the static sets where the decor stays largely the same. Maybe one day I’ll design things that way, but for now, I value the ability to create different looks as needed because I don’t want to just shoot in the same space all the time. That is a quick recipe for burning out as a photographer. Part of my joy is finding a vibe that I want to shoot and building something around that. I value simplicity in my photography so I would rather have a few well-placed elements rather that just filling the room with distractions. I’ve noticed that seems to be the trend among boudoir photographers these days. Their sets have enough plants to be a greenhouse, there are rugs and blankets all over, with a mirror on one wall. It seems that it is mandatory to have a neon light with a sassy saying on the wall, as well as some statues, books, and candles. By the time the photo has been taken, the subject of the image is lost in the set. This has never been my style and I hope to never go that far overboard. My goal, like all of my photography is to create art and that is usually accomplished through simplicity of design.
In the short time that I have been doing portraiture, I have come a long way. I want to close this entry out by sharing some of the results of studio shoots which I hope will illustrate the points that I have tried to make. In each instance, the photo has been created in the space that I have discussed here using strobe lighting only since the ambient light is all fluorescent which is not a flattering light source, nor is it positioned in a flattering location.

Here you can see how that seamless gray background can be colored by gels. The subject lighting was accomplished by a total of three other strobes. Essentially, this was as the camera captured it. There was very little work in post to get it to this point. When it comes to my portraiture, I try to take colors into account and for this photo I knew that my subject was going to be wearing a black robe with purple trim. With that little bit of information, I created this concept with a natural vignette for the purple background to fade to black creating a highlight for my subject. It was a very simple concept, but one that I truly enjoyed working through.
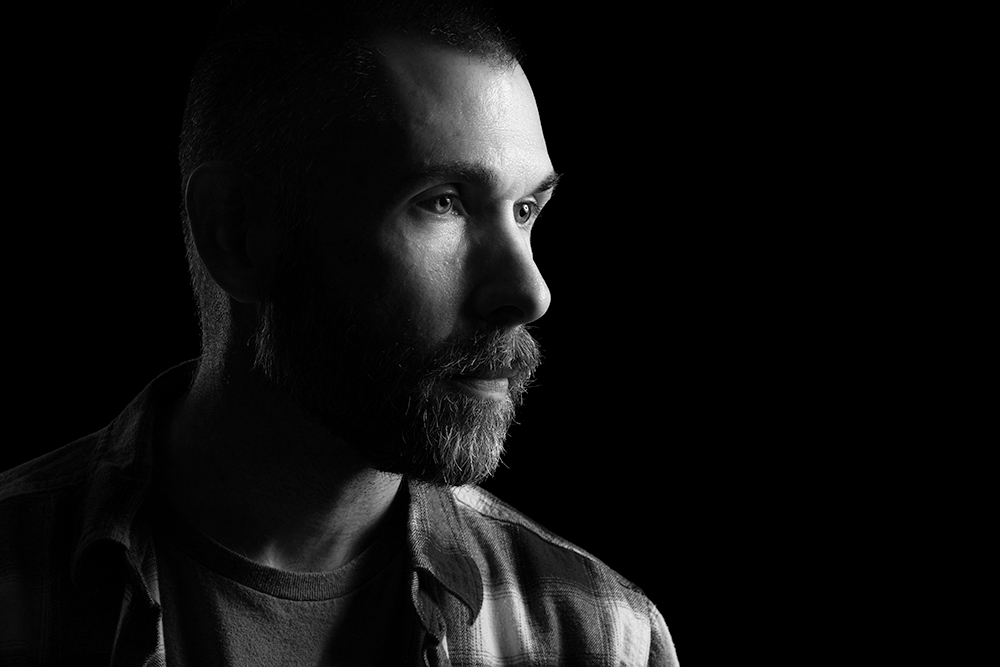
As I was wanting to experiment with some lighting, I ended up shooting this self portrait a while back. Again, it was done on the gray background, but by using grids on the two lights that I used I was able to keep the background totally black. I loved the dramatic lighting with this, and it has turned into my main profile photo and headshot. I will say that this one was rather hard to do because I had to prefocus the camera on a light stand which was placed about where I suspected my head to be. Then I had to use a 10 second timer and hope that I was positioned right. Things would be a bit easier now with the R5 since the screen will flip around for viewing from the front, but in the case of my 5DS R, that was not an option. Regardless, the process went really quick, and I was able to get this photo after only a few attempts.
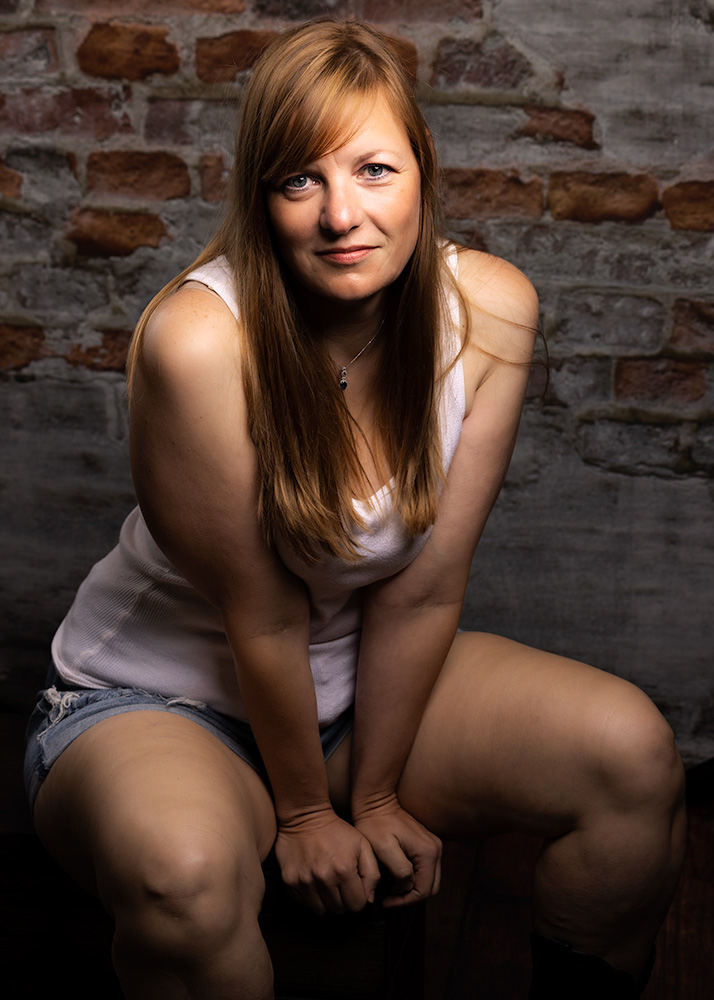
For this example, I have brought in a collapsible backdrop to give the feeling of being outside at the end of the day with the dimmer light. It was lit with a single strobe using a bare beauty dish which also lit the background. I’m finding that more and more, I am really liking the lower key images that I shoot because the attention goes right to where I want it. That is not to say that I can’t shoot high key images in the studio.

This is one of the images that resulted from the set represented in the video earlier in this entry. There were three lights involved, two of which were on the white muslin background with the remaining light in an umbrella to provide subject lighting. I also used reflectors to fill in shadows to keep the high-key look. This lighting is a bit more involved to set up, but it is much more flexible than doing low key where light placement is absolutely imperative.

Here we see another low-key image with a completely different type of lighting that I have just started to get try out. The key light is a 36″ parabolic softbox placed above the subject with a grid attached. The lighting flows directly down and creates this very dramatic effect. For a bit of fill, and catchlight, I will use a large umbrella placed behind my shooting position to give a pop of light to the scene and to help light the background a bit. I’m really a fan of this kind of light and have found it very easy to work with.
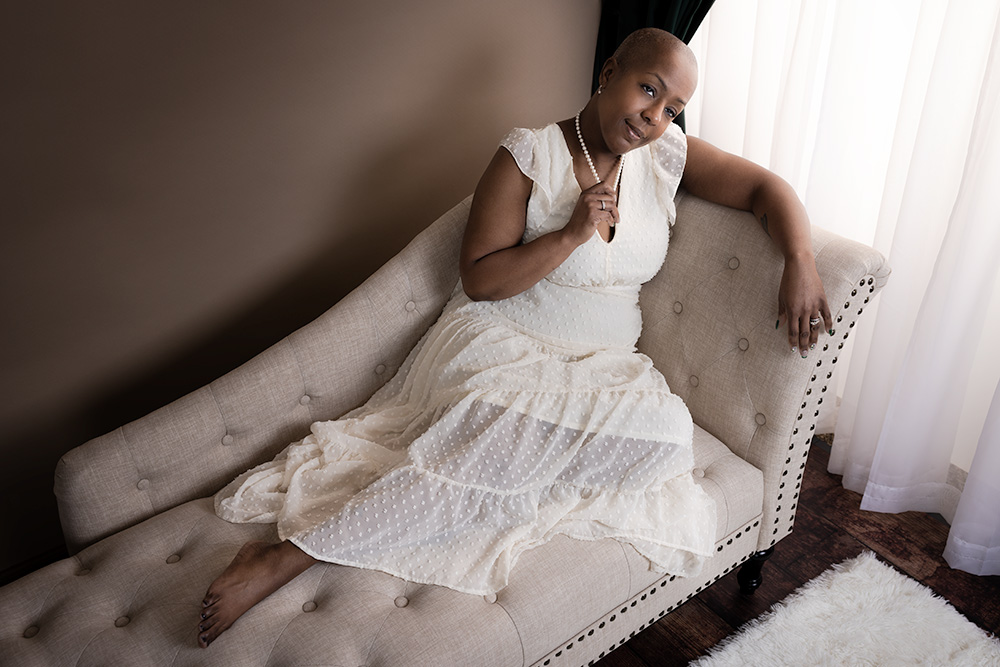
Here we can see how the studio creates a completely different feel based on how the lights are used. In this case, the studio was set up in the way represented in the second video above. The main light was coming through the faux window which was diffused with the Translume. The sheers disguised the fact that there really isn’t a window behind there, and the curtains just gave it a bit of a framework to exist in. The majority of the light on the set came from the large softbox with was also in about the same direction as the window with fill coming from a large umbrella. The end result was a light and airy feeling which I ran with when it came to the color grading of the image.
At this point, the biggest hurdle that I have to overcome with my portrait photography is getting my name out there. For most of my photographic career, I have turned people away that have wanted portraiture done. I’m still paying for that because I am just known as the guy that doesn’t do people pictures. It has been about two years now since I ventured into it seriously and I am finally at a point where I think I can manage quite well. I still have a long way to go to get where I want to be, and that will take some time since I am still very much dedicated to my landscape and decay work. It is a great diversion for me to work with people though and I hope to get to a point where I am doing a client portrait shoot each week. I’m not looking to fill a calendar with client shoots which just means that any progress that I make will be a bit slower than the norm. Considering the limited test shoots that I have done up to this point, I have grown very quickly as a people photographer. This gives me hope for becoming truly proficient with it in time. I am still looking for test shoots, so if you are interested in having me photograph your session, let’s talk about it. If I see it as a learning experience for me, I can very easily waive the creative fee and all you would be responsible for paying for would be any products that you select (prints, digitals, albums, etc). I know that right now, I am in need of some more boudoir test shoots, as I haven’t even tried out the new set yet. If you have been considering doing a boudoir session, this might be a great chance for getting it done. The creative fees (or sitting fee) alone for a session will usually be between $400-600 depending on who you go to. I am willing to waive that in exchange for a signed model release with you having final say on what types of images I can share from your session.
No matter what kind of portrait session you might have in mind for yourself, I would love to talk with you about it and potentially work with you. Consultations are always free and they give me a chance to get to know you and what you are wanting out of your photos. It will give us a chance to style the shoot accordingly so that one the day of the shoot it all goes smoothly. All it takes is a quick phone call in most situations, but these consultations can also be done via video chat, or in person. You are always welcome to come by the studio if you need to get familiar with it. Of course, I am not limited to studio shoots at all. With Spring basically here in NC, I am available for location shoots which can offer a lot more flexibility for story telling. We can schedule your session outside at any number of locations, or I can come to your home and conduct a shoot there should the need arise.
Thank you for joining me for this studio tour and a little bit about how I work in the space these days. I hope to continue growing as a portrait photographer as I do really enjoy it now. If you are interested in booking me, just give me a call at 336-681-0220, or you can email me as well at [email protected]. You can see a full list of types of images that I shoot in my Portrait Services page and my Boudoir page. Just because you might not see your idea mentioned doesn’t mean that I won’t shoot it. I’m still finding my direction with people photography and am open to different types of sessions with the exception of weddings. I will not do a wedding for a laundry list of reasons. I’m happy to do the engagement session, and will even do bridal boudoir and couples’ sessions, but the actual wedding is not something that can be staged and repeated. As they say, I don’t need that kind of stress in my life.
Join me next month when I talk about what to do when the shot just isn’t there. This will be more in line with my normal topics as it will deal heavily with my landscape and decay work. I hope to see you back here for that. I’m also hoping that March is a little more productive than February has been in terms of getting out for new photos.
Until next time…

Remember to use the code KISER10 to get 10% off your purchase