Wednesday, July 22, 2026
I know I am. Every time I get online, I’m bombarded with AI generated images whether it is news articles or stories on social media. It has gotten to the point where I am questioning everything that I see online and I have a feeling that you are as well. The blog today will be filled with images that I am betting will make you think of Artificial Intelligence and even wonder if I have gone off the deep end and started entering in prompts to any of the AI image generators. I assure you that is not the case, and I’ll go even further by saying I have no idea where to even start to make that happen. I’m a 52-year-old Gen X’er that just doesn’t care to learn that new tech and still think that I can manage well without it. The trek today is kind of an experiment to see what I could do with a concept. Essentially, I gave myself prompts and allowed myself to engineer the process and the images.
Now that I have completely confused you, allow me to backtrack a bit and introduce this trek as I would any other. It all started back in 2008 or thereabouts. I was visiting Toni long before we got married and was really into painting with light in a studio type of setting. I didn’t have a studio at the time, but I had her dining area and table to set up different photography projects. This could be macro shots of flowers, abstracts of oil and water over a Capri Sun box, or it might be some photographs of a clear plastic chess set. There really was no limit to what I was willing to photograph back then. I did have a lot of fun with the clear chess set and started to find a certain groove with working in a dark space and lighting things with a flashlight. That kind of started a direction for some of my studio work from then on.
I liked the chess set because it was a great way to tell a story and there was a very good chance that the story would be dramatic. For those that knew chess, there would be a deeper understanding of the pieces and their roles in the stories, but for those that didn’t know the game, there would still be a certain amount of theatrics that could be seen and understood. I worked with this chess set a few times before moving onto a much larger set which actually held some sentimental attachment for me. You see this particular chess set is older than I am. It was made by my mom when she was in school and was taking a ceramics class. The board is 28 inches by 28 inches, with the pieces six to eight inches tall.
The set had always been stored in the small office off of the downstairs den at my grandfather’s house. I remember wanting to learn to play the game just so I could play with that chess set. It wasn’t because Mom had made it, I just thought it was the coolest thing to see. Of course, I wasn’t allowed to play with it as a kid because…well, I was a kid, and I might have broken it. Eventually, the chess set was given to me, and I kept it at home in a few different places, but eventually it ended up out in the storage building in the back yard. This was less than ideal, but I just didn’t have a good place to put it inside the house where it would be safe. When it was in an accessible area of the house, I did mange at least one photo shoot with it and tried a few things to build on what I had done at Toni’s apartment several years before with the much smaller chess set.
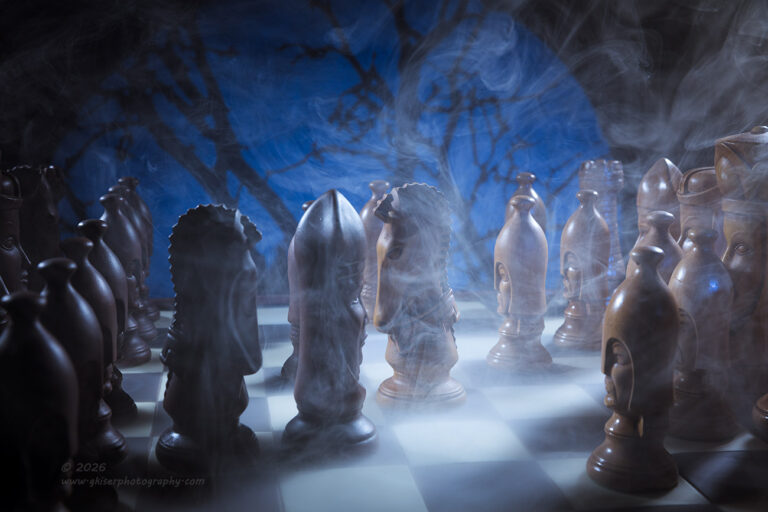
These photos lacked much of the drama from what I had captured before, but I did like the detail in the faces of the pieces with the larger set. That detail seemed to change the overall effect of the photos though and calmed things down more. I tried different ways of processing the images to get some of that drama back, but that was without success. I loved the idea of working with this chess set, but it was seeming that the scale of it really affected the photos negatively. It wasn’t at the forefront of my mind, but I was always thinking about how I could improve on the concept and create something very memorable with this chess set.
A little over a year ago, I thought that I had figured it out when I spent a rainy May day in the studio. I decided that I wanted to use some gelled strobes to light the scene for a bit of drama and visual interest. I worked out compositions that felt right for the mood that the light was giving me. By the end of that session, I was actually quite happy with the whole concept and execution. I kept looking back on those photos many times afterwards and really enjoyed how they looked.
However, they were still missing something. The photos came off as a still life of a game with detail in the pieces. The mood and atmosphere still weren’t quite there for me. I was still missing something. It might have been the focal length because I had shot the whole series with a 100mm macro lens that had enough compression to oversimplify the scene. I had opted for a black background to further that simplification within the frame. It was just too sterile in many ways. It was still a better attempt than what I had done before and I felt that I was getting there.
The concept of the chess set shoot just kept rolling around between my ears for several months and there have been a few different days that I have thought about pulling it away from the wall and giving it another try. I just needed to figure out how I was going to actually photograph it to make it worth my while. I needed something different, and this is where my own creativity started to come into play. This was not going to be solved with a series of prompts keyed into a computer. I am a photographer and my tool of choice is a camera which I understand quite well.
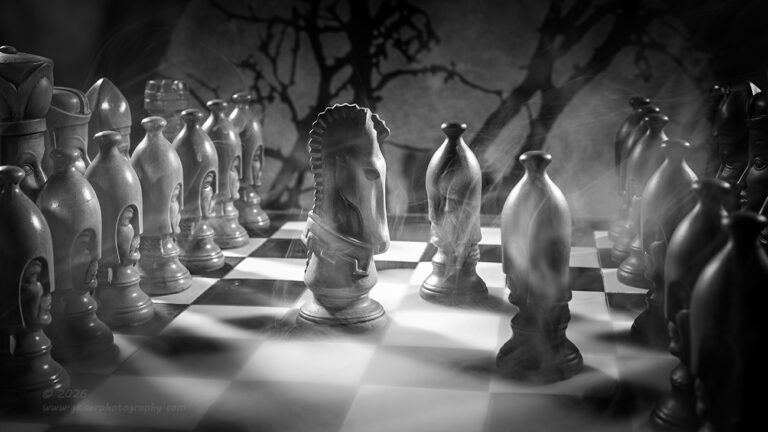
I think that the most important step of the creative process came when I realized that I had not used my PMI Hazer kit in well over six months. This is a piece of kit that does need to be used periodically to keep it from getting gummed up. Sure, I could fill it up and go outside and make smoke for 15 minutes or so, but that seemed wasteful to me. I had it out for a recent studio session with an upcoming model but I never actually put it to use. We ended up running out of time and the concepts that we spent time on didn’t really work with smoke. I thought about packing it for a trek and using it with some of the old cars that I shoot, but I figured that was going to be more difficult than it was worth. There was also a real chance that the images would look very cheesy with the added smoke.
What I needed was a situation where the smoke would add to the atmosphere that I was already trying to achieve with the subject and lighting. That was when it hit me. The last time that I had photographed the chess set, the smoke would have added to that visual story. The chess board was of a size that would be easy to add the smoke to and still be able to photograph it. This was something that I could work with, and I started to put my mind to it.
There was more to the process than deciding to photograph a chess set with smoke. That would look forced, I needed a reason to have the smoke as well as figuring out what type of smoke I would be using. The Hazer has three different settings with fog, steam, and dry ice. They each do different things and create different effects. Before I pulled out the studio equipment which does take some time, I wanted to make sure that I had the concept all figured out. If I were to guess, I would say that the process has taken me roughly a month to work out.
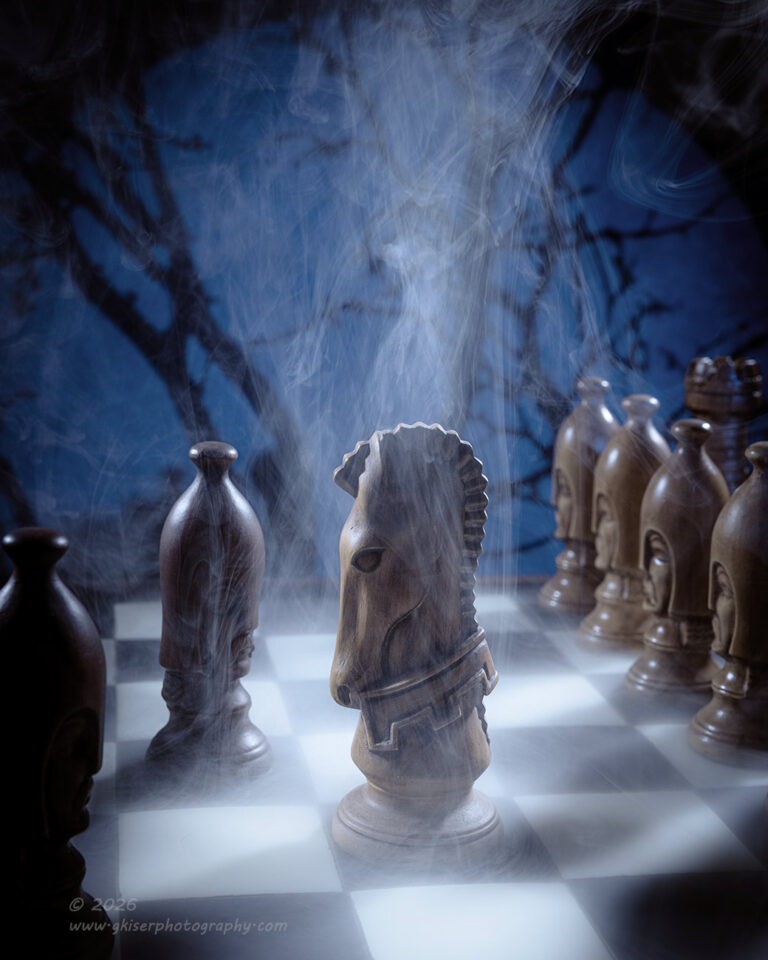
The idea was a battlefield rather than just a gameboard. I wanted there to be a seriousness to the images because all of the facial expressions on the pieces were quite serious. I wanted something like the early morning fog settling on the battlefield which would mean using the dry ice setting on the Hazer. From using smoke in the studio, I knew that in order to see that smoke, it would have to be lit from the back. This would be my opportunity to use gels and light the smoke with red and blue tones for some added excitement. No, wait a minute. Having gelled smoke seemed a bit forced and designed to look like studio lighting. I wanted something more natural, but leaving the light white seemed kind of boring at the same time.
This was the first hurdle that I came up with. In order to try and figure out the best way to proceed, I started to think about the posing, or the positioning of the pieces. I had done some minimal compositions previously that were effective, but I was thinking that I wanted to have more of the pieces on the board to help frame the images. It would also have more depth to the scene with more pieces visible. Something that I hadn’t experimented with the previous time was having some of the pieces laying down to show defeat. This would not have worked as well with the smaller set that I had started out with years ago because there were no faces on the pieces, so there wouldn’t be that connection with them as individuals. Now that I was working with faces, there was a sense of tragedy that was possible to capture with fallen soldiers. This was an element that I wanted to capitalize on, so I kept in mind that I wanted faces and fallen players in the different compositions.
This brought to mind the possibility that I could tell a pretty full story with the session as I moved the pieces in different ways. I could quite literally begin at the beginning and go through the battles and then show the outcome. That gave me a plan for the progression of the session rather than just some simple still life positioning of the pieces. This was the concept and I started really working out the details so that I would be ready to set things up.
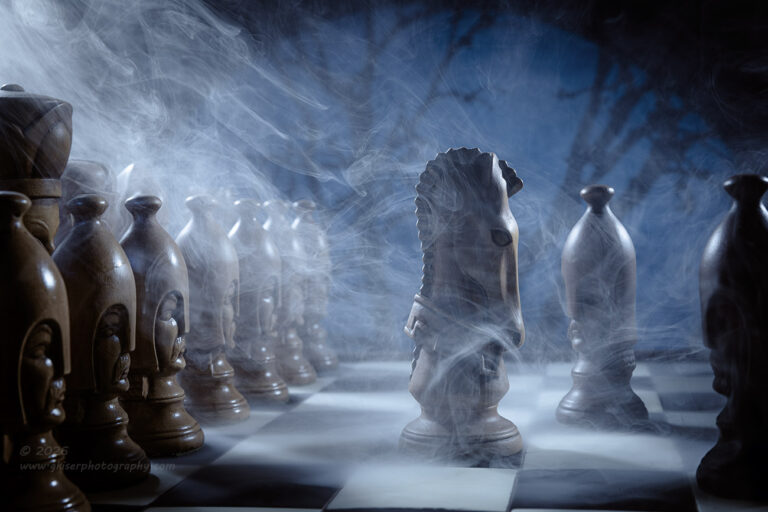
It might be because I can be a bit lazy, or it might be that I knew I hadn’t figured it all out yet, but I didn’t start this session as soon after I had figured out the smoke element as I would have liked. There was still more to work out, I just didn’t really know what those elements were. Over time, I did realize that I needed to work out the lighting other than the illumination of the smoke. I knew that I would have to strobes on either side of the chess board giving back light. These would likely be gridded to keep the light off of the background.
Oh wait….the background. That was what I was needing to figure out. I had just assumed that I would use the black background again to keep things simple. I love a good low-key image, but the thought of a plain black background just didn’t work for me. I needed something to give a sense of environment without being a distraction. I wasn’t going to do a background replacement, or have AI generate a background for me. First of all, I don’t know how to do that, and second, that doesn’t feel like photography to me. I needed to work the background out a little more before I got started.
I had liked the aspect of using the optical spot the time before as it gave some dimension to the key light. It was also a nice hard light which I wanted to use for the chess pieces because of their scale. Anything other than a super hard light would have muddied the details on the pieces and cut out much of the contrast that I was wanting. Instead of using that spot as a key light, I decided to make it responsible for the background. By adding a gobo, or a cookie to the spot, I was able to project a shape onto the background. My original thought was to do dappled light which would just add some subtle interest to the background. In order to do that, I was going to need a different color background than black. Gray was the obvious solution for that, so I just assumed that gray was going to be it.
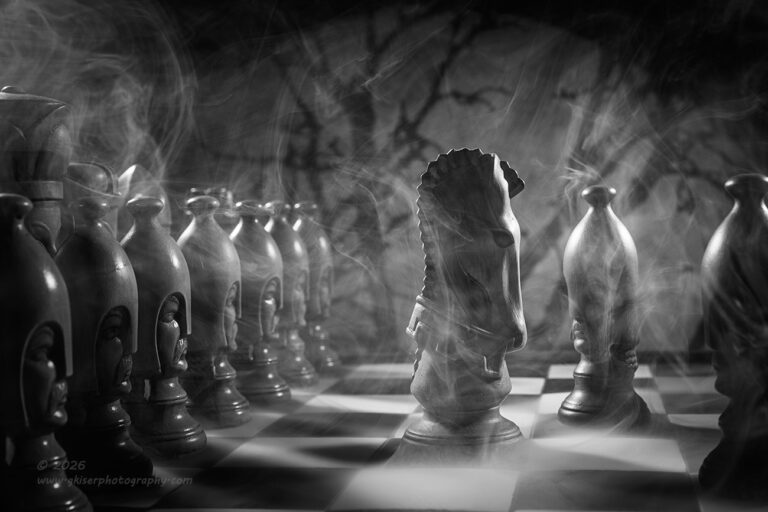
I had three lights figured out, but I still hadn’t worked out a key light for the scene. The key light is one that shapes the main subject and provides the light for the main point of interest. As I mentioned before, I liked the idea of a hard light for a key, and I had just given my hardest light to the background. There would be a little bit of spill onto the chessboard, but most of the light was going to be on the background. This left nothing illuminating the subject. The two lights that I had in the background which were responsible for the smoke would be little more than rim lights on the pieces. I needed something to provide light on the main subjects before I started to set things up.
By the time Tuesday night came around, I was watching some photography videos on YouTube and was feeling a bit creative. It had been a few days since I was last out with the camera and as you well know, July has been one of those months when I just keep going out every few days. Now, I wasn’t exactly sure what I was going to be doing because I had spotted an old Activity bus the other day that I kind of wanted to photograph on a very cloudy day. The weather was calling for rain, but if the rain held off and the clouds remained, there would be a decent chance that the light would be right to work with that bus.
When I woke up, the sun was out which kind of defeated the idea of working the bus. The rain was still supposed to come in within the next couple of hours about the time the clouds came in. It seemed like the bus wasn’t going to work out. I guess that left me with the time and creativity to work on the chess set. I had most of it all figured out and all that was left was to move the table into the middle of the studio and start setting things up. I knew that I would alter the plans as I progressed because that was how studio sessions usually went. I always have a starting point, but as I see how things are progressing, I tend to go with the flow.
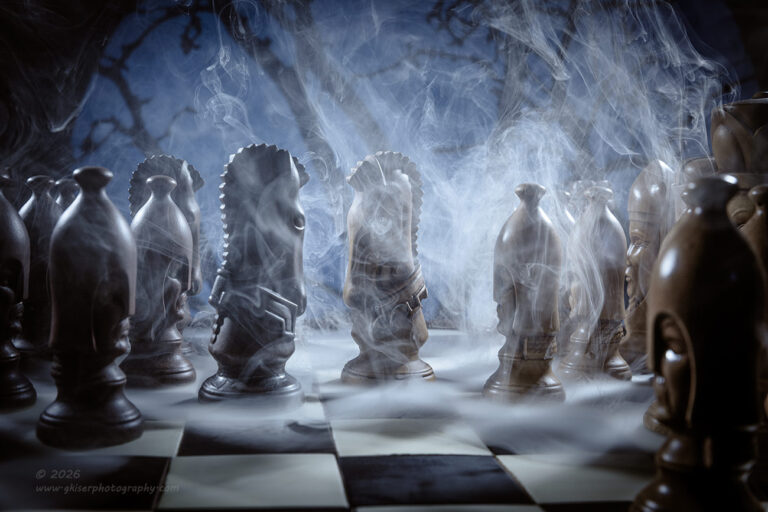
When I was all done with my morning administrative stuff, I started to think about getting things set up. There was actually a lot of things that needed to happen in order to get started with this session. While I’m not really lazy, there is something about making that first move into something that is going to take a significant amount of time. I still wasn’t even sure if this was going to work or not. With the rain starting outside, I didn’t have much else to really do today, so it was kind of the idea day to make this happen. Since it all hinged on the smoke machine, I pulled out the Hazer and refilled the reservoir before making sure that it still worked as I was hoping. There was no sense in setting up the studio if this element wasn’t going to be a part of the plan.
I made a bit of a mess filling it, but that was because I thought it had to be unattached from the unit to fill. That wasn’t the case, but after I realized that without it plugged into the Hazer, it would drip on my leg, I got it all filled and ready to work. The next step was pulling the table with the chess set away from the wall so that I had room to work with it. Fortunately, the table slides easy on the carpet, and I was able to get it into position quickly.
It was now time to get the backdrop set up. I pulled out the stand that I was going to suspend it from and then went over to get the plain gray pop-up background. Before I even got it out of the bag, I remembered that I had a textured black and green background which might give a bit more depth to the projected image. However, it was a bit darker than I remembered it being, so that wasn’t going to work. The other side of the background was a light gray color which was also textured. This would take the light much better and would work with a gel if I wanted to do that. I positioned it about two feet away from the table to make sure that it only got the light that I wanted it to have which would keep it black otherwise.
Knowing that I needed rim light, I set up two strobes on opposite sides of the background pointed to the table. I kept them high so that the shadows on the board wouldn’t be too distracting while keeping the edges of the pieces visible. I just added seven-inch reflectors to the strobes with 30-degree grids to keep the background from getting any light. I would be able to tape gels onto these lights if I wanted to add color to the smoke which I was thinking that I didn’t.
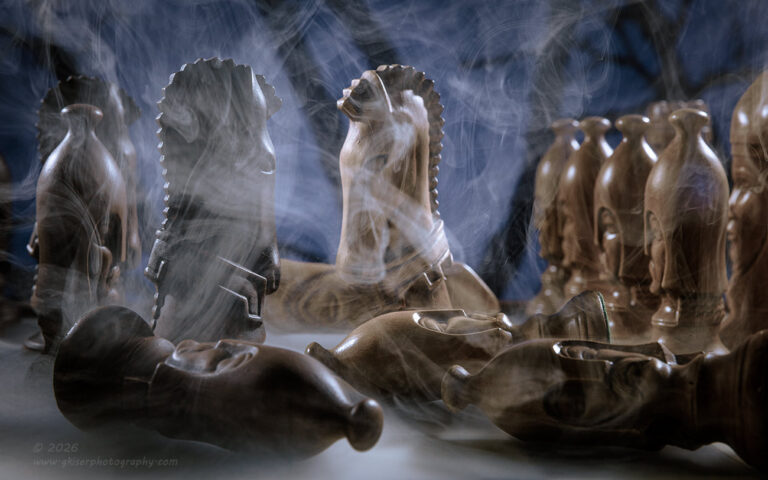
The next step was setting up the optical spot off to camera right. I kept the 100mm lens on that unit which made for a very small patch of light on the scene. This made me have to back the strobe up a good bit for coverage. I went through my gobos and found one that was shaped like bare trees. This seemed to fit the idea that I had in my head, so I slipped that in. I remembered this time that it needed to go in upside down so that the optics would show it right side up. This is something I learned from trial and error by using this optical spot. Once I had it built and roughly positioned, I needed to see how it looked on the scene, so I turned on the strobe and the modeling light so that I could focus the gobo onto the background. Once I was happy with that, I started to think about the key light once again.
I already had my three big strobes being used, but I had two more speedlites that I could use as well. For the scene, I didn’t need much power for a key, though I had to have a lot of power for the optical spot because of how small the opening was. Everywhere I thought to put the key would dilute the background and keep the structure and detail out of the pieces. I then had the odd idea of embracing the dramatic light by using a version of split lighting. I needed to keep the strobes facing as much forward as I could manage so that the smoke would show up well. However, if I moved the lights a bit more off to the different sides, I would be able to get some wraparound of the light which would give me a hit of illumination on the pieces. Since I was going for a dusk or dawn look to the scene, I decided that would be appropriate lighting. It would keep me to just three lights which I liked.
After repositioning them, I started thinking about gels. I knew that I wanted a cooler color cast to this scene. The pieces were already colored in beige and brown, so there was the warmth that I needed. To bring in the blue, I thought that the optical spot was a logical choice because it was responsible for the background and therefore the overall setting of the scene. I added a simple blue gel to that light and figured it was time to see how it was all coming together.
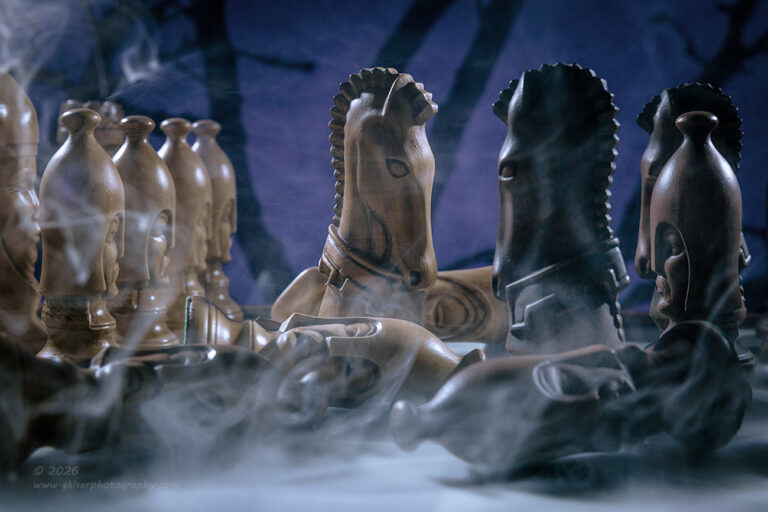
Now for those that think that photography is all about the camera, you might be in for a shock at this point. I hadn’t even thought about the camera at this point. There wasn’t even a camera out. I had a tripod in the rough position of where I figured the camera should be, but there was no camera. There were lights, stands, backdrops, chess pieces, and a smoke machine, but no camera yet. The last time, I had used my R5 because my 100mm macro was an RF mount lens which required that body. I was really thinking that I was going to use a standard lens for this set which would mean either the 28-70mm f/2L which is another RF mount lens, or my 24-70mm f/2.8L Mk2, which is an EF mount lens that fits my 5DS R. Here I was, all set up and ready to go, but didn’t know what camera to use.
If you recall me talking about the addition of the mirrorless system to my photography a couple of years ago, you might remember me saying that I still much prefer the DSLR camera over the mirrorless for anything other than photographing people. While the chess pieces had human features, nothing was going to be moving here and there was really no reason for eye detect AF. This meant that I could just use my favorite camera, the 5DS R and my trusty standard zoom. All I needed out of the R5 bag was the remote trigger for the flashes which plugged right into the older camera.
Once I got the basic settings dialed in for flash photography, I fired off a test frame to see where I was at for the optical spot. I needed to punch up the power a bit which I ended up a third of a stop more than half power. That optical spot takes a lot of juice, especially at a distance. The exposure was good for the background though, and I was ready to see what the rim lights were looking like. I fired those off and found them a bit dim as well. After I boosted the power a touch, I had a good exposure on the edges of the pieces which defined their shapes. The wraparound lighting was working very nicely on the individual pieces, and I was pretty sure that this was going to work with just three lights.
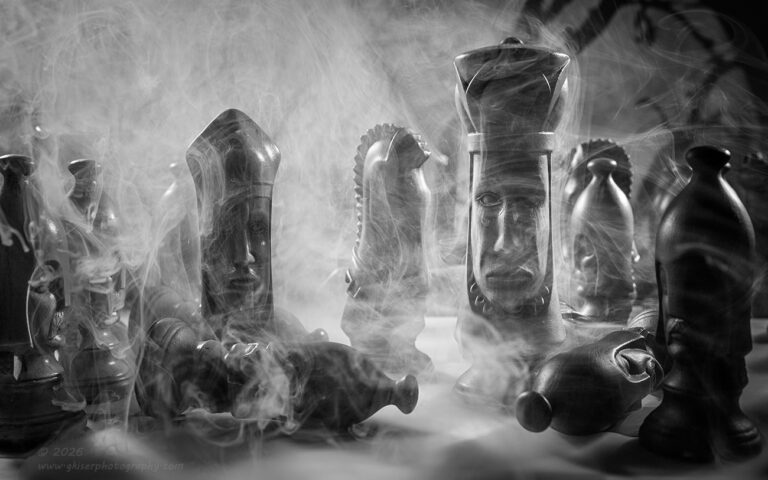
When it was time to put all of the lights together, I found that the color palette wasn’t as nice as I had hoped. There needed to be more blue in the scene, but I didn’t want to gel all of the lights. Instead, I changed the white balance to tungsten which cooled the scene even more. With that test frame, I found the overly blue look much better for what I was hoping for. Remember, I was going for that blue hour look over the scene, so having everything visibly cooler than neutral was ideal. That last change created the colors that I was looking for.
Now, I was ready to start putting together a composition with the pieces placed in certain areas on the board to tell that story that I was looking to share. It was a matter of visualizing what I was after and moving the pieces around before checking the camera. I would then reframe and then adjust the pieces to make it all come together. Once I had the pieces in the right position, I would fire off a test shot to see how things were looking. When I was finally happy with the overall composition and colors of the image, it was time to add the smoke to the scene.
This was where it all came together. The smoke had been the catalyst for this session, and I knew that once I started the Hazer, the fog in the studio would be such that there would be no going back. I used the dry ice attachment which allowed a very thick fog to spill out of the nozzle and linger heavily on surfaces. I worked my way around the board and tried to get good coverage over all areas before putting it down and starting to take photos. Everything was nice and compact, but in the time it took me to put the Hazer down and return to the camera the smoke had changed quite a bit. It would have been easier to have some help, but now that I was started, I didn’t want to break away and go up to enlist the help of Toni or Aulani to apply the smoke. Instead, I just got better at applying it thicker in areas that I needed it and putting more around the area so that I had to wait a few seconds for some to clear off.
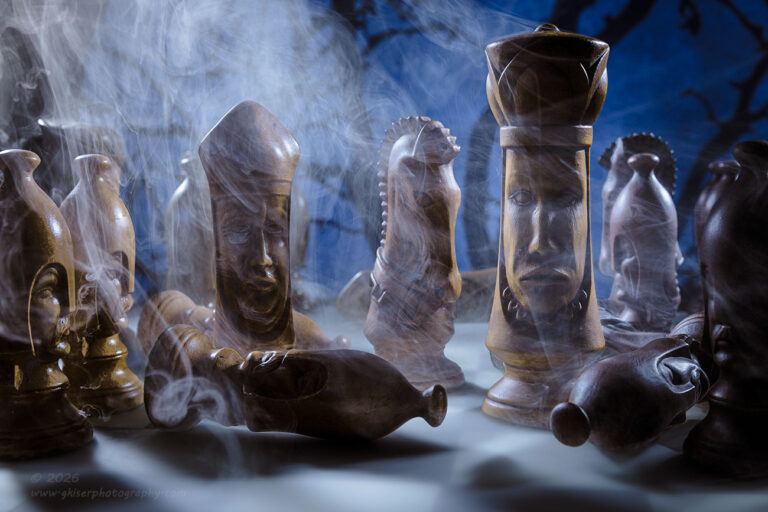
That process seemed to work very well. I would apply the smoke and once back at the camera wait for some of it to dissipate before firing off five or six frames with the changing smoke. By that point, the smoke would have cleared, and I would be back to just a hazy look to the scene. I was constantly looking at the images in review as I was waiting for the last of the smoke to clear before adding more. I would make subtle changes to the framing as well as lighting positions to make sure that I had the best options when it came time to cull the images.
Each “look” with the pieces on the board was shot a couple of times for some added variety before moving onto the next “pose.” I felt like I was rushing things, but I had to keep reminding myself that I was really only looking for a frame, maybe two of a “pose” before continuing on with the story. What I was seeing in the image reviews were looking really good to me. There were some that I just knew were going to be keepers even though I wasn’t sure how the processing was going to turn out. I knew the mood that I was after, and I had the lighting set up to deliver that, but I knew it was going to be the final processing that brought it all together and created the pieces of art that I was wanting.
For me, the whole purpose of sessions like this is to create fine art that belongs on people’s walls. It saddens me when photography can only live on a hard drive to be seen only on a screen. Now to be fair, that is what the vast majority of my images do, but that is never the intention. You can help make a difference in that respect by choosing to turn your favorite photos of mine into one-of-a-kind prints for your wall. That’s right, all of the photos that you see here in the blogs as well as in the curated galleries on this website can be done as prints on photo paper, fine art rag, canvas, or metal. I can do these in pretty much any size you can dream up so you can have that perfect piece to hang on your wall. By purchasing a print, you are not only supporting my art, you are also making it possible to go on treks and create more images in the future. I would love to talk with you today about matching you up with your very own Greg Kiser Original work of art.
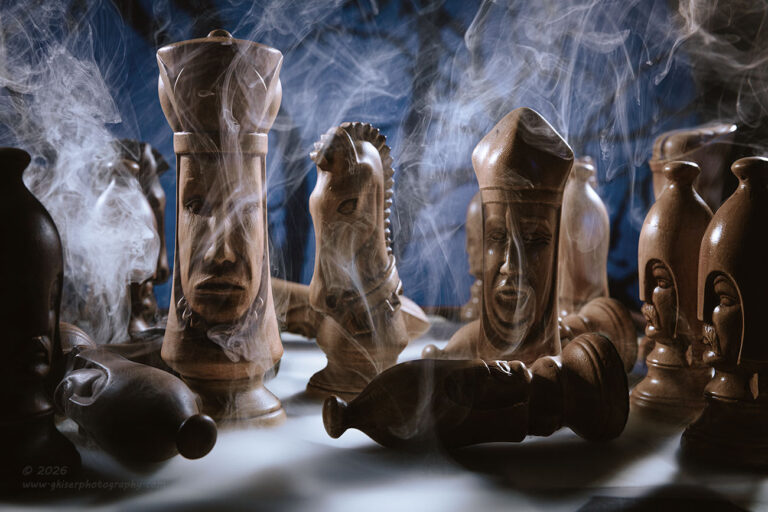
That was a word from our sponsor who is making this blog entry possible. Of course, that sponsor is me, and I do appreciate you being here and reading about how these photos come to be. This was a very fun session and while it lasted only a little while, I still ended up shooting 80 frames with roughly 70 of them with the smoke flying. Of those frames, I ended up with a total of these eleven keepers which is without a doubt the most successful of the chess set shoots. Looking back over these, I am actually kind of struck with how well the intended mood was captured here. Everything really did come together to set that mood and keep it. The color palette worked fantastically, and even the few black and white photos that I did still kept the overall mood intact.
I’m sure I will eventually want to improve on this execution, but for right now I’m thinking to myself….NAILED IT! Could I have done this using AI? I’m sure that I could have, but where is the fun in that? I mean, I used the chess set that my mom made when she was in school. I used a lighting concept that I had recently used on a portrait session showing off the physique of a model. The smoke came from another session where my subject played the role of a marionette. The background was a last-minute idea that my creative self just insisted would work. This session pulled from so many places of real experience and knowing what I have as far as tools in the studio. Even though I was taking pictures of a gameboard, I am looking back on this as something way more important. The way that I understand light is so much more effective than what I was doing even last year. The use of colors and shadow is next level compared to how I started out photographing the clear chess pieces. In fact, the more I think about what I have accomplished with this session, the more I am really thinking that these are some very significant photos for the year.
While they don’t fall into the wide-angle focal length or the abstract photo goals that I have set, they all touch on something quite a bit different. They represent the blending of so many aspects of my photography to date. I have created a landscape in the studio with lighting that doesn’t really feel like studio lighting. There is an element of wabi-sabi to the story which is linked to the bare trees visible in the background. The composition isn’t all about rules but has a sense of balance to it that has become my trademark over the recent years. This might just be one of the most “Greg Kiser” photo shoots that I’ve ever done.
The really sad thing is that I know that this is going to be a series of photos that lands without a sound on social media. The photos won’t get much response and because of that, the algorithms will throttle back the audience for them. There will probably only be a few views of this blog entry once it is published in a few more minutes. It will be effort that is wasted in terms of connecting with an audience, but I am used to these types of sessions by now. It doesn’t make it any easier when I am looking at the photos and thinking that they are almost putting everything else that I have shot to shame. I really am that kind of impressed with these photos and if I’m the only one that is, so be it. I know that in the period of a few hours on the 22nd of July, 2026, I grew as a photographer, and it happened in a studio of all places. In an age when AI is all the rage, I just created something that AI can’t hold a candle to no matter what prompts are put in. In fact, I might have just created something that has never really be done before. I just wish that Mom was still around to see what I just did with her chess set. It would also be nice to tell my grandfather how glad I am that he kept me from breaking any part of that chess set when I was a kid. Because of them, I have been able to do this session and create these photos.
Yeah, this was a significant day even though it will go over like a tree falling in the woods with nobody around to hear it.
Until next time…