Welcome back for another installment of my monthly Behind the Camera feature. Last month, I did something a little different and answered several questions from you that hopefully gave you a bit more insight into who I am, and how I function as a photographer. This month, I’m going to return to normal programming with a topic that I have been thinking about tackling for about a year now. It isn’t that it is a difficult topic to discuss, I was just looking for the right motivation to get in here and really collect my thoughts on the topic. What is the topic you ask? Well, I want to talk about the benefits of working the subject. This isn’t some advanced interrogation technique that involves phone books and garden hoses as it might sound. It is simply referring to digging a little deeper into the subject to get your photos. You have seen many examples over the years of this concept in play as you have read through my blogs. Sometimes I mention the mindset specifically, and other times, I just gloss over what I’m actually doing figuring that you will pick up on the clues. This month, I am going to really explain what is going on and how I started to see the benefit of it.
When I first became a photographer some 20 years ago, I did like most photographers would do and I looked for an entire scene to photograph. This could be a landscape, a barn, and later on an old rusty car. I would see the subject and decide that there was a photograph to be had there. The camera would come out and I would get the shot, pack up and move on. There was a little more to it than that, but essentially, I captured the image exactly how it had impacted me upon a first look.
What is wrong with that you might ask? Well, as a photographer, I was leaving a lot on the table, or meat on the bone if you will. Sure, I was getting a photograph which many times would turn out nice; but the reality was, what I was photographing was rarely the most interesting aspect of that scene. In many situations, I was seeing a subject and thought that it was interesting, but the setting wasn’t really working for the subject which meant that I didn’t get a photo of it at all. I was severely limited in my creative vision for just about any subject unless it was in that perfect location. It wasn’t until I started learning to really work the details and angles that I was able to find ways of getting photographs when the setting was not fantastic, and more importantly, I was starting to be able to get exponentially more compositions of the same subject, but each one completely different from the last.
This is what I am referring to as working a scene. You spend time with your subject and peel back the layers to find the details, or the essence of what you are photographing. You can turn a ten-minute session with a subject yielding a single photo into an hour’s worth of photography with a half dozen or more compelling images to show for it. The really nice thing about this concept is that the same thought process will apply to anything from a landscape to an old car, or even something small like a flower. If you get in the practice of trying to find these little details, you will find that your list of acceptable subjects will increase dramatically. Let’s take a look at how this goes in practice.

Here we have a stitched panorama including ten frames to show an entire scene in front of us. This is the view that I was blessed with during the sunrise at Beacon Heights several years ago. I have seen this view many times over the years and have photographed it several times as well. This is probably the kind of shot that a new photographer would want to achieve and they would spend all of their energy working towards this goal. There is nothing wrong with that, and I’m still very happy with how this photo turned out. It could be said that part of working the scene is determining the best time and conditions to capture the image which certainly came into play here. That is not the aspect that I’m looking to explore in this entry though. Let’s just assume that we ended up at a scene in the right conditions because we had worked through how we wanted thing to look ahead of time. Now that we are here, are we just going to be satisfied with a single photo (or in this case a string of 10)? I would suggest working through the scene and finding the details that appeal as well. This could be just a simple reframing of the composition, or something even more drastic.
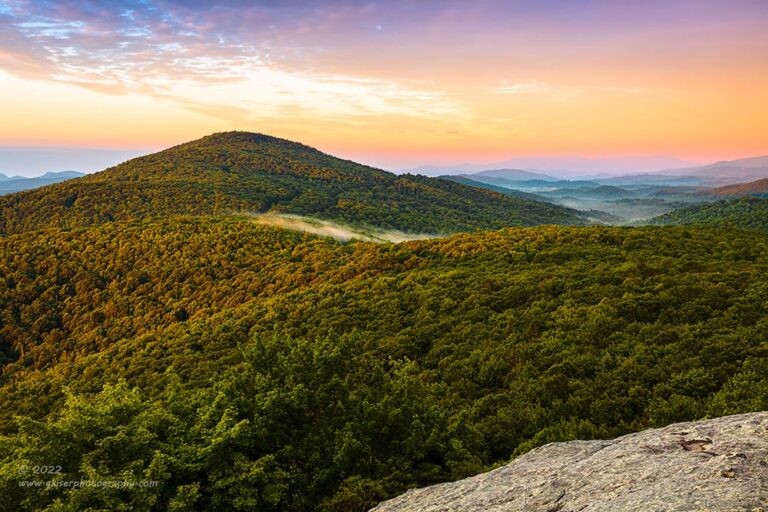
In this case, the change in framing came from using a different lens and using a single exposure to capture a more customary aspect ratio. I chose to concentrate on the main mountain in the scene along with how the light was presenting in the sky. It is a more intimate capture and invites the viewer to look further into the distance which really shows the depth of the scene. Is it better than the panorama? That is up for debate, and I would venture to say that they would serve two completely different purposes. In my eyes, the standard 3:2 aspect ratio would be a better fit for a smaller section of wall that was meant to be viewed from a bit closer in. The panorama is much better suited for a large wall, above some furniture where viewing distances are a bit further away. They could both accent each other in the same room, but they say completely different things. Even the primary subject changes between the two as the pano shows off the largest mountain much better than the smaller composition where it just becomes a shape in the frame leading out to the distant hills.

Now, let’s really blow your mind with the possibilities from this location. As I mentioned, I had photographed this location several times before, so I knew what I was working with before even getting there. This was the shot that I opened up the morning with. It has nothing at all to do with the broader scene and doesn’t include the main mountain that had been featured so predominantly in the other photos. This is part of working the scene because you start to pick out details that are interesting which might otherwise go unnoticed. How many of you were looking at the panorama and concentrating on the far-left side at the distant mountains? Of course you weren’t, the composition and the lighting dictated that you focused on the main mountain and how the light was falling on that side of the frame with the expanse of visual information on the left pushing your eyes to the right. That whole left side of the frame served a purpose for the entire composition but wasn’t the focus.
By removing the expected focus of the composition, I have now redirected your eyes to a less important part of the whole. That less important part has now become the reason for the photograph, and such has taken on a new level of importance. This is the power of working a subject. As the photographer, you get to determine what is important in the scene, and in many cases, you get to make unimportant aspects an interesting focal point. In order to do this, I was using a long lens to reach out and pick out the details in the distance. This photo serves a much different purpose up on a wall as compared to the other two. While the other photos were meant to become a focal point in a room, this one is more of a mood image which will go with a color palette in a room to evoke calmness. It is subtle, but when you start to look at it, you easily get lost in the undulations of the mountains as you explore around the cloud inversions. All three of these compositions were from the same day, yet they all serve different purposes for the viewer.

Let’s take a look at this particular morning at Catawba Falls that I visited earlier this year. For the sake of this conversation, I will omit the part where I wasn’t quite sure where I was during the hike, and when I got to the falls, they weren’t the section that I was expecting. I’ll just say that this was the first time that I had seen this waterfall and I wanted to spend some time with it. This is the upper section of Catawba Falls and I think it might be a bit prettier than the lower section that used to be quite easy to get to in comparison to the upper section that included a bit of a scramble up the mountain. Anyway, this was the scene that I was met with. It was quite majestic, and I knew that I was going to get some good photos from this one. There was a time when I would have worked around the scene and gotten this composition in front of the camera and figured that was the end of it. I would have been shortchanging myself at this location after a long drive to get here, and a long and rather concerning hike to arrive at the falls. Sure, I could do the simple thing and flip the camera to vertical and get a different kind of composition, but essentially these are two representations of the same basic concept.
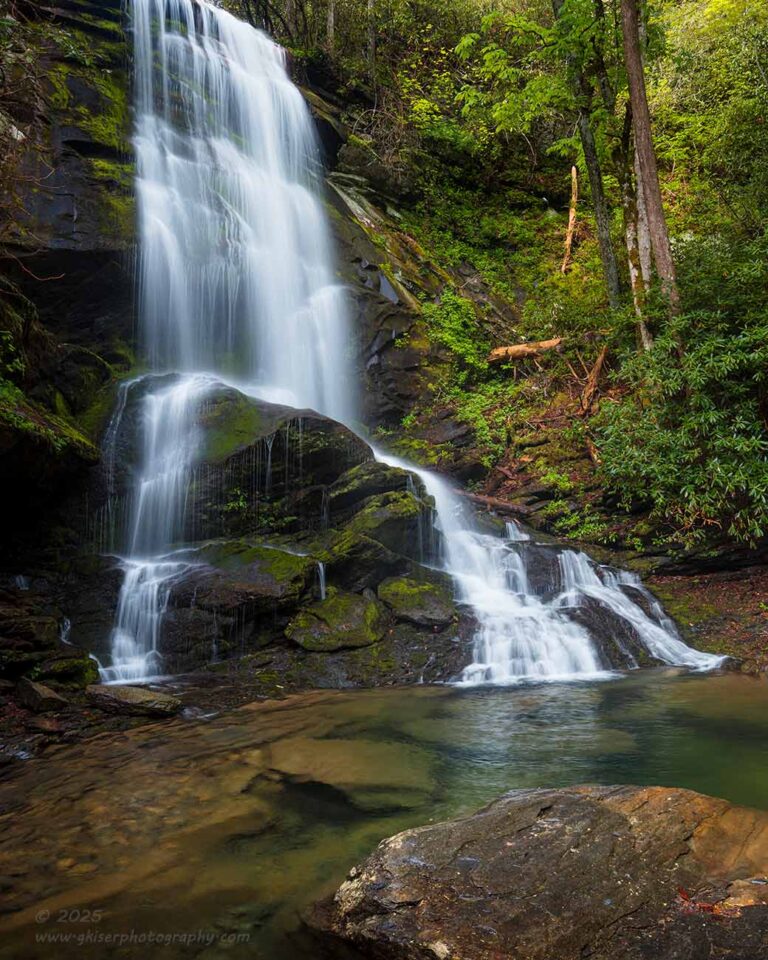
The argument can be made that this vertical photo is a more direct visual as the waterfall fills more of the frame. That is true, but how the falls appear is largely the same. As I have mentioned, my goal for all of my photos is to end up as prints hanging on a wall. With this in mind, I am always looking for how a scene will appear when hanging. There are options for narrower sections of walls where this vertical composition will be more applicable, but that same vertical shot would not work as well on a long hallway wall, or a main wall over a couch in a living room. That is where the horizontal composition comes into play. This is part of working a scene and determining if a particular scene will work as both a horizontal and vertical image. There are times when the visual weight of the subject and the surrounding elements will dictate which version has to be shot, but at times like this, I do like to have a variety for my clients to choose from.
Now, I could have been done with this location after these two photos that I think are quite nice. However, there was more meat on the bone, and I wanted to explore this waterfall even more than I already had. This meant looking at the scene and finding the shapes that were being made by the water to see if there were some detail shots that I could capture. These are the kinds of images that I call isolations because I am typically isolating details in order to remove all the other visual information leaving only that isolated detail to be seen in the frame.
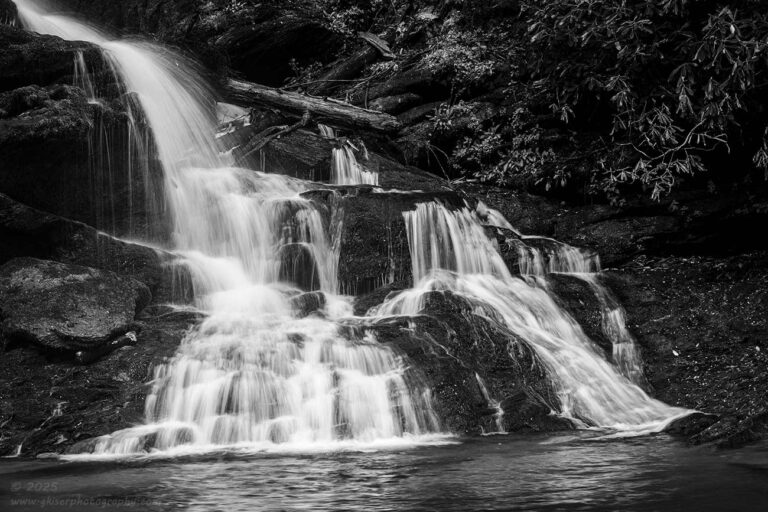
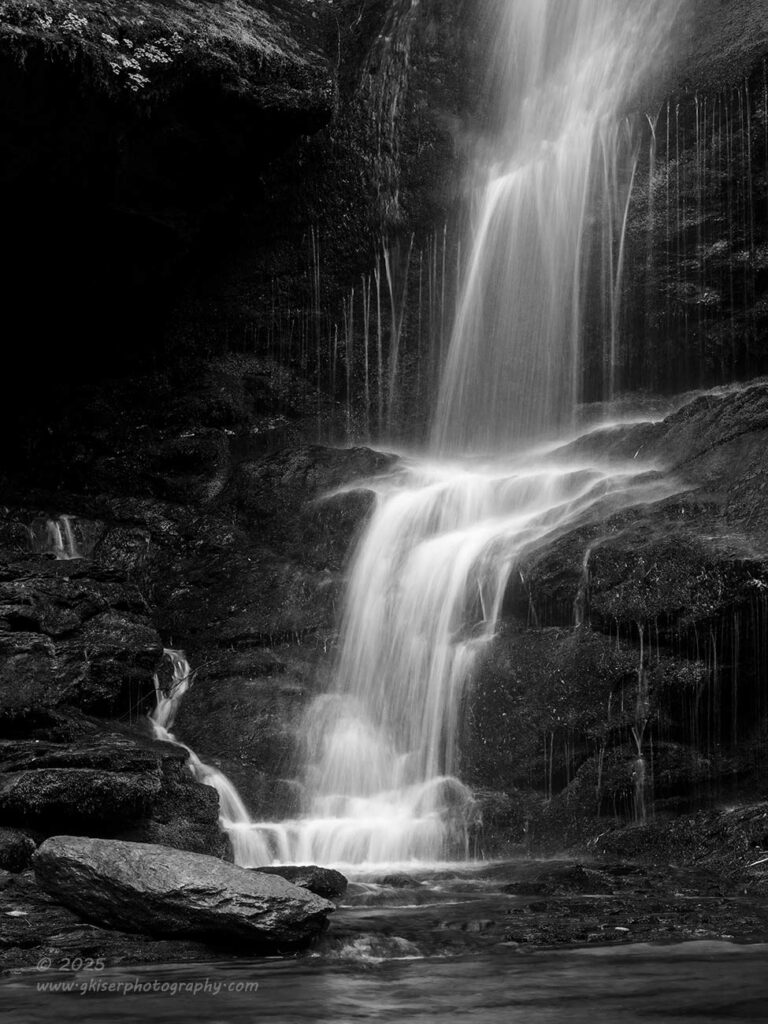
On a basic level, we can see two different sections of the waterfall. The one to the right is larger and fills more space, while the section on the left is a bit more delicate looking and not nearly as wide. They have very different personalities yet are part of the same waterfall. In the broader photo we just accept them both as part of the same waterfall and realize that they give the grand waterfall the shape that we are seeing. We don’t choose favorites or see these sections as individuals within the frame. They are like our children; we love them all equally (insert chuckle here). However, as part of working a scene, it is up to us to acknowledge that the different elements in a particular scene have their own personalities and we interact with them differently, much like our kids. This is when we start to look at the elements as individuals and play to their strengths.
When looking at the waterfall as a whole, we saw that it worked as a vertical and horizontal composition. I believe that this is in part due to the fact that there are two different personalities within the flow of the waterfall. By picking out those two primary personalities, we start to see why this is the case. One of the sides mandates a horizontal approach, while the other insists on a vertical one. When removed from the overall waterfall, they are both allowed to have their own life as waterfalls in their own rights. From this one scene, there are now three different main subjects, and four photos that have been produced. You see how working the scene can really increase the number of photographs that you have to work with when you get home. More importantly, you are starting to tell a story of the subject that most will not see until you point it out to them.
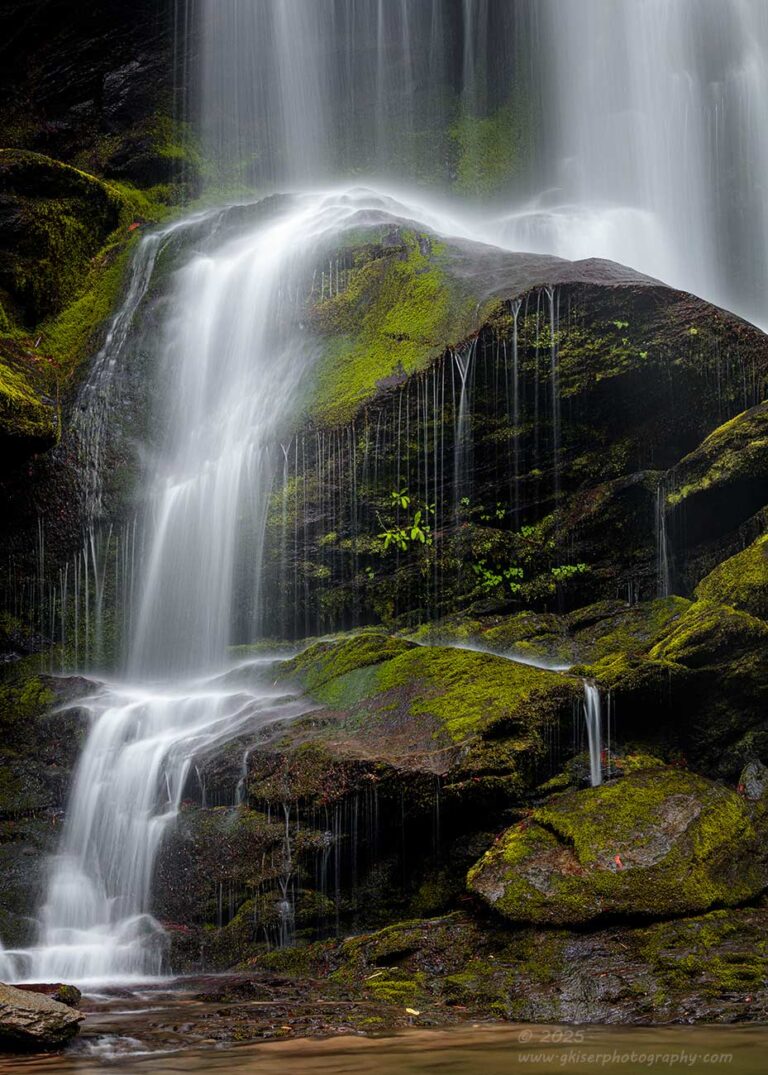
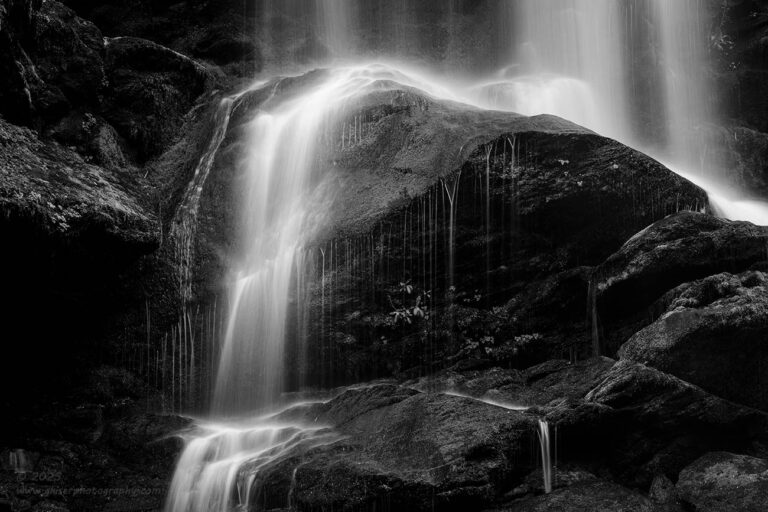
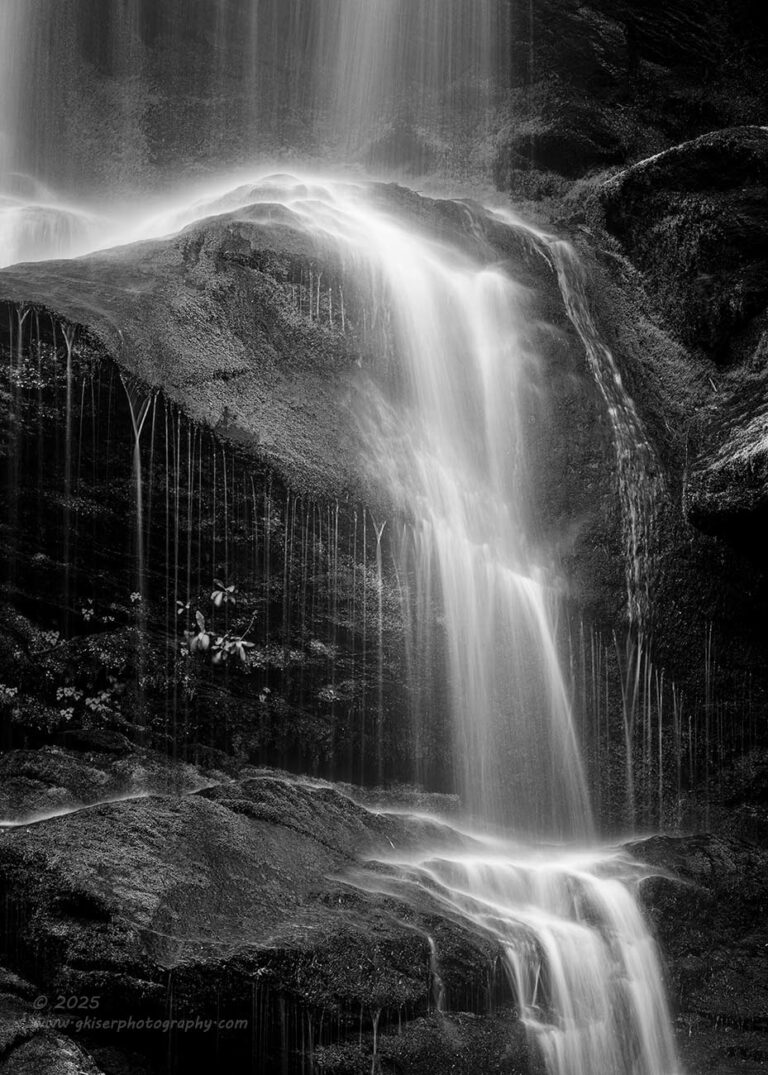
I could have been happy with the four photos that I had gotten up to this point, but I felt that there was more meat left on the bone with the more delicate section on the left. I had spotted an isolated section within the middle of the water flow that really held my interest. I started to work that scene in both vertical and horizontal compositions as I dialed in what I loved about the flow. By getting in this close to the waterfall, we have now lost track of what specific waterfall we are looking at. Even those who are familiar with this particular waterfall would probably not recognize it without some intense thinking. The reason for that is, I have removed all of the visual clues as to the overall shape of the waterfall. The focus is now the path that the water is taking over the rocks in one very small section of the smaller half of the whole. There is no doubt that is what is important to me, and without knowing what waterfall these photos have come from, the viewer is now forced to examine the same aspects that were appealing to me. Not only that, but they have no choice but to look at only the details that I captured and how I presented those details.
These last three photos are all of the same section, but they appear fundamentally different. Because they are no longer recognizable as part of the whole, I have the ability to flip them horizontally to affect how the viewer reads the photo. By choosing black and white or color, I have another difference that I can introduce to direct what is the most important aspect. For instance, in the color image, it was the greens of the moss that really appealed to me with the way the water was flowing around it. In the black and white versions, the moss was not an element at all, it was all just the flow of the water and the rocks. The horizontal image focused the attention more on the rock with the water providing the shape of that rock, while in the last vertical image, the focus is the water itself and path that it was taking. So, in essence, I have created three compositions of essentially the same section of this waterfall, but the main subjects have been the moss, the rocks, and the water. Each of these subjects got their own photograph and made the total for the day seven images of a single waterfall.
When it comes to working a scene, this is what the result looks like. You take what would be an easy photo and turn it into seven in the course of an hour or so. You learn more about what interests you in a scene and you begin to understand how to better use your camera as a tool to tell the viewer how to view the scene. This is one of those unexamined skills in photography. We spend far too much time looking at what exposure settings to use, what lens, which is the best camera body, when is the best time of day to get photos, and my personal favorite…which preset package do I buy so that I can have a style? The question that we all should be asking is have I effectively communicated what I have found interesting about this scene?
While on the topic of landscape photography, working the scene has another fold to it that I haven’t mentioned yet. This is actually a bit of advice that I read many years ago that still sticks with me. When shooting a landscape, don’t forget to turn around and look to see what is behind you. The light will change over a landscape and will present new compositions from what you have expected to see. This will also keep you from getting locked into a single scene as you work through an area to capture more and more of what interests you. A perfect example of this would be my time at Jekyll Island and Driftwood Beach a couple of years back. These two mornings yielded so many photos and included me working in all directions as the sun changed position in the sky. I want to illustrate a different area for this discussion, but I think that if you take the time to read through these two mornings starting here, you will have a better understanding of the concept.
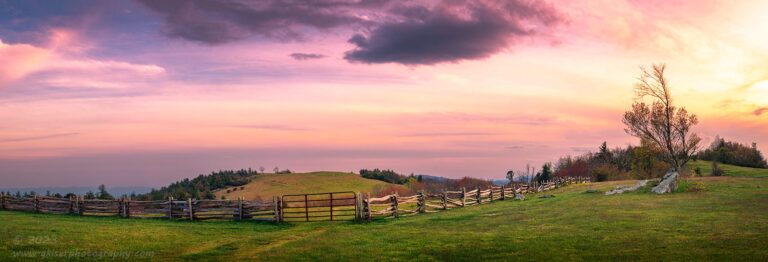
For the purposes of this blog, I want to take the concept of turning around to a different extent and talk about walking around and seeing all that there is to see. I’m going to highlight Doughton Park here because it is one of the locations that I have probably spent the most time and have gotten the most different views over a course of many years. I won’t be sharing all of the images I’ve shot here obviously, but I did want to highlight a few that are of subjects right here in this frame. As with Beacon Heights that was featured as the opening location, this was a large panoramic image encompassing a very large area. It is the impressive view of the park and even has that bit of rural flavor to it that appeals to me. It is a very effective photo, but there are so many details and additional views to be had within this area.

Just around the corner of that fence line, you have a fantastic view of the old Bluffs Lodge which I’ve captured here in another panorama. Working a scene doesn’t always mean getting into the details, it can also just mean walking around and getting different angles. The light plays on the scene differently during the day and something that didn’t look good before will eventually really stand out. This is just the same field, from a different location.

What about from the top of the meadow looking out over the mountains in the distance? Yep, by working the scene, we can get a whole different look to the area that I started photographing from the entrance. All of this is within about a mile hike over relatively simple terrain. These three views could be had in about 30 minutes’ worth of walking from the parking lot. Obviously, what you do when you get to these locations is up to you, but there are a lot of very different views that are available to you. Once you are here, you can really start to delve into the details and find those smaller points of interest.

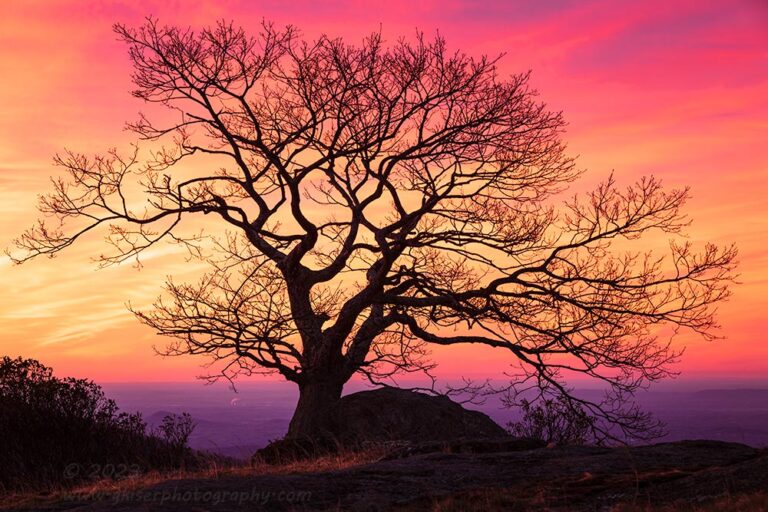
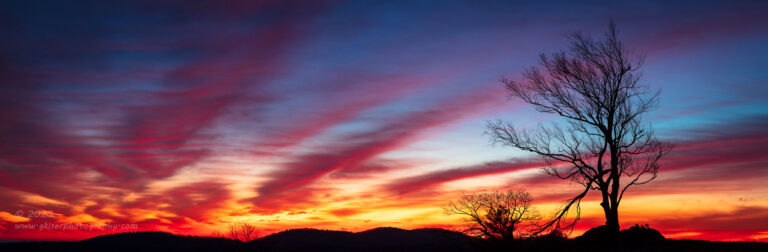
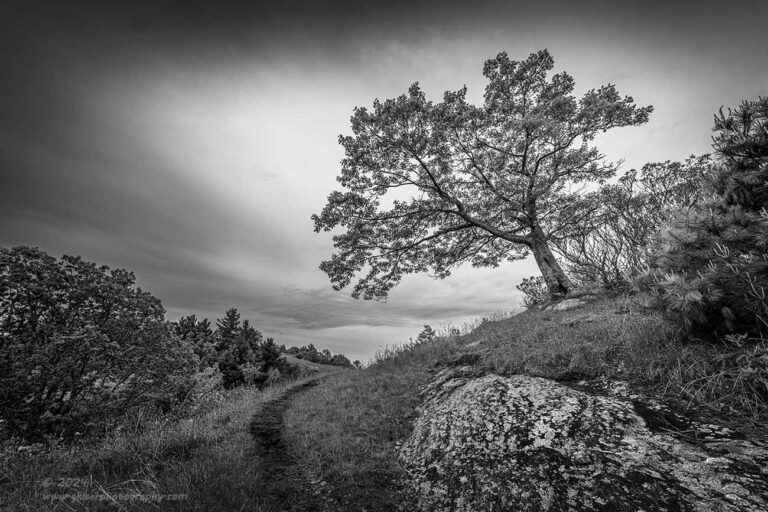
This is a section of the meadow that I have recently found to be a fantastic area to work with. It is about midway between the two parking areas of the park, and you can see it at the top of the ridge from the first pano I shared from the park. There are 360-degree views from up here and you can really find some excellent compositions from this spot. It is also about a five-minute walk from an area that I have always loved and still has one of my favorite trees.

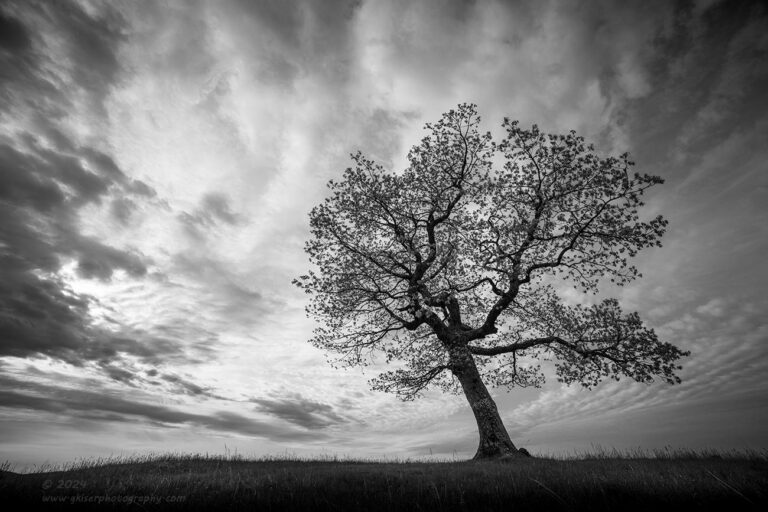

There is so much that can be done with this one tree and is usually where my workshops start out at this location. Speaking of which, I am doing a landscape workshop at this very park on October 18th of this year. There are still slots available, so drop on over there and get signed up. It isn’t just the tree here that provides so many compositions, there are other views that I think are even more impressive once you get up here. You can do the broader scenes, as well as really getting into the details of the landscape. Again, all of these views are within the area that can be seen in the panorama that I used to start talking about this park.
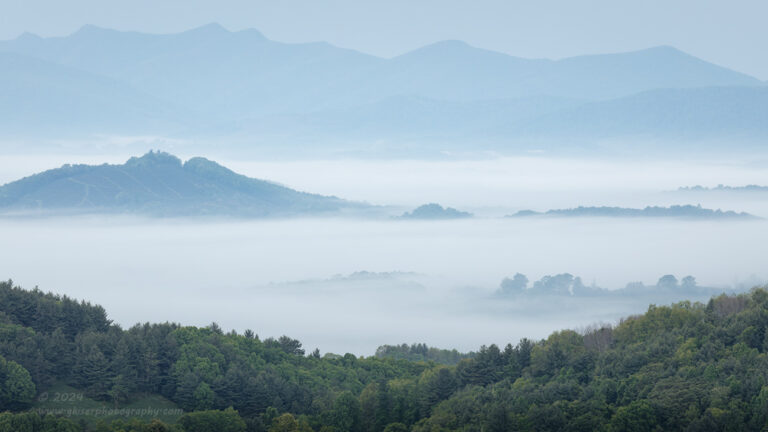
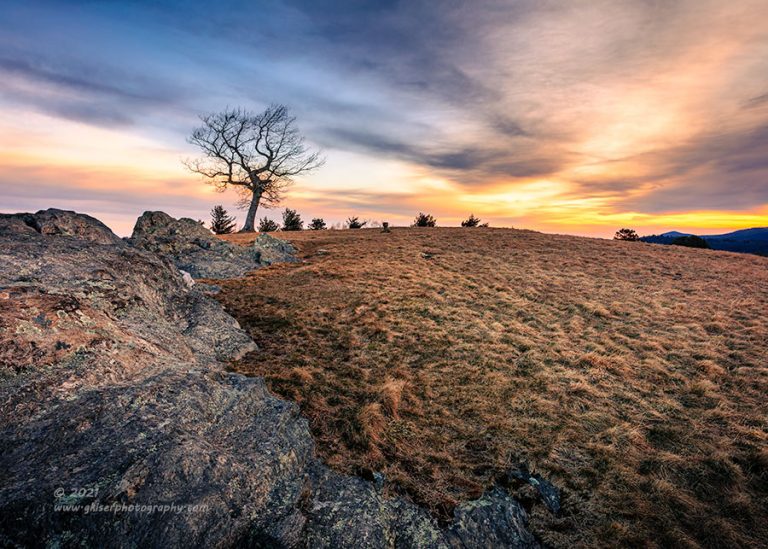

This top portion of the meadow really offers a lot of opportunity to work the landscape and find unique compositions. Of course, the best way to do this is to come back many times over and work with different light and conditions. You will be rewarded though and will have a lot of photos in your collection or portfolio from a specific spot. You can never expect to capture everything the first time you arrive at a place, so just understand to get the best out of something, you will have to return many times. This is a core concept of working a scene, and one that a landscape photographer really has to understand.
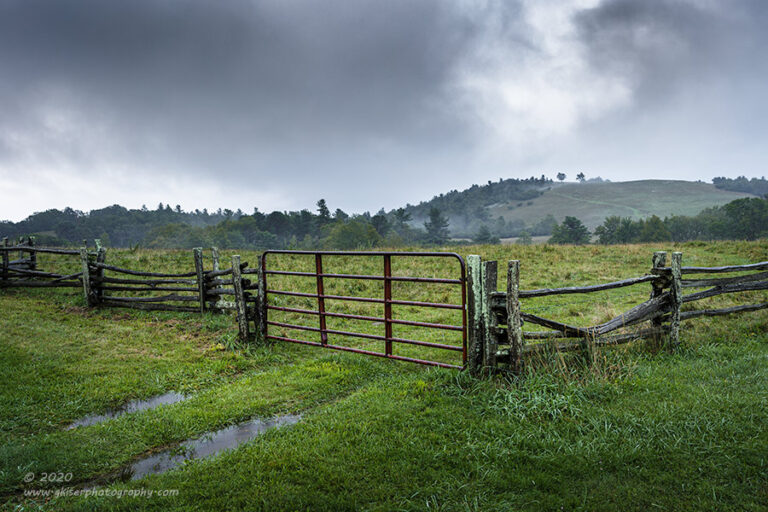

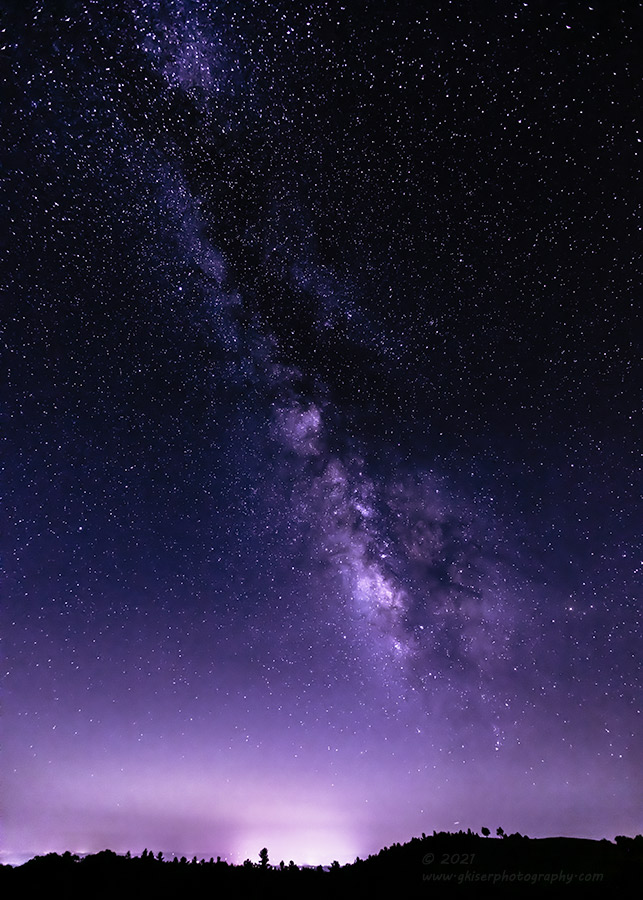
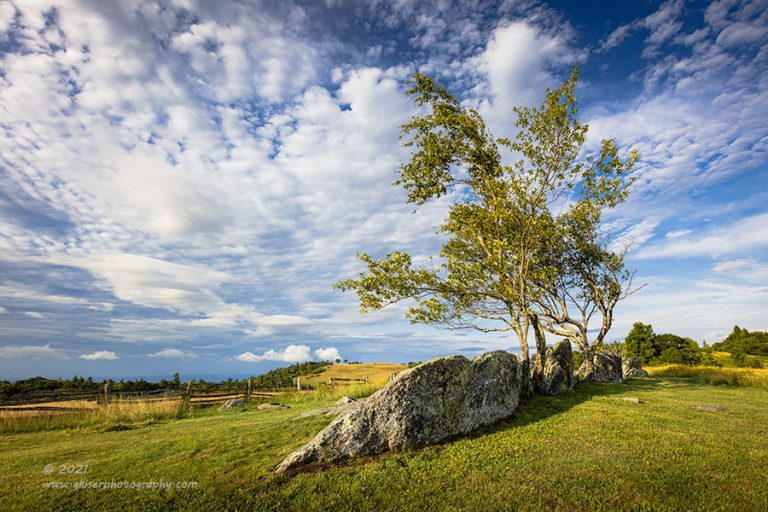
To finish our journey of Doughton, I have a selection of photos that were shot from the opening area to the park, where that first pano was shot. You can see a detail shot of the trees and rocks that appear next to the fence that framed the opening panorama as well as an isolation of one of those trees between the rocks. The gate and fence make for a compelling composition as well. For those that like to come out late at night, this is even a good area for doing astrophotography and capturing the Milky Way. No matter how you look at it, Doughton Park is a great example of working the landscape or subject. It is a location that never fails to deliver tons of options and opportunities for compositions. You can work in a broad scope, or dial it back to just a single tree, or a portion of that single tree. The key is to always look around to see what the light is doing at that particular time. Maybe it is the sky that is your subject, and you just need something to place underneath of it. Whatever you are after, keep your mind open to the possibilities that might present themselves while you are out there. Don’t be satisfied with just the single capture. Always dig deeper.
Now, I have spent a lot of time talking about this concept in the realm of landscape photography. As you can see, it does work very well in this type of photography. However, this is almost the more expected use of the concept of working a location. I suspect that the idea of turning around and looking at what is around you is probably almost a common concept. Digging into the isolations might be a little less familiar to you though. How about if I told you that this concept has been a lifesaver for me in my decay work, specifically with the old cars that I shoot.
You see, the problem that I end up dealing with more often than not is that the vehicle that I want to photograph is placed in the worst spot imaginable for a photograph. It might be next to a daily driver, or possibly a mound of building materials. There could be a nice house in the background, or the car could be in a shed. In many cases, the car is barely a car at all and just has a few remaining pieces on it to establish what it once was. This is where working the subject really comes into play and can give you the option of having many photos when you can’t even get an overall composition that makes you happy. This one concept has opened up possibilities for me that I just can’t even start to fully explain.
When I started shooting decay years ago, and well before I even thought that it was a valid form of photography, I found myself very limited in subjects because most of what I was finding happened to be in those terrible locations for a photo. If I was unable to capture the entire vehicle, then I didn’t think that it was worth even stopping to try for any photos. I remember talking to a photographer friend of mine somewhere around this stage and he mentioned that he used to go to junk yards to photograph cars and because they were so tightly packed, he had to get proficient at picking out details. That made a lot of sense to me. I had seen many magazine articles in my automotive publications where the photographer had shot details like badges, wheels, lights, vents, and so on. It was a perfectly natural thing to see, but I hadn’t considered doing that in my own photography. That was about to change.
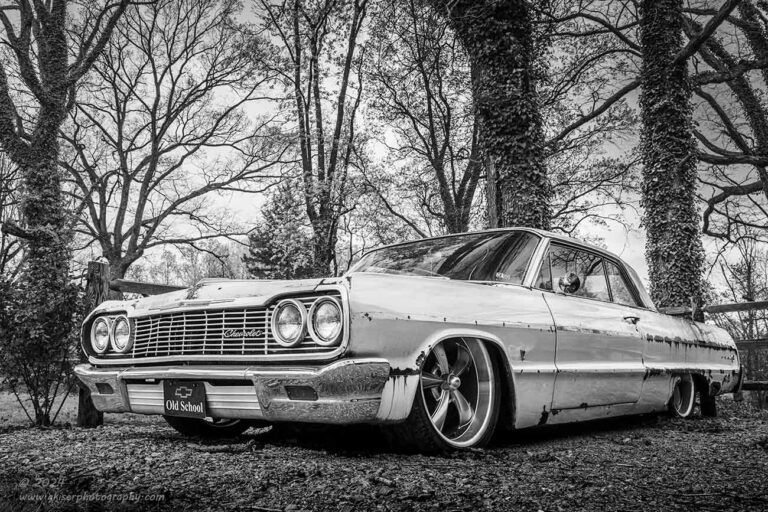
Let’s take a look at this subject from a trek back in the Spring of 2024. This was not an uncommon scenario at all. I spotted this Impala from the road and got permission to photograph it. It was parked off on the side of the property with the neighbor’s house behind it, and the owner’s house in front of it. To the driver’s side was a truck that I didn’t want in the photo, and there was a fence on the other side of the car which was very close to it. There were no really clear angles from which I could work this car, but I took my time and figured out where I could focus my attention and how to simplify the frame. This wasn’t the opening shot because the isolations were actually easier to come up with, but this does kind of set the stage for how the location was looking. I carefully selected where I wanted the camera placed and how high off the ground I needed to get it in order to block the distractions behind it. These choices effectively eliminated the house behind the car because the car was looming so large in the scene. The truck to the side was just out of the frame to the right and as far as the viewer knew, it didn’t exist at all. The only thing that mattered in this image was the car and the trees. The black and white accentuated the contrasts there and made those elements the only thing that would be seen and considered.
While this is part of working a scene, the best part is once you get the all-encompassing shot. It would be easy enough to stop here, pat yourself on the back and move on to the next subject. Hey, you have a great photo, why stick around for more? As they say, there was still a lot of meat on the bone with this car, and I wasn’t going to stop until I was satisfied that I had picked that bone clean. I knew that some of the images might not work, but there was a good chance that as I moved around the car and shot details that I could very well end up with something more impressive than the one overall photo. This is truly working a scene, and what followed became a very detailed look at this car and all of the interesting aspects of it.
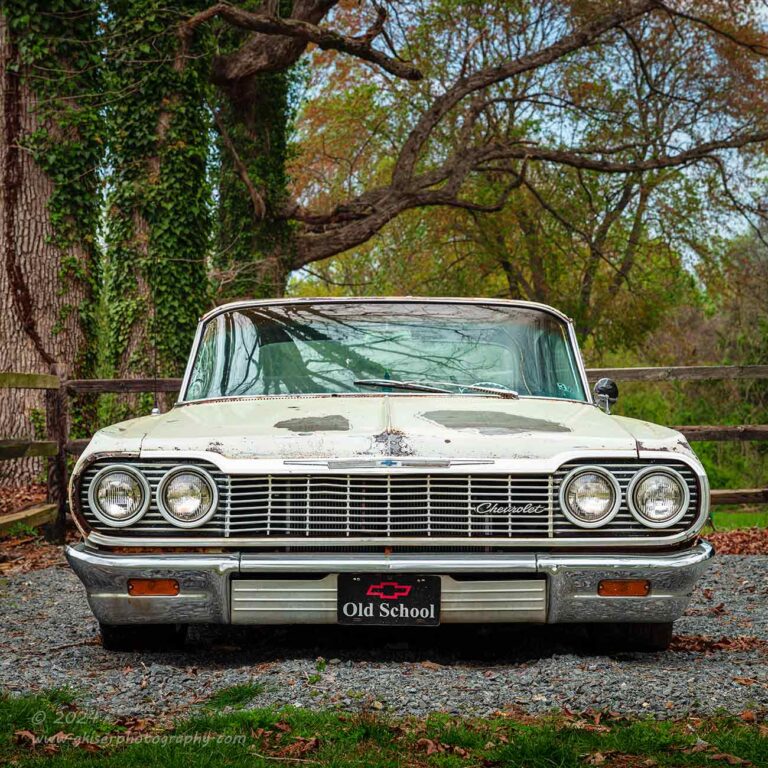
While getting a shot that includes two different angles on a vehicle is preferred to show depth, going straight on from any of the sides can also work. Because I was able to get another clean background with this tightly cropped square composition, I was happy to include it as well. Since the angle was a bit more simple than the preferred quarter shot, I could make this a color image as the greens framed the car quite a bit better than the bare trees which took up a lot of the frame earlier.
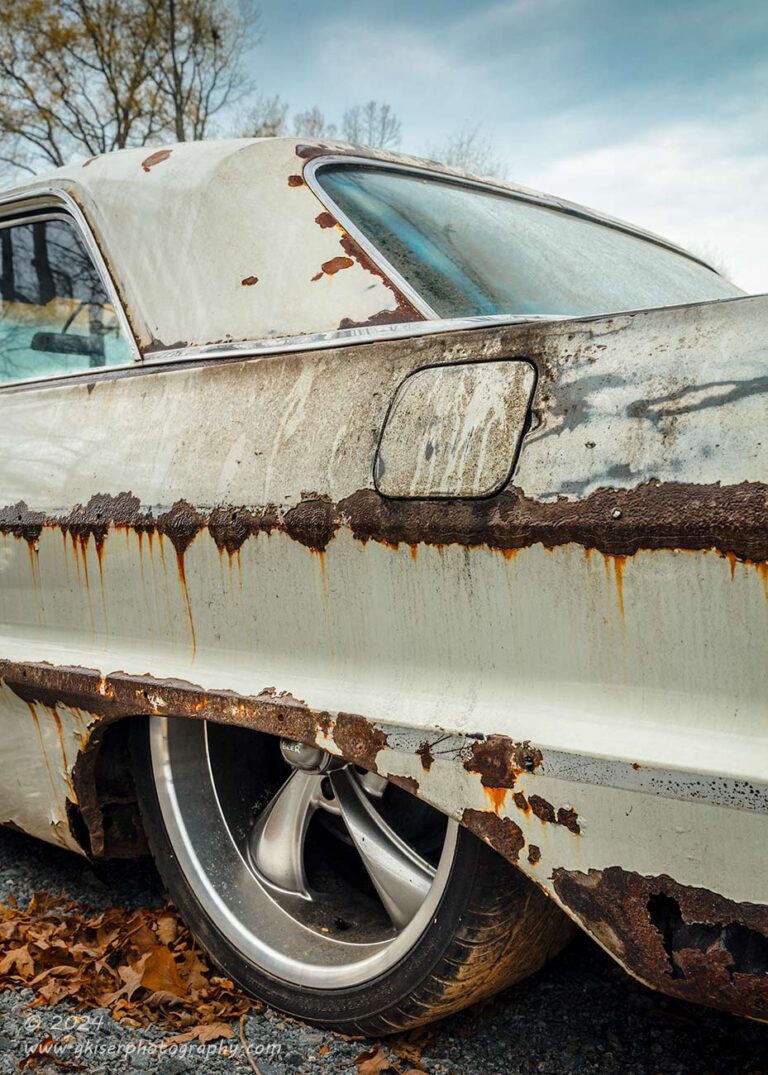
There was also the opportunity to grab sections of the car which included the unique shapes that were involved, as well as the wheel design which I have always thought was an iconic look for this kind of vehicle. Getting low was another important took for this as I had an entire house that was just out of view beneath the roof of the Impala. The position allowed me to make the sky and a bit of the tree my background which worked so much better than a portion of a house. The elements here were all linked to each other and the forms within of the photo was quite connected, even though it was just what appears to be a random section of the car.
Shape is just so important to a photograph, and if you start to boil down a scene into shapes, you can start to fill the frame with shapes that go together. Circles, lines, triangles, boxes, and curves all create different visual flows. You have the choice about whether to include things in a horizontal, vertical, or diagonal manner which will set the tone for the image and dictate the order in which the shapes appear. Figure/Ground is something that I teach in my mentorships when I think it can help the client. Essentially, I will break any given scene down to the basic shapes and then show how those shapes fill the frame. It is a great way of learning visual flow as well as balance within a frame. Once we remove the recognizable context, we are left with nothing more than a pencil drawing on a piece of paper where we organize the shapes within a space to be visually pleasing.
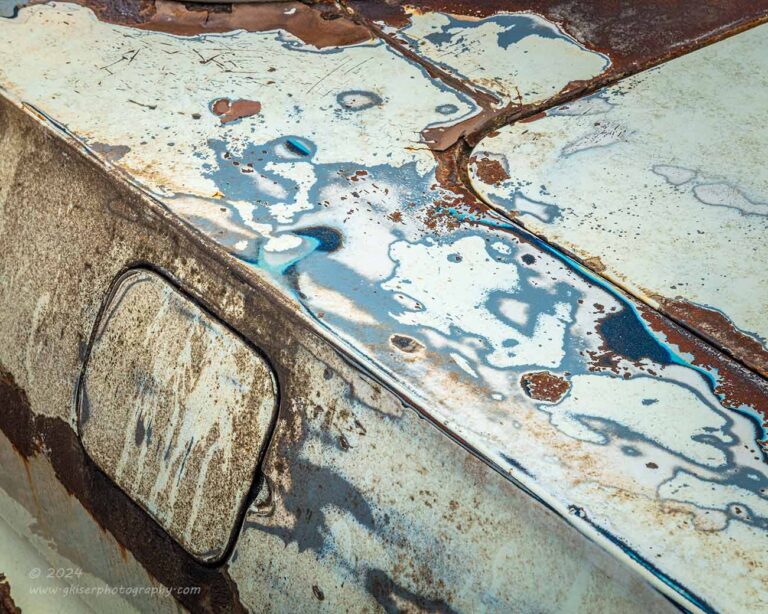
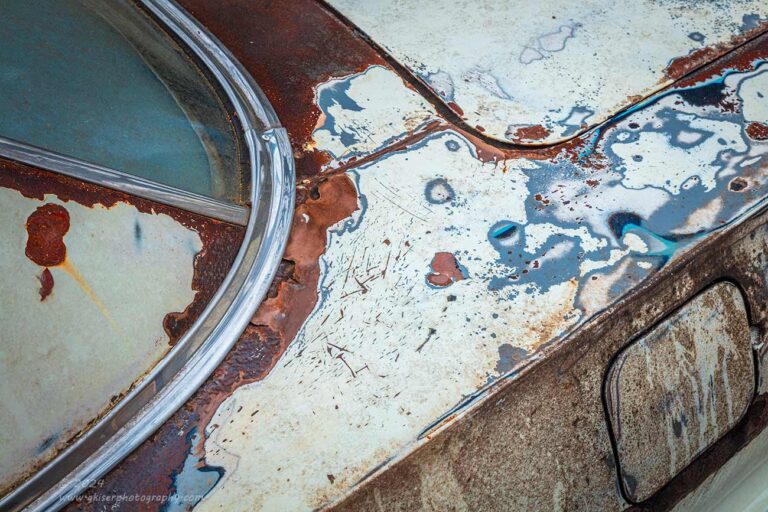
In the previous two photos, I didn’t have a specific subject for the composition, but rather the patina in general. I used the different body lines and seams to form the composition and keep your eyes moving through the image. The gas lid was quite important for the extra shape that was brought into play with these compositions. You see, when you are working a subject to this extent, you don’t really have to worry too much about subject as you can interpret your subject pretty much as you wish it to be. Unless you are very well versed with these cars, I doubt that many would even know what car these kinds of photos came from. That’s the point when it comes to working a subject. It is no longer important what the specific subject is, you are looking for the details that capture a certain essence of the whole scene.
If you will recall the waterfall example from above when I shot the upper falls at Catawba Falls. I started to pick out details based on shape and visual flow. They were no longer connected to the actual location or the specific waterfall. The same concept has been applied to this Impala while working it. A great word to consider here is Synecdoche, which is a word that I have recently been exposed to and love the concept of. Simply put, it is a situation where the small part represents the whole. This is something that I have been doing in my photography for years but was just now seeing that it was an established concept in literary fields. There are times when an abstract capture of an Impala can represent the entire car without the viewer even knowing what the whole car looks like.
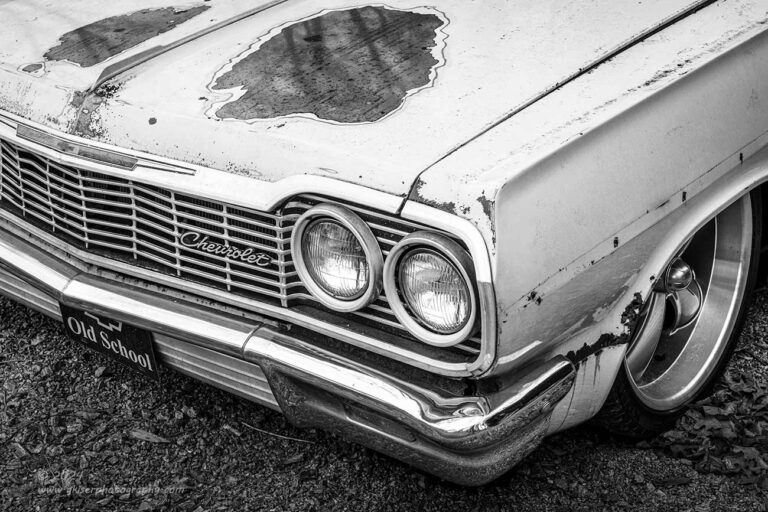
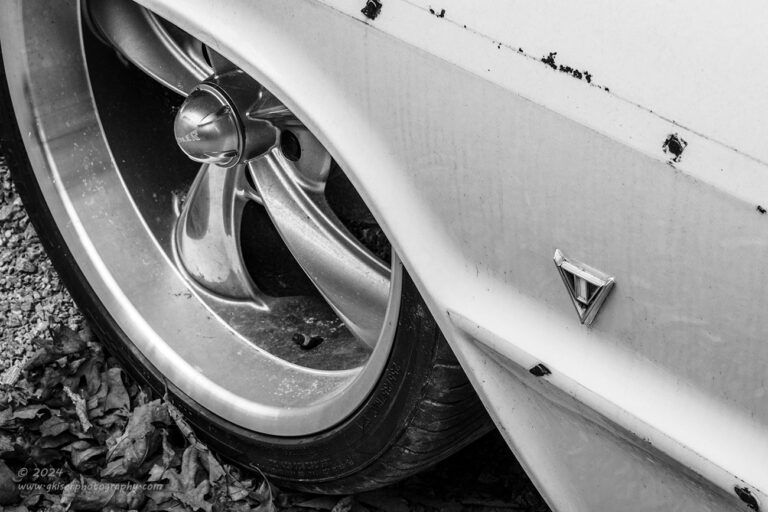
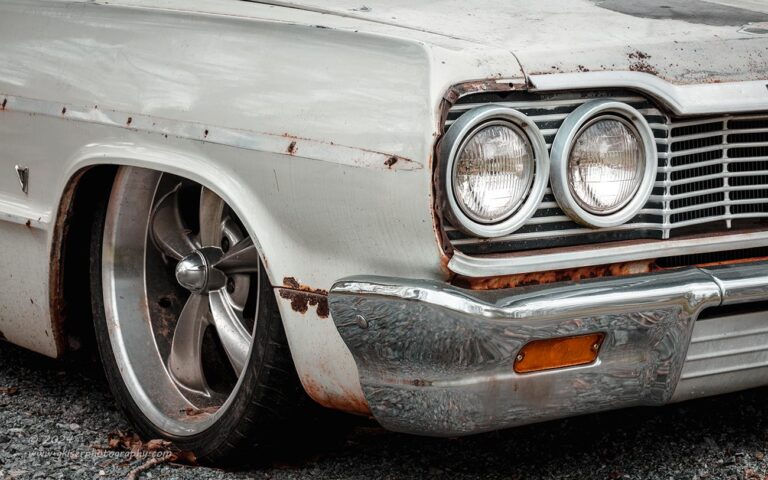
In the previous three examples, I have picked out emblems, wheels, and headlights, or a combination of those elements to speak for the entire car. The car itself is kind of recognizable in these photographs, but it is not the driving force behind the compositions. In these photos, I wanted to capture certain styling elements that could be found on the car. They might be similar to the compositions used in marketing when a car is brand new and they are wanting to really show off the styling of the car. Obviously, that is not the look that I was going for with these because the condition of the car is far from new or restored. As a decay photographer, I love the evidence of time and what it does to a vehicle. The photos that show the styling of the car are intertwined with the rust and the apparent age of the car. It makes for a neat dichotomy for those car lovers out there who, like me, are used to looking at the magazine articles of their favorite vehicles. There is now a whole new layer to enjoy with these compositions, not to mention the memories that they will provide.
As you can tell, working a scene can easily yield a lot of great photos from a single location or subject. It is a tool that I consider invaluable when I am out with the camera. I can look back on when I was much less experienced and think about all the potential that I let go of. If there wasn’t a photo that just jumped out at me, I didn’t consider it and moved on. There were other times, that I got a simple postcard shot of a very interesting subject, but left it at that. This is a skill that takes a while to practice and is one that I do talk about quite a bit during my workshops. I think that it is just that important to a photographer. If you don’t believe me, let’s take a look at one more example before I close this entry out.
This is how working the scene really plays out in the real world. I’m going to use a recent trek as the subject for the example but will show you a bit more than I did in the original blog entry. I had spotted what turned out to be a Chrysler New Yorker sitting in a parking lot of a service station. The shape of it caught my eye because it was very much unlike anything that was currently flooding the streets. I looked at it once more and decided that it wasn’t quite as decayed as I would like, and that it was in a lousy location. When I returned to the area the following day with the camera, my primary location fell through and I stopped here to see if I could kill a bit of time by getting a few photos of this car. I was now looking at it in close proximity and was feeling that it was still not a great subject either by its appearance, or by its location. This is what I was seeing when I was thinking those thoughts.
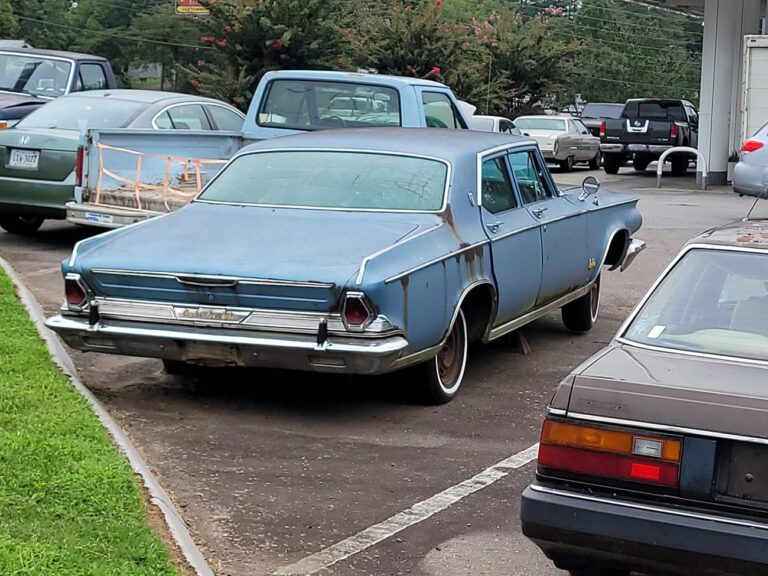
When I am looking for subjects, I want them to be from the ’70’s or earlier in most cases. This one worked for that criteria. I also look for them to be rusty with a good patina on them. This one got a C- in that department because it was mainly just faded blue paint. There was a bit of rust here and there, but not really widespread. The chrome was even in great condition for the most part. One of the big things that I look for is that the subject is set off by itself and away from distractions. If there are distractions, I have to think about how they could be used to enhance the composition or removed with creative compositions. Looking at this scene, I would give the location score an F–. I mean look at all that was around it. There was no clear shot to be had of it, and nothing at all that I could do with the cars immediately near it to make anything work for this car. Without a full composition possible for the car, I was left with looking for isolations. For isolations, I almost always rely on the rust to give texture and added visual interest to the photos. With very little rust here, all I was left with was a car from the ’60’s that had some interesting styling.
This is probably one of the best examples of working a scene that I can think of. For the first probably decade that I was a photographer, I would have continued on down the road without another thought. There was just nothing here worth photographing. However, now that I am much better at my craft, I decided to dig my heels in and try to get a few workable photos of this car. I started to take stock of what I had to work with. There were some interesting details and emblems on the car. The styling had some unique areas, and there was a touch of rust here and there. The blue of the car would probably cause me to make most of the photos black and white because I really felt that I needed some warmer hues to balance out the cool tones of the paint. This is where the rust would have come in great, had there been any.
So, what did I do with this car? Because of the highly reflective chrome, I pulled out the long lens which would allow me to keep a distance from the car and hopefully keep from appearing in an unintended cameo. I added a polarizer to control glare and to temper any reflections should I include glass in the shot. I started to walk around the car and began looking at the details to see what really interested me. I wasn’t wanting to force the photos which would make it look like I didn’t care for the subject. While it wasn’t my favorite car, there were plenty of attributes that appealed to me and that was what I wanted to figure out photographically.
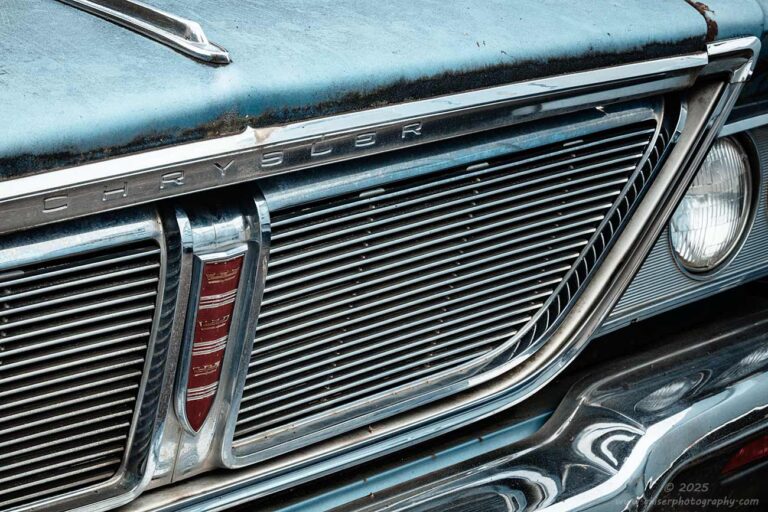
The first idea that I came up with happened to center around that need for a warm color in the composition. The grill badge was red, and there was a stamping above it that identified the make of the car. This was my starting point for the composition. I started to work around the front of the car to find out what elements I needed to include and which ones I could omit in order to make a well-balanced composition. Through the careful planning of angles and elements, I managed to get a composition that really captured the essence of the vehicle and its styling. It was the first composition in the bag and one that set the tone for this car. I was energized after this and continued to find aspects that I loved about this car.
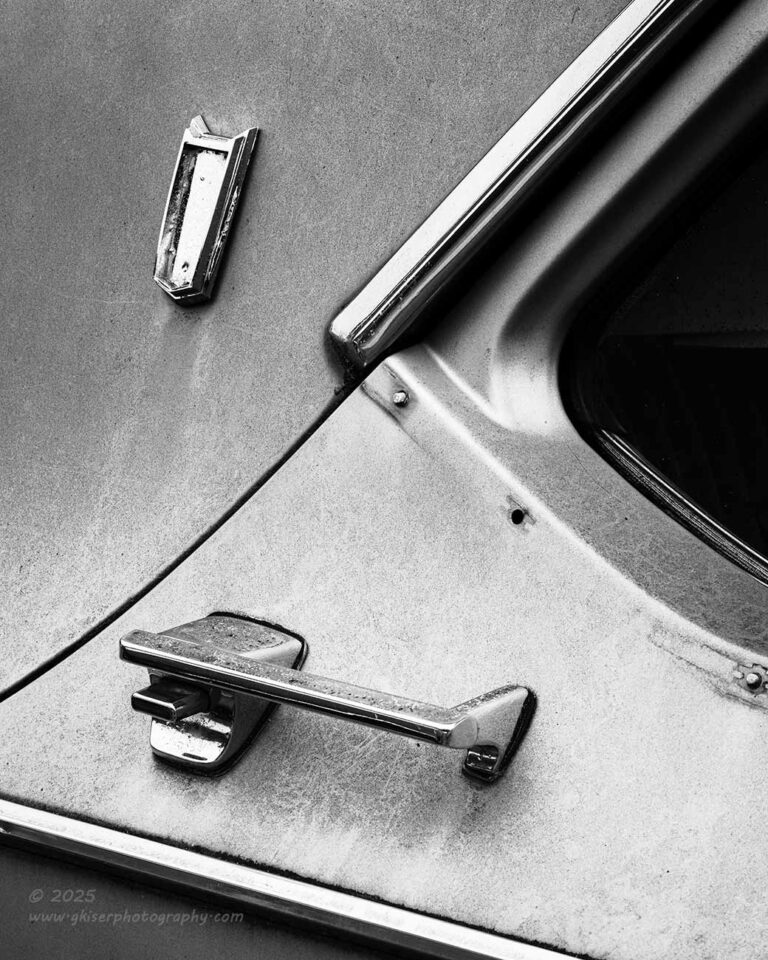
Next up was a composition that fell into one of my concerns from the start with the paint being in decent shape and that shade of blue. Without anything to add warmth to the scene like that grill badge, I was left looking at this as a black and white image. What had drawn me in was the emblem housing on the pillar where the crest had fallen out some time before. I liked the way that the rain guard fed into the door seam, which went down to the door molding. Those two lines framed the door handle quite well which added another bit of interest to the puzzle. The missing chrome under the window was another aspect that I liked because it showed the decay of the car. The window itself added a triangle which complimented the other triangle that framed the door handle, as well as another one that framed the emblem base. If you are keeping track, there is another triangle below the molding as well. This composition became all about triangles and thanks to the omission of color, that was all you really had to see in this photo. It was a very effective composition of a car that was kind of boring in most respects.
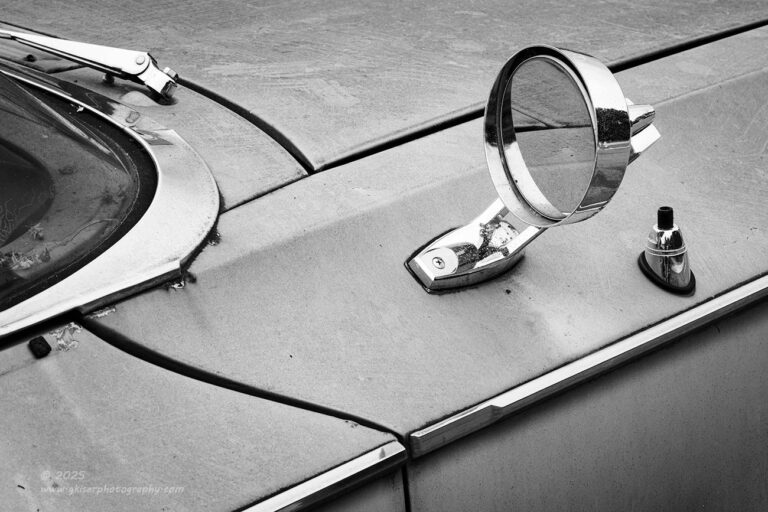
Going along with the same compositional thoughts, I moved up to the front of the car and centered the next photograph around the rearview mirror mounted on the fender. The blue was removed from the photo leaving just a bunch of lines creating shapes, and shadows creating depth. Diagonal lines were used here to add to the visual excitement, and I made sure that those diagonals were aimed up rather than down to secure that aspect. This is one of those sections of a car nobody really thinks about, but by composing this image in the way that I have, you are now looking at it and finding it to be interesting whether you are a car nut or not? Tell me I’m wrong.
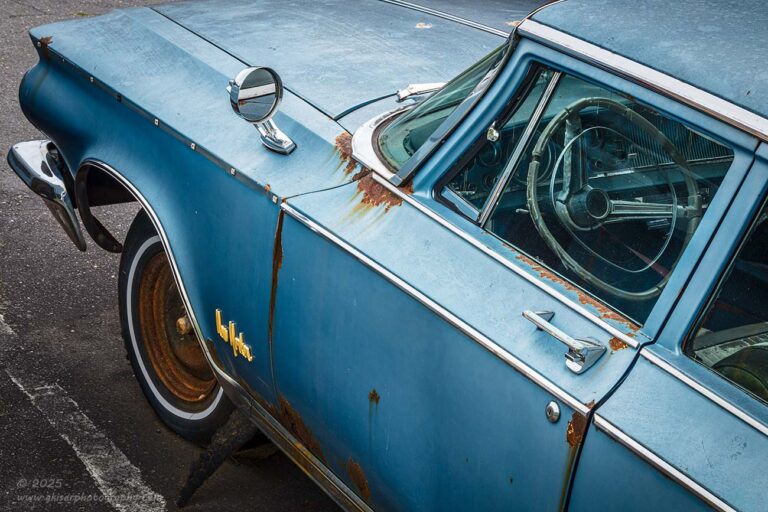
Now that I had a few solid images under my belt, I allowed myself to get a little crazy with this car. The next aspect that I started to work with was the steering wheel because it was more square than round. Imagine turning that smoothly at low speeds! The wheel by itself would have made a boring photo, but after starting to add other elements to it, I found that it was a very workable image. The concept had kind of started with the badge on the fender, but the wheel had overcome my attention in short order. I was now including that first element as a supporting player for what was now the main focus of the photo. The golden color of the badge and the red rust on the wheel gave the photo that bit of warmth to balance with the blue which is why you are seeing this one in color. The mirror has also found its way into this composition to help frame the other elements, and because I really liked the shape of the front of the fender, that was given a place within the frame as well. Other than the very awkward height of the camera to achieve this view, the photo was actually pretty easy to piece together and is a direct result of the time I had spent working the scene.
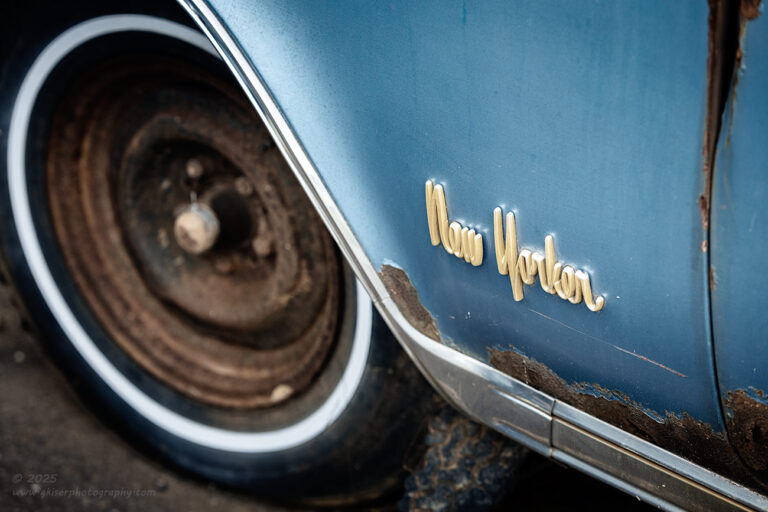
This next composition came on the heels of the steering wheel journey that I just took you on. After seeing how well the yellow badge looked on the blue paint when matched up with the rust wheel, I went back to trying to figure out a way to make the emblem a more primary focus of an image. This is what I came up with and I used the door seam as a framing element because it introduced a fair bit more rust that I thought that the upper right of the frame needed. This gave balance to the wheel in addition to the framing aspect. The rust continued to frame the emblem because there was a good bit of it above the rocker molding which fed into the wheel arch molding. All of that chrome made the whitewall tire work out so well. It wasn’t an obvious composition to start with, but one that I think works very well in both color harmony and how the shapes and textures all work together.
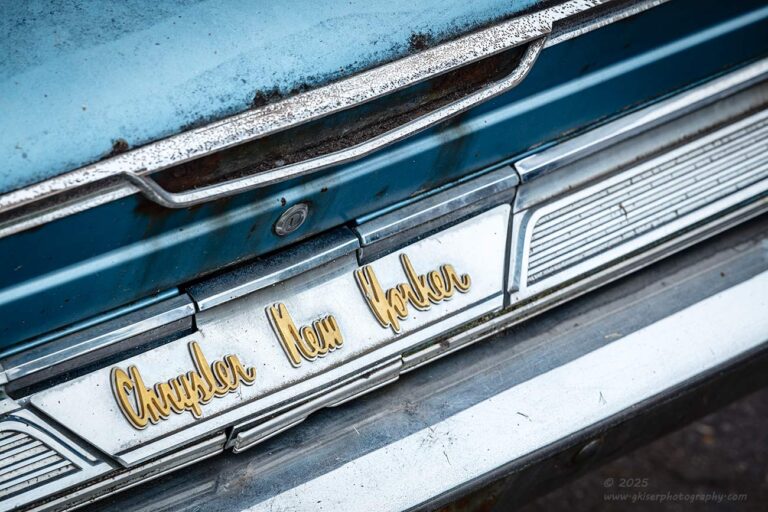
I was just getting started at this point. I had found that the golden/yellow badges worked very well with the blue paint for a color balance depending on the scope of the photo. I had remembered seeing a very long emblem on the back of the car and went back there to look at it again. I was also looking at the taillights, but more on that shortly. I eventually decided to build a composition specifically around the long script on the back of the car. This took a bit of doing, but I figured out how to create a nice diagonal composition for a bit of visual excitement in the frame. Once again, the color harmony worked fantastically, and the chrome added the contrast that the scene needed. This turned out to be one of my favorites from the car by the way, but I still wasn’t done with working this scene.
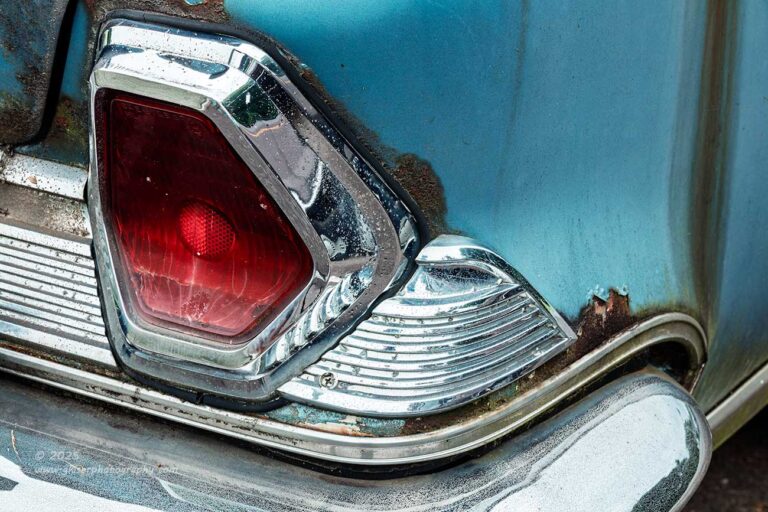
I still wanted to get something with the taillights, and this was because of a couple of different reasons. First of all, I liked the design of them and how the housings were incorporated into the bumper. Second of all, I saw this as another opportunity to bring in a warm hue to balance with the cool paint which was on the car. I also liked that there was a bit of rust around this taillight on the passenger’s side. This gave a bit of texture to the scene as well as a bit more warmth. The photo worked in all of the ways that I needed it to, and the streaking from the rust further up on the quarter panel provided a much-needed frame for the right side of the photo and also kept the blue from being empty space. Because it was now framed, that empty space had become negative space which worked for the whole scene by providing visual tension to the areas of detail on the left of the frame. Without that streak of rust, the blue would have just continued off into oblivion taking your eyes with it. That is empty space because it serves no visual purpose. The negative space which this had become served a purpose to contrast with the abundance of visual stimuli to the lower left and calm the scene as a whole.

This last composition was a result of two other photos. The one that got me interested in shooting this one was the taillight shot I just talked about. The rusty streak took my eyes up to the largest bit of rust on the car and I wanted to capture something with that rust. The problem was there wasn’t much going on around the rust other than a body molding that was proceeding through the rust. It wasn’t enough to make an interesting photo. However, when I combined that concept with the composition that I had shot earlier of the pillar and door handle, I started to see a more interesting composition coming together. I used the basic angle that I had shot the pillar from and flipped the camera horizontal so that I could get the rust to the left within the frame. As you look at the two photos, it appears that I could have cropped this horizontal photo into the vertical one that I had shown earlier. That would have left me with the section that I had tried to frame up before with the rust and decided that it lacked something. By adding in the elements from the earlier composition, I had a much better visual balance for the rust, and now I had a color balance that let this be a color photo instead of a black and white.
That was the last photo that I shot of the Chrysler. If you have been keeping count, I ended up with a total of eight photographs from a car that I was unable to get a single overall shot of because of the location. The car itself wasn’t even all that interesting, but by working the subject like I did, I ended up finding ways of translating what I found to be interesting details into eight (hopefully) interesting photos for you to look at. This is the power of working a subject. What is great about it is you can do these same kinds of things with a subject that allows you to get an overall shot to begin with. What you end up with is a full story of the subject both in an establishing shot, or several of those if you are lucky, and then multiple detail focused compositions.
You might find that certain subjects lend themselves to one type or another, but if you keep your mind open and work the scene, you will be sure to have everything that you could hope for when you leave. It takes just a little extra time to work the subject whether it is a landscape or something much smaller. The end result is training yourself to understand what details you really love about a scene and what drives you to want to photograph it in the first place. There is power in that realization because when you start to understand that about yourself, you can really start to create the photos that are specifically you, and not just the postcard shot of whatever you found to photograph. Work the scene, and discover yourself through what draws you in.
Thank you for joining me for this installment of the monthly Behind the Camera. It did go a bit longer than I anticipated, and for that I am sorry, but I wanted to make sure that everyone understood how beneficial this skill can be for your own photography. The same aspects can work when doing portrait work as well, so don’t forget those details, and different angles. Extra photographs have never been a bad thing, and you might find that your favorite photo of the day might just come after you got the “easy” photo.
I look forward to seeing you back here next month as I tackle a new topic with you. I’m not quite sure what that is going to be just yet, but I have a few ideas in the wings waiting for the right time to flesh them out.
Until then…