Welcome back to another installment of my monthly Behind the Camera feature. Each month I try to talk about something that has been on my mind for a while, or possibly a question that has come up during a workshop, or maybe in passing with somebody enjoying my photography. This month, I wanted to do something a little different from the norm and just open myself up to answering any questions that came in through a series of posts on social media which I started in June. The last time I did this was several years ago and I think that it went very well. Without further ado, I would like to get into the questions.
This first question is from a long-time client of mine who has been through more workshops than I can recall. Richard Bean asks simply what got me started in photography. At first, I thought that I had already answered that a very long time ago, but when I started to look through that entry, I realized that I only skirted the issue and focused more on how the inner me comes out in my photographs. Well, don’t I feel silly? This is really a great question that it would appear I have never actually answered…until now.
The exact moment that got me started in photography happened on Christmas of 2002 when I got my first digital camera as a present from Mom. By the way, it is her birthday today, so Happy Birthday Mom, I love you and miss you. Anyway, this was when digital was just getting started and she was tasked with purchasing cameras for the school where she taught. Since I had a bit of experience with cameras for a similar use because the police department I worked with had just transitioned to digital from Polaroid for the supervisors. With that input, I helped her choose the same cameras for her school. To put this in perspective, the cameras were Sony FD-200’s where the FD stood for floppy disk. There were no 256 gig SD cards in these cameras, they used a standard 3.5″ floppy disk which could hold only a few 2mp images. Mom ended up getting one these for me because I had been using a 35mm point and shoot to take photos of my truck to post on an online community forum for off-roaders. This was an arduous task as I had to wait for the roll to be finished before I could send it off to be developed. Then I had to scan the photo into the computer to share it on a post. Yeah, I am that old, folks.
Mom took pity on me because it seemed that by the time I had the photos back and ready to share online, I had done three new things to the truck so everything that I was sharing was dated and at times irrelevant to the current conversations. Seeing the benefits of a digital camera for quick turnaround for her job led her to see the benefit for me as well. It worked like a charm because I could go and snap photos of the truck and pull the disk out to upload them to the computer and then share them within minutes if I wanted to. As the hip kids say, it was a game changer, and I was obsessed.
There was a side effect to that process though, and that was the fact that for the first time I was able to see what I was shooting as I was shooting it to know if things were coming out the way that I intended. In most cases, they did not because I didn’t understand photography at all. My only experience with it to that point had been using the simple point and shoot film cameras, like the family camera that only had a single button and a flash. This digital photography thing was all new to me and I wanted to learn how to maximize the photos that I was shooting. That was when I went to the bookstore…no not the Amazon bookstore where you feed the Kindle. I’m talking about an honest to goodness bookstore where you could select a physical book and purchase it to flip the pages and read through it. Yes, I’m an old fart, so what?
I found a lot of great information in these books, and I learned what a filter was and how to use them, I learned how to understand the exposure triangle, and even started to understand the rule of thirds which apparently was the only compositional theory worth talking about. This was a rabbit hole that I had not intended to go down, but here I was at the local camera store…again, a physical building that housed all things related to photography. The internet was still kind of a novelty for shopping at this point. I started to purchase things like a polarizer, an ND filter, and a UV filter (I was told I needed one by many sources, but they were all wrong). I also got a camera bag to hold it all, some spare batteries, and even a cute little tripod. My photos improved, and I started seeing what I could do in real time to make them better.
Through the next two years, I subscribed to several magazines (periodically published short form literature with articles and stores in a physical form) and continued adding to my book collection. I was becoming an expert in photography and found that I really loved the idea behind it. I was enjoying the learning process of the craft and was starting to see some “artistic” photos coming out of my camera. I was still shooting my truck, and later on a car that replaced the truck, but I was also starting to shoot things like gazebos and things out in nature. There were even times I would drive out to the Blue Ridge Parkway with my little 2mp camera and take photos from the overlooks.
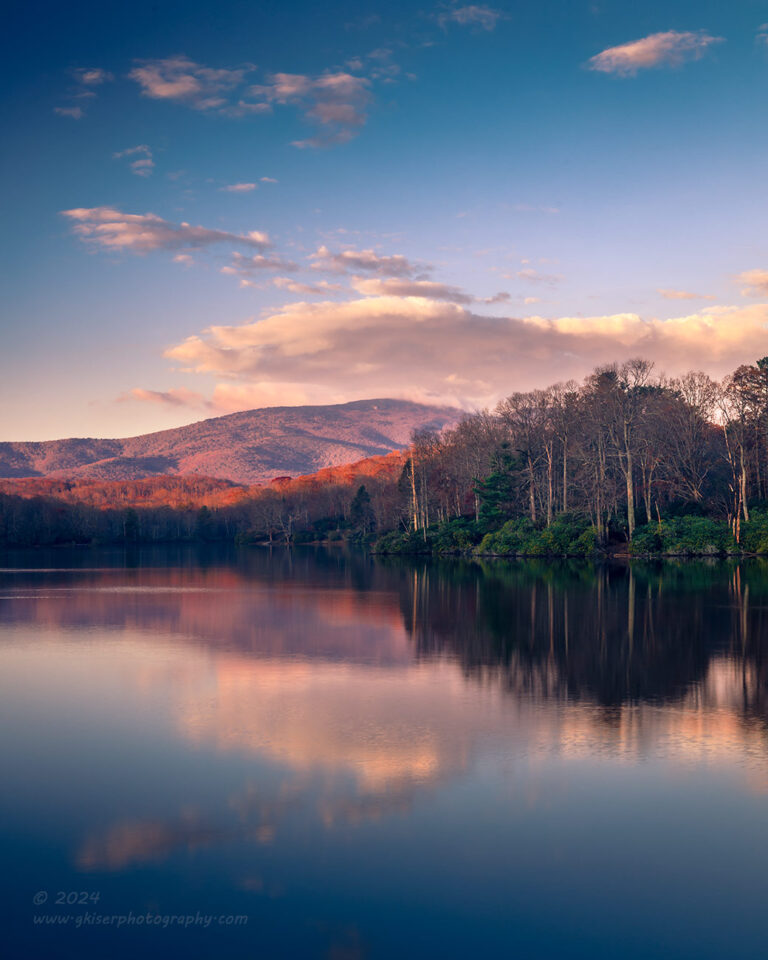
By 2005, I was starting to outgrow the little point and shoot camera and started to talk things over with Mom about what she thought of my photography. Side note, never ask a mother what she thinks about your creative projects. Remember that bowl you made for her in elementary school that couldn’t hold a dream, but she loved it? Yeah, mothers are always a bit biased when it comes to what their kids are creating. She did agree that I was getting much better and was ready for a change which was all I wanted to hear. I needed to get to a point where I could work through the exposure triangle and start taking creative control over those choices which I wasn’t able to do with the little FD-200. This was my first real investment in photography as I decided to purchase a new Sony F-828 “prosumer” camera which functioned very similar to how a DSLR worked, but without the interchangeable lens. It also had a live view which would allow me to continue shooting in much the same way as I had been doing with the floppy disk camera. The thought of an optical viewfinder and basing exposures on a light meter baffled me and I knew it would add to the frustrations of my learning process.
With this new camera, I got a new camera bag and started a collection of filters that the thought of baffles me to this day. I think I had something like 25 filters in that bag which was insane. I also needed a new tripod to support the camera and with that I went out looking for things to photograph. I had already decided that I was going to be an outdoor photographer and wanted to focus on landscapes because that was what I was seeing the most of in the magazines and books (of course, with purchased print media, the algorithm is pretty much completely up to you). I thought that I could do those photos easy enough and maybe start making calendars and selling prints. Oh, the delusions of youth. Ironically, the first subject that I shot was the old mill in Guilford County. It was not a “true” landscape, but I liked how it looked, and it gave me a chance to work on my composition and use of filters. I also shot an old house, or more accurately, the remains of one in the woods that I was familiar with from work.
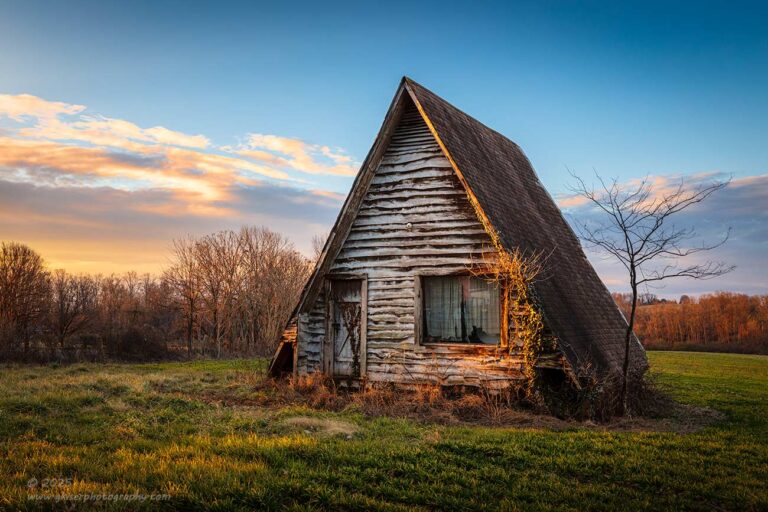
As I look back on things now, I can see the irony in the fact that I had chosen to be a landscape photographer but my first two subjects with my “real” camera were much closer to the decay subjects that I shoot today. It was a matter of convenience more than anything as I just wanted to get out with the camera and see how it worked. I did go and do a lot with landscapes and went on a lot of hikes where I shot quite a few nauseatingly colored images because I had read that warm tones were favorable. No matter when I shot the photo, I had the white balance set to shade for more warmth and then added an 81-series warming filter of some strength to warm it even more. My color images were basically no better than a sepia photo by the time I was done tearing up the color palette. Hey, we all have to start somewhere, and I was still trying to do what I read would work. I just didn’t quite understand the extent that they were talking about.
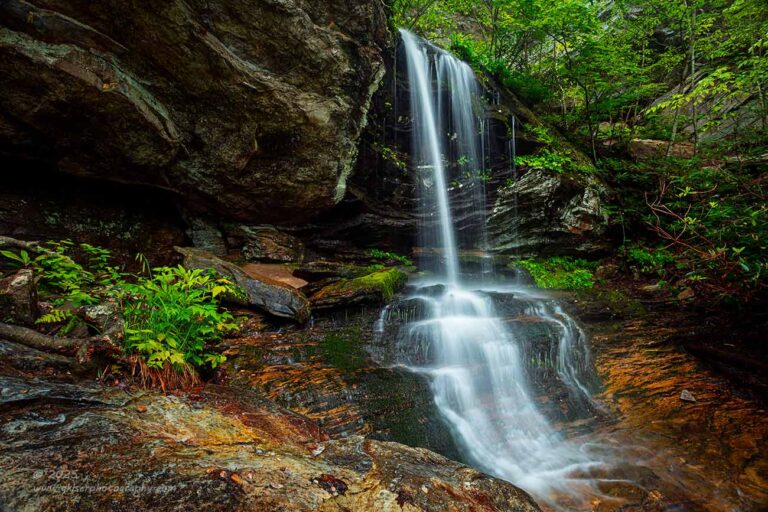
About a year after starting with the F-828, I found waterfalls to be a really exciting subject to photograph. The compositions were easier to come up with, and I found that taking a photo with an established subject (waterfall) was easier than just a broad landscape where there was no clear subject, other than the design of the landscape. Waterfalls became a quick passion for me, and I started to really love doing long exposures. By long exposures I mean that I would shoot waterfalls with shutter speeds as close to 30 seconds as I could manage. The longer the better, right? Well, add to that the proclivity of using warming filters and I ended up with countless photos of yellow milk flowing over orange rocks. But yet, I thought that I was a fantastic photographer.

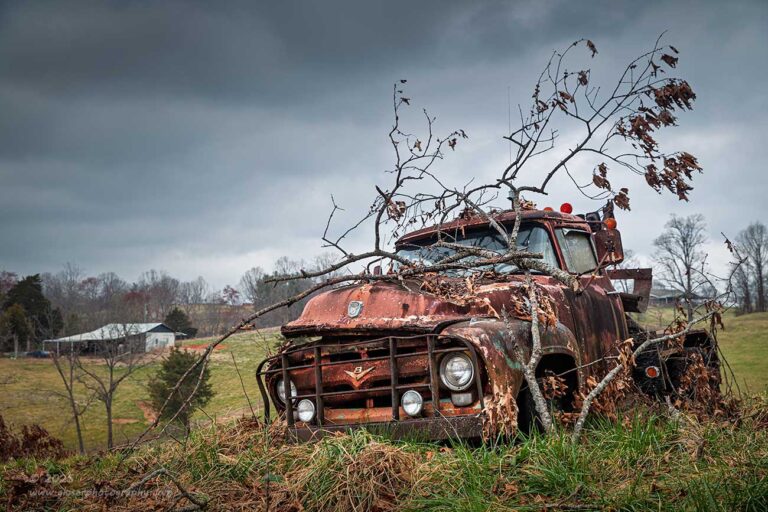
I believe it was 2007 when I found an old Ford truck off on the side of the road and stopped to get a photo of it. The one pictured above is not that photo, but one that was recently shot in another location. I really seemed to connect with this particular subject and loved working with it. In fact, one of the photos that I got of the truck, I had processed in black and white and had submitted it in a competition. It didn’t win, but I still really loved the image, and it hung on my wall until it was donated to a good cause sometime around 2018. Because it hadn’t done well in the competition and it was most surely not a landscape photograph, I kind of looked at it as more of a guilty pleasure than anything else. I needed to stay focused on my landscapes, and that was just what I did.
In fact, in 2008, I went on a trek to Alaska with the promise of really igniting my love for the landscape and coming back with some epic photos like I had seen in those books and magazines. Once again though, I was looking at my camera and seeing how it was limiting me. Before going on this trip, I decided to purchase my first DSLR with a full kit of lenses. The Canon 5DS Mk2 was my choice because it had a live view feature that would allow me to shoot with a histogram as I had gotten used to doing. Now, I don’t recommend getting a whole new camera system before going on a trip that could be once in a lifetime because you will most definitely mess something up as you are getting used to how the camera works.

Despite that ill-advised move, the photos turned out pretty good and I realized that I was scared of the DSLR for no good reason. I think that it comes back to watching Dad with his 35mm Konica when I was a kid. It always looked to intimidating with the dials and buttons. Remember, I was used to a camera with a single button and a flash. His SLR intrigued me and frightened me at the same time. I never thought that I would be able to operate a camera like that which was why I put off getting a DSLR for so long. Now that I had one, I really liked it and loved being able to change out the lenses for what I was shooting at the time.
I had finally found my stride and was a very happy landscape photographer and enjoyed going hiking and camping to get wonderful naturescapes. I still had that strange need to photograph old cars and trucks though. Heck, even an old barn would work for me. I never could explain it though, and I kept feeling guilty for getting excited to see those kinds of subjects. I would shoot them, but I knew that they would not be well received or understood by anyone else. It wasn’t until after the great temper tantrum of 2011, when I sold everything photography related and started cycling that I began to understand why I was drawn to the decay subjects. When I decided to get back into photography in 2013, I bought all new gear and more new books. One of those books I happened to purchase was by Harold Davis called Creative Landscapes. In addition to many other ideas presented, this book introduced me to the concept of wabi-sabi which I have talked about many times through this blog. For the first time, I felt that my love for rusty vehicles had a legitimate basis in photography. It was exciting and I was finally able to allow myself to express my reaction to seeing these things of forgotten beauty.

After fixing a printing issue that had been dauting me for the entirety of my time as a photographer to that point, I went full force on finding these forgotten relics and capturing them. They eventually eclipsed my want to find landscapes and I resigned myself to being more of a decay photographer than a landscape photographer. I found the stories behind the photos to be much more compelling than the story behind a sunrise over the ocean or a mountain range. There was more to look at with the decay subjects, and I loved the textures and the way that each subject aged. There were never two examples exactly alike. Of course, to keep to my roots, I do still photograph my own vehicles, but they are no longer for the purpose of posting on online forums. They are now practice for me for client shoots where I am expected to photograph shiny cars from time to time.
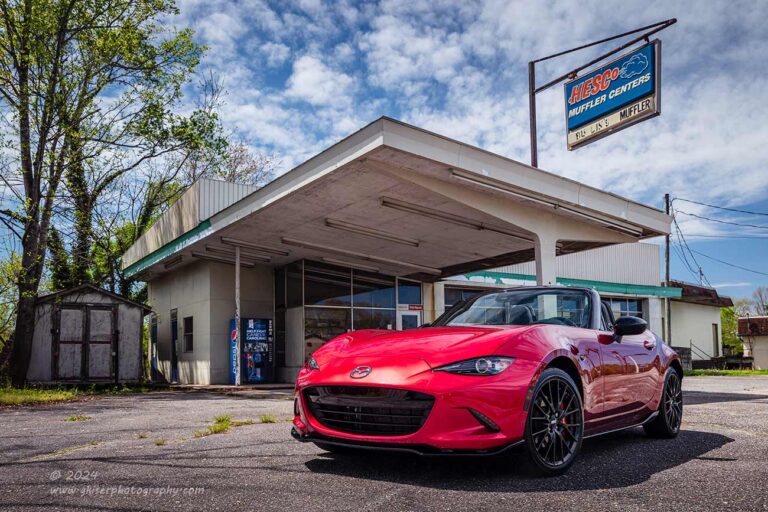
That is kind of the long answer as to how I got started in photography. It was really by accident because I never really wanted to be a photographer until I found myself wanting to be one after learning a little bit about photography. I appreciate Richard for asking the question and prompting me to finally answer this introductory question. I do apologize for not putting it in print earlier.
The next question comes from a Facebook follower, Gwen Bell, who asks which lighting is the best to take pictures? Should it be behind or in front of the subject? How’s that for a question? I mean volumes have been written on that topic over the years and there are tons of opinions out there as to the best light. Since she asked it of me, I will answer from my perspective, just know that there are many other opinions out there which are also right.
Gwen, for the most part I prefer a nice cloudy day because the light is diffused and just barely directional. Everything is evenly lit, and I can work from any direction with ease. This makes what I do much more productive because I will typically drive around and react to scenes that I see rather than plan out when is the best time to shoot them which would take into account the “right” lighting I would need. Cloudy days also allows me the ability to add in contrast where I want it in the photo and will give me that painterly look that I have been doing for so long now.
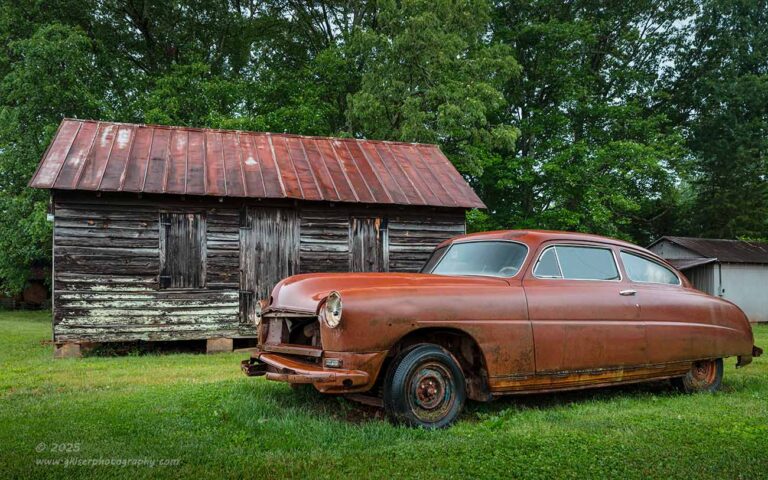
Now, that being said, I have been plagued with sunny days that I have ended up shooting in for the past couple of months. In these cases, still prefer clouds overhead because they add interest to an otherwise bland sky when I choose to include it. The sun is directional at this point and has to be taken into consideration. The position of the sun relative to the subject has to be considered to determine how I want to photograph the subject. I don’t really have a preference as to what I like the best because it all depends on the subject I’m trying to capture. I just try to find the most flattering angles based on how the light is hitting the subject and scene. Something that I have determined here in the last couple of years is that for my decay subjects, having the sun high up in the sky is not a bad place for it to be. Now, it is terrible for people photography, and for landscape work, but for old cars, the shadows that it creates tends to be a bit more flattering close to midday. This took me a very long time to realize and for many years, I would not even bother going out during the middle of the day unless there were clouds because conventional wisdom told me that the high sun was terrible lighting.

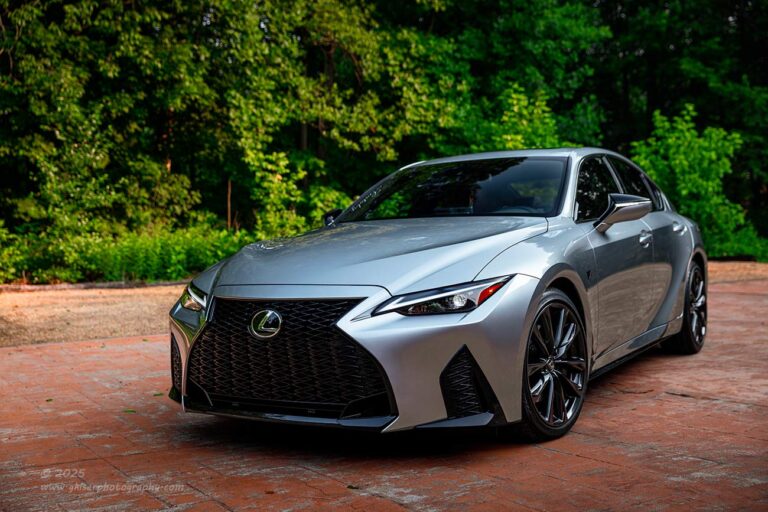
This is an example of how this concept plays out. There are clouds in the sky, but you can tell from the shadow that the sun is still rather strong and directional. It is also right above the scene, and this was close to the middle of the day. The high sun provides a bit more sculpting on the shape of the body while not leaving anything significant in shadows. The lighting is even over the car and scene which gives me the opportunity to introduce the contrast exactly where I want it in post. This harsh light that nobody likes in photography works very well for this kind of subject and is becoming one of my favorite types of light to work with when an overcast day isn’t possible.
In addition to cloudy days, I also don’t mind rainy days for the way that the scene looks. It is a total pain to deal with from the perspective of keeping the front element and any filters dry and free of spots, but the lighting is always great and especially with my rusty cars, the sheen that the rain gives the surfaces adds another little touch to the entire frame. There is also a universal increase in saturation when everything is wet which almost makes the base image looked pre-processed in a lot of cases. This is the kind of light that I love for waterfall photography because the colors that are present are super saturated, and if the rocky surfaces around the falls are also wet, the tonality matches all through the scene as seen in this photo from Catawba Falls.

I start to really look at directional light when shooting landscapes because that helps to define the undulations across the landscape. To do this, I look for a low sun so that shadows are created that stretch out across the image. It adds another level of interest and since I am not dealing with fine details that are up close, I’m not worried about the shadows hiding things that I want to be able to see. This also works well with barns, but I have to be careful about what direction the light is falling because I don’t want to lose the barn into silhouette unless that is the idea behind the image. Mostly, I like the light to hit from a 45-90 degree angle to the main subject. This provides sculpting and some nice contrast to the scene.

When it all boils down though, I take the light for what it is and decide on the way that I want to photograph the scene at that moment. There are many photographers that will plan everything out using apps to tell where the sun will be exactly at what time of day and when, during the year. I’ve done that, but the juice isn’t worth the squeeze in my opinion. When I’ve tried to do things that way, I just ended up missing out on a lot of opportunities for photos that would have turned out better had I just been out looking for situations to unfold that would make a great photo.
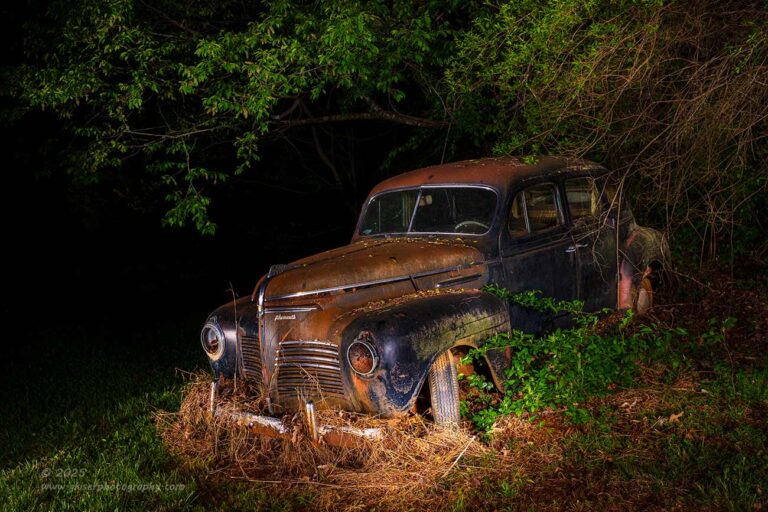
I hope all of that made sense and answered the question. The short answer is that there is no bad light, it is all dependent on how the photographer chooses to use the light. Each type of photography wants different kinds of light, and something that I haven’t talked about is portraiture. When dealing with outside shoots, in full sun, you will want to use backlight absent any shade because the harsh direct sunlight will create unflattering shadows on the faces. If the sun is behind them, it becomes a hair light while the face is in shadow. By boosting the exposure, you get the proper exposure on the face with no harsh shadows, and it is in beautiful light because you are actually using bounced light which is much softer than the sun. There is just no end to how to use light, and as long as there is light to be used, I can usually create a photo given most situations. There are also times when there is no light, and I have to bring my own, but that is light painting and a discussion for another time.
Our next question comes from Bill Neagle who has been with me for a very long time during my photographic journey. He asked “What apps do you use to help you decide what to shoot and where to go? Why those particular ones?” When I first read that, I remembered going through that very discussion a while back, so I went back to look at what I had said. For the most part that information is still pretty relevant with a few exceptions. I’ll try to cover those differences here.
When it comes to deciding what to shoot and where to go, that is largely not based on apps unless you count FB messenger. I’ve gotten a lot of tips on locations to visit from messenger from folks that follow my work and know what I like to shoot. Recently, I stepped that trend up a bit and started posting occasional questions on the different Wilkes County groups to see if anyone has any derelict vehicles or buildings on their property since I know that there are still a good many other subjects out there that I can’t see from the road. Honestly though, most of my decisions on what to shoot come from just driving around and getting lost. Doing these aimless drives around will get me into areas where I start to find the good subjects and I will return there time and time again.
When it comes to landscapes and waterfalls, I will refer to books like Kevin Adams’ North Carolina Waterfalls book, of which I have had two different editions. I think it is generally considered the bible for waterfall locations here in NC. I’m also looking on social media to see where others are photographing, but mostly, I go to the areas along the Blue Ridge Parkway which just turns into a leisurely drive through a stocked pond with a fishing pole. I’ll do research on different areas using Google Maps which is helpful in both landscape and decay work.

When it comes to apps that I use, they come into play much more for when I go out for my photos rather than where I go. I still use Clear Sky which I talked about in that previous Behind the Camera with examples of how the screens look. This is a great app, and I refer to it as my cloud app because what I use mostly with it is how the clouds are going to look. It will break them down by high, mid, and low-level clouds rather than just a basic cloud coverage. This will tell me what kinds of textures to expect and whether it is going to be an overcast day or if there will be texture in the clouds. This used to be my most favorite app because it told me the most important information for where I was going to be. However, over the last year, this app has become less and less reliable and I’ve gotten to where I can’t trust it like I used to be able to. It is still the best source I have for determining what the cloud layers will potentially be which is still helpful, but the forecasting ability for it has diminished greatly in my experience.
I’ve been relegated to using the basic weather app on my phone which is through weather.com for most of my planning, although that has gotten significantly worse over the last year or so as well. At best, I can get an idea about what I might be looking at weatherwise, but that is about it. Even the hourly forecast changes by the minute on the day of the treks. I hate to admit it, but the weather that I have come to rely on the most for an accurate idea is the basic weather app on Toni’s iPhone. I’ve found it to be significantly more accurate at predicting weather than what I have been using. I can’t figure out how to get that app on my phone, so I spend a lot of time asking her what the weather will be which kills me to the core, but I’m sure she eats it up. I have to go with what works, and for right now, Apple has the lock on the weather apps it seems.

Another app, or more accurately, a website that I use from time to time is www.sunsetwx.com which has been around for a long time, and I’ve found to be pretty accurate considering what it is trying to do. It is a sunrise/sunset forecaster that takes into account the forecasted cloud formations and the levels that they are supposed to be at to determine the chances of color in the sky. There is a little science to it, but I think that it is based off of educated guesses, but I’ve found it to be kind of accurate for the most part. This is particularly helpful when I am doing landscapes because I typically like to start those early in the morning with sunrise and then see where the day takes me. This will give me an idea of the chances of color so I can decide on a location. I’m not only looking at the part of the state that I want to be in, I am also looking at whether or not I want water in the shot to maximize the color, or if the sky alone would support what I am after. I always have a bank of locations that I am familiar with and can determine what areas might be best suited for the expected color intensity.

Another app that I use is Golden Hour, which is a pretty simple app that is roughly based on the paid subscription based app PhotoPills. It will break up the day, by location for when the different types of light will be happening. This is very helpful for those days when I am shooting sunrises or sunsets, so I know when I need to be on location and ready to go. I can look ahead to any date and get the right timeframe for what I am wanting to do. This is particularly helpful for times that I am planning workshops and need to know when to start or finish based on the light. This is not the only use for this app and the next feature is much more useful.

The part that I really like about this app is that it will let you pull a map up of where you are, or another location and put an overlay over it to show the path of the sun through the day. In case you weren’t aware, the sun has a path of North to South in addition to the well known East to West. This is based on the time of year because the sun is actually further North during the Summer which is why the Northern Hemisphere gets warmer during the Summer. In the Winter months, the sun has moved back down to the South and the Australians are having pool parties, while we are shoveling snow in NC. This app will tell you what angle the sun will be hitting at any time during the year. This is very helpful for those situations when I have a composition in mind but need specific lighting to hit it based on the shape of the subject. It is also good for sunrise to know where the sun will be coming up in relation to a location.

I have another app that I can use in the field to really get the location of the sun figured out in real time. This is called Sun Locator and is an app that uses the phone’s camera with an overlay of the sun and moon’s routes through the sky along with other information. This will allow me to find the composition long before the sun crests the horizon knowing that is where the brightest part of the sky will be. This app was used a great deal when I went to Jekyll Island a couple of years ago with Toni. It is very nice to get out to a location and be able to see through the phone camera what the angles look like with a track of where the sun will actually be traveling. It sure beats pulling out the compass and pointing it to the East and hoping. It is also much more detailed than the Golden Hour app I mentioned because I can see the sun’s position from the exact spot that I am standing while looking at the real landscape in front of me. For me, this is invaluable because it will allow me to spend more time on the composition and not have to scramble when the sun starts to appear.
I had previously talked about Dark Sky, which was my rain app and would tell me how much longer the rain would be lasting in the area that I was in. This was a helpful app, but the free version was discontinued, and I have never looked into paying for it. To replace it, I now look at the radar future cast on my phone’s weather app which will give me an idea of when the rain will be passing. It also has a cloud overlay so I can see how the clouds are tracking which is helpful as well.

An app that I don’t use often but is indispensable for me when using dark ND filters is from Lee and is called ProGlass IRND which is designed for use with their filers, but with one exception, it translates easily to my Singh-Ray filters. It gives two wheels and the one on the left is what the normal shutter speed would be taking into account your ISO and aperture. You actually get that figured out with the camera as you would normally. Once you get that shutter speed dialed in, you can then select one of the strengths of filter above to get the red wheel to show you what the corrected shutter speed will be. Lee does 4 and 6-stop filters, while Singh-Ray has a 5-stop so there is a little mental math there, but my 10 and 15-stop filters are direct carryovers for this app. That allows me to see what strength I will need for a given effect in my photo.
Now, doing it this way will give me three shutter speeds to consider, but those might not be the speeds that I am looking for. When I get close on the red wheel, I can dial it in specifically to tell me what the natural shutter speed should read. With this information, I will adjust the exposure in the camera to match the new shutter speed either by adjusting the aperture or ISO. When I get the shutter speed dialed in correctly, I can slip the filter on and then key in the time that the app told me would work with that filter. In the case of the image I attached, my natural shutter speed was dialed in at 1/8 of a second, but when I added the 10-stop ND filter and the screen went dark, I knew to use a bulb exposure of two full minutes to get the same overall exposure of the image, but with motion being recorded over two minutes.
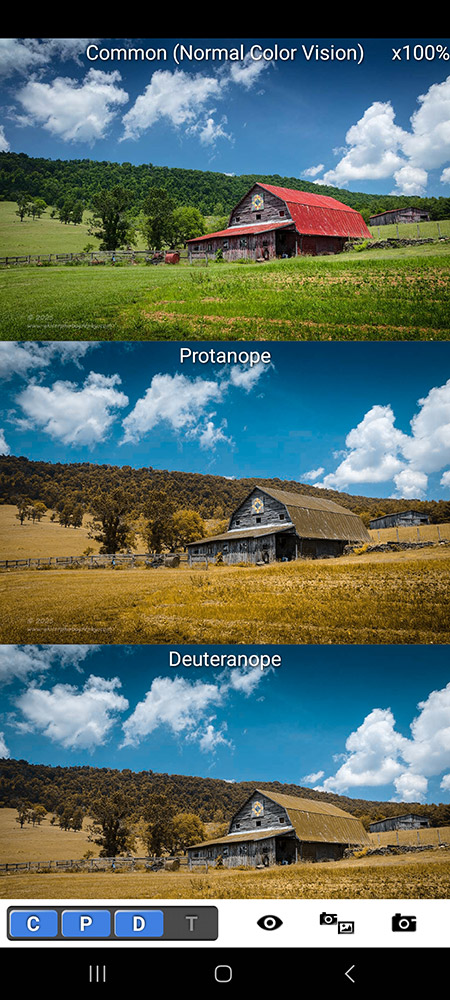
The last app that I want to talk about is called CVSimulator and it has nothing to do with the drug store chain. This app is not one that I necessarily use in my photography, but it is one that I am starting to use more and more to understand what a few of my mentorship clients are dealing with when it comes to being red/green colorblind. I have to give credit for this to Bill Neagle who told me about it after one of my recent workshops when we were talking about being a photographer with this form of color blindness. I’ve worked with at least three photographers that experience this over the years and I really had no clear idea of how this affected their perception of color, but I did try very hard to figure it out. It isn’t because I just wanted to be empathetic to their struggles, but it was because I really wanted to figure out way to have them feel more confident with doing processing of color images. I really feel that is an integral part of being a photographer, especially in the color space and I wanted to help those photographers to overcome this slight hurdle.
This app has really opened my eyes as to just how pervasive this type of color blindness can be, especially for a landscape photographer. It has allowed me to really understand why color blind photographers tend to overcook the blues in their images. It also allowed me to see just how inadequate my suggestions for interpreting colors of an image through the histogram had been. This is a game changer app for me, and it has really put the pressure on me to figure out ways around this beyond the “shoot black and white” suggestion that has worked the best in the past.
The final question comes from Chris Berry through Facebook. He asks if I have ever thought about using a box camera because of the optical imperfections they offer. I am assuming that he is referring to the old Brownie style camera which I have two of them on my desk as display pieces. The short answer is that I never really have thought about using these cameras, nor have I really considered film as an option for me. I haven’t put a lot of thought into why, but this question is a pretty good opportunity for me to start to flesh it out. I’m going to start off by saying that I have total respect for those photographers that choose to work in film and do their own developing in a darkroom. I think that is really quite cool and I’ve done a little research into what goes on with that. That being said, I view doing film photography in this day and age as kind of the “in thing” to do. It just isn’t for me, and how I like for my photos to turn out. The exception would be if I ever decided to shoot large format, which is a form that is still very much a film arena.
I love my decay images and the imperfections that show up on my old vehicles. It always works to give them character, and the same thing can be said of the character that film and old lenses can offer. Looking at a box camera, we are essentially looking at a lightproof case that has a shutter behind the lens where the only light can enter. That is the same thing as my digital camera because it is a lightproof case that has a shutter behind the lens. The difference is what the light is recorded on, the quality of the lens, and the effect of the chemical change on the film. Since I am motivated in a very large way by textures in a scene, that is an important part of my visual language. With simple and low-quality glass creating the image, that texture starts to muddy, or disappear completely. The areas of micro contrast that my photos rely on would be lost with a lens that introduces a different type of character into the scene. For what I like to do with a camera, the character comes from the subject mainly, and then the processing fits the subject to accentuate those features.

Imagine if you will what this photo would look like with a lens that was kind of blurry and very soft around the edges. The contrast would be much softer, and it would also be in black and white. The entire feel of the photo would change. The camera with character would become the star of the photo rather than the subject and composition. This is not what I would want out of my photography. I actually want the camera and gear to disappear in comparison to what I am capturing. For me, the tool should never be the star of the photo. For that matter, the photographer should never be the star of the photo. Whatever is in front of the camera should be the reason for the photo entirely. For me, a digital camera is the best tool for me to get that outcome. It is less guesswork in the field, and I get to spend more time really seeing the image develop with the changing light and can zoom in to see if there are any distractions that I want to remove. These things just can’t be done with film.
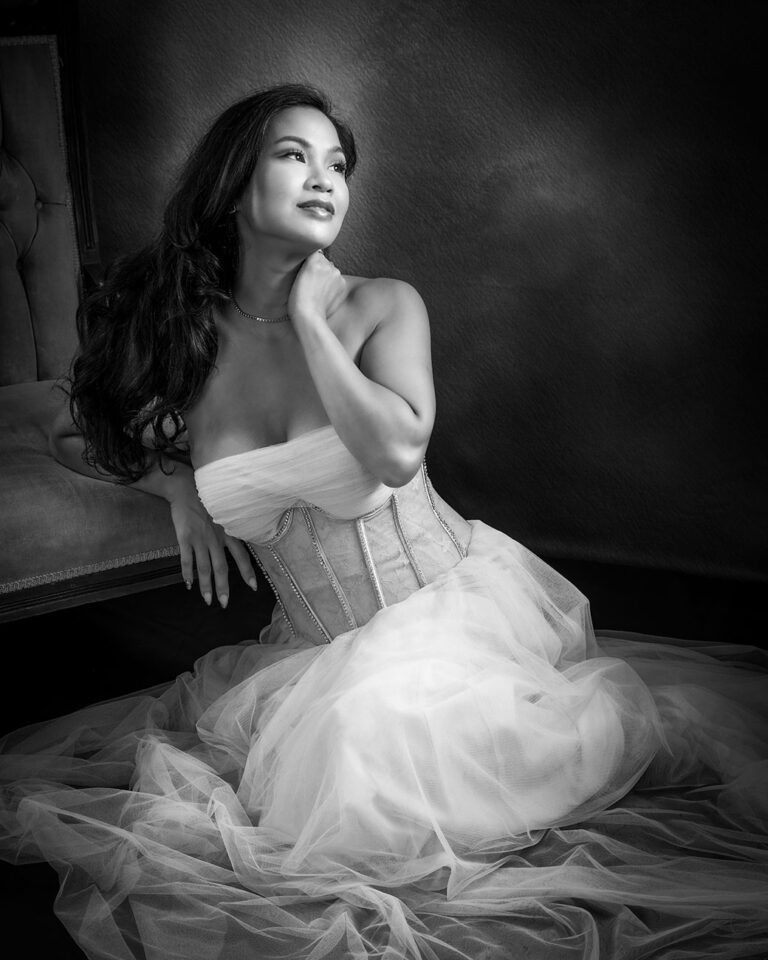
When it comes to portraiture, this is the exception that I might be inclined to try out film with optical imperfections to give the photo some more character. However, once again, that would increase my workload at the time of capture because I would not be able to see what I was getting as I was capturing the images. Focus wouldn’t be as big a deal because the entire image would be soft anyway. I still think that digital is the best way for me to capture what I am shooting because I get to take a RAW image and work it to the aesthetic that I am after for that shot. In the case of this image, it was a crisp color image straight out of camera, but I converted it to black and white and changed up a lot of the tonalities to match the vibe that we were going for. I had plenty of options here and could have even added a soft-focus filter. There would be no way for me to arrive at this photo with a box camera because I still wanted there to be areas of crisp detail while the overall image was rather soft. Choices like this can’t be made with an old box camera.
Using dated gear is a popular thing and there is a resurgence in even early digital cameras because what is old is new again. I still think that a large part of this is those striving for uniqueness online because there is never any doubt about when somebody is shooting film online. They are very proud about it and will mention that right up front. “This was shot on Portra 400 with a such and such 35mm film camera using a $20 lens I picked up at a yard sale. They will point out the wonderful imperfections that the combination provides and that becomes the focus of the photo. What the photo is actually framed around becomes insignificant in relation to what was used. Film takes a certain amount of knowledge to work with if you are doing the developing at home, and there are a lot of extra steps which in the long run result in the film being scanned into a computer and then processed like a RAW file without the same creative latitude. In my opinion (and I’m probably in the minority here), film photographers are just adding work to themselves for the same type of output that a digital photographer has, even in the print world. If the photographer loves the process of working with film, that is entirely valid, and I think that they should continue to shoot film. Photography is an art form, and what tools and methods that are used are much less important than the actual product that is created through those tools.
I love photography in all of its forms and when looking at a print on the wall, or in a book, or online, I have never once wondered if it was a digital or film capture. It didn’t matter to me. All that mattered was what was in the frame and how the photographer chose to capture it. I look at the photo for what it is, and not what captured it. I hope that others are viewing my photos in the same way. The tools I use are insignificant to the conversation because I could create the same images with a number of different tools. What I capture is the whole reason that I pulled the tools out, and that is where I believe the focus should be. The concern with gear has largely blown up because of social media and influencers since reviews create views, and using different tools creates interest from others. We have lost the ability to enjoy the photo because that has been replaced with an infatuation of seeing the behind the scenes and knowing what new lens the photographer used for that shoot.
This was a very long answer to a simple question of whether or not I have thought about using a box camera for my photography. I could have just answered “no” but wanted to kind of flesh out this train of thought that the question started in my mind. At any rate, I appreciate you for bringing this one up Chris.
With that we are at the end of the questions that were asked. There weren’t many questions, but I still seem to have rambled on for a very long time for just four simple questions. I hope that you all found this informative and hopefully these answers will bring to a better understanding of my photography. Ultimately, that is what I want to accomplish with this whole blog thing that I have been doing for years. Photography is very personal to me, and by sharing what goes through my mind, I think that there can be a stronger connection to the work that I am creating. Let me know if you agree. Also, if there are any topics that you would like to see in these pages, please let me know. I have a collection of ideas to talk about, but I’m always looking for topics generated by those who read this blog.
We will be back here September 1st, for a brand new installment of Behind the Camera, and I can’t wait to see what I am writing about then.
Until next time…