Welcome back for a brand new Behind the Camera, which will be the second of 2025. In this feature I try my best to pick topics that will help other photographers understand their craft even better, and I also like to share a lot of what makes me tick as a photographer. Last month, we went through a very long synopsis of the previous year which went much longer than I ever would have thought considering most of the year I spent trying to get my creativity to click. That was actually one of the more personal entries that I have done in recent memory, so I hope that you enjoyed it. This month, I wanted to return to the regular scheduled programming and talk about my theory on technique.
Now, by technique, I am not talking about how I compose an image, or what settings I am using. I’m not even talking about my approach to lighting. This will be much more basic than that and hopefully will explain my position on the concepts of capturing an image in the camera, editing those images, and the final post processing that brings us to the keepers that we see in these blog entries on a regular basis. For those of you who are not photographers, there is no reason to close this window and go find something else to look at because I’m not gearing this to photographers at all. This will ultimately help you understand my photography and why I do the things that I do.
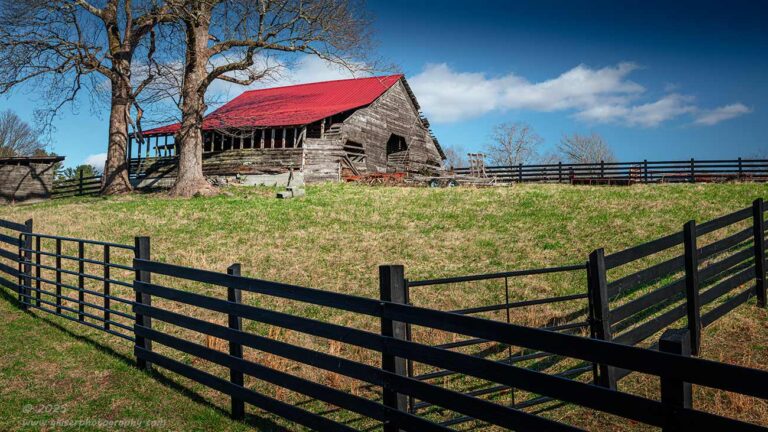
The idea for this topic is one that kind of materialized on the first day of the new year when I was out photographing a barn that I had shot a few times before. I knew that this subject had only one good angle, and I knew how I wanted to capture it. The lighting was good, and I had no tremendous hurdles to deal with. However, I worked this barn for a good little while and shot way more frames of it than I had with the two barns from a previous trek. If memory serves, there were twice as many frames shot of this single barn, than of the two earlier barns combined, so we are looking at roughly four times as many frames per barn. OK, I promise, that is the last bit of math that you will have to endure.
How could that be? It comes down to where I want to put my time and effort when it comes to photography. When you boil it all down, there are two main steps to a photo in regard to how it looks to the viewer. The first step is what you do in the field. This means things like lens choice, time of day, weather conditions, and exposure choices. The second step comes into play after that RAW file has been created. This is where post processing comes into play. It has been said by others far smarter than me, that the RAW file is the score while the processed image is the performance. I couldn’t agree more, and you need quality in both of those evolutions to wow an audience. The question is, where is your time best spent?
When I started out in photography a couple of decades ago, I lived by the mantra of “get it right in camera” where I shot digital with a film state of mind. This meant that I did everything that I could to get a finalized photo right out of the camera. The other end of that was that I had no idea what I was doing when it came to post processing. I was still using a free software that came with Microsoft Office called Microsoft Picture It!. Of course, the end results of the photos that I was creating were not of the level that could have been achieved had I known what I was doing with post processing.
That phase of my photographic experience didn’t really come into play until about ten years ago when I started to really learn how to process a RAW file outside of just doing global edits in Photoshop. This opened up a whole new arena of creative possibilities for me and my photography. Almost overnight, my photography improved to a level that I had never expected.
It would stand to reason that I had the correct recipe for a good photograph at this point. It was all thanks to my abilities in Lightroom and how I was post processing the images. Back then, software like Photoshop, Lightroom, and several others were all the rage and photographers were learning all kinds of tricks about how to correct things in a photo. This could mean removing distractions, correcting perspective issues, or even fixing lighting and adding elements to the scene that were never there. Just about anything could be changed through software.
Enter Artificial Intelligence here in the last couple of years. Now, we can just tell the computer what we want done to a photo and it will do it. Even the most rudimentary software can do a sky replacement, but most can change large portions of the photo with a single click.
Technology is great, and many think that it is a replacement for technique in the field. Even in the glory days of the old Photoshop, the quip was always “Fix it in Photoshop (or Post)”. The assumption was you could take a lousy photo and run it through the wringer in post processing to get the image that you wanted in the first place. It has progressed in current times because you just need a photo of your subject which can then be placed on a background of your choosing either from another photograph, or from an AI generated image. It is just so easy to create the exact photo that you are looking for, and sadly, it is getting more and more convincing.
If you spend any time looking at images online, you will see disclaimers that this image was created with AI, or that image has been manipulated. We accept it, and to a point expect it from photographers. Of course, this makes it harder for those of us to who carefully craft our images without excessive help from post processing. We are constantly having to defend our photos as being “real” which kind of takes the fun out of photography.
Before I go off on a total tangent here, I want to say that I truly believe that both the capture in the field as well as the way in which an image is processed have equal bearing on how a photograph looks in the end. The only question is, which one do you want to take the most time with, in order to create your final vision?
When I started out, the answer was simple. I wanted to spend the time in the field to get it as right as I could because I didn’t have the skills to fix it in post. When I learned the skills needed to properly process a RAW image and got to the point that I could teach post processing, I had the tools to overcome most of the issues that I might run into. When AI came out, I could essentially create any environment that I wanted for my subjects. But I didn’t.
It would stand to reason that I would let the computer do the heavy lifting and save the aggravation that I go through in the field. I could just arrive at a location and pull out my cell phone to get a quick photo and move on. I could then put that photo into some software where I change the perspective, take the noise out of it, upsize the resolution, change the sky, create an AI inspired setting, and then adjust the quality of light to create that final photo. Sure, that could be done, but is that really the point of photography?
I’ve talked about this before, but I really feel like this is where photography ends, and digital art begins. There is nothing at all wrong with that, but I personally want to be a photographer, not a digital artist. When the photography becomes just an element to a photo, it ceases to appeal to me.
Of course, that is an extreme illustration of what I am getting at, because I would never go through those steps in any circumstance. The more realistic option would be to show up and take the photo with the right gear and then go home and add a cloud here, or change the sky there. I could clone out elements that didn’t belong and maybe move something over slightly to fit the composition better. These things are more in the realm of realistic possibilities that are easily available to me.
The question is, do I want to spend the time doing those options, or do I want to spend the time in the field getting things right? I’ll always opt for getting it right in the field because I think that will always make for a more honest photograph. Not to mention, I don’t like spending hours in front of the computer working on a photograph to make it look like I want. I guess I am lazy that way, and want to make the edits as fast as reasonable and in ways that enhance what I have captured in the field.
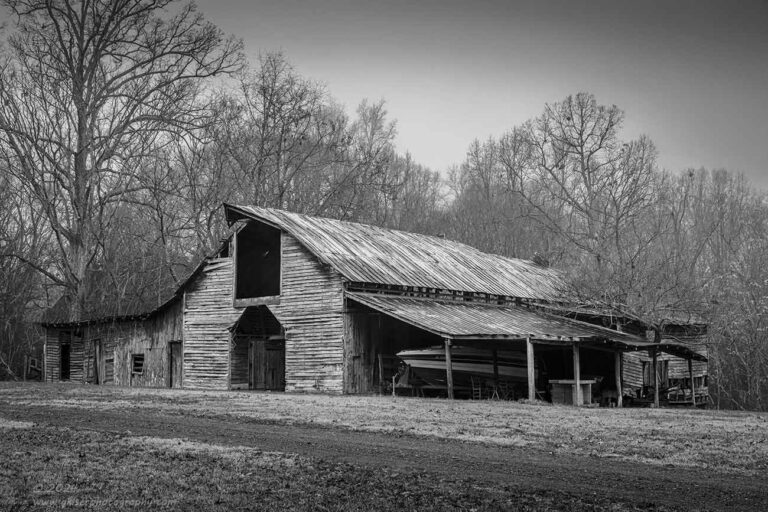
In the two photos that I have posted here thus far, I have photographed two similar subjects just days apart. The difference was that the first photo took something like 30 frames to get right, while the second only took six I believe. Of course, there were comparable times relative to the frame count spent to capture those frames. Why did one go so quickly while the other took more time and effort?
The answer is actually quite simple, I was trying to get it right in camera so that when I got home the processing would be much simpler. It just so happened that the photo in the fog had very consistent conditions in terms of light and movement. This meant that all I really needed to do was to get the composition figured out. There is a process by which I build a composition to create a photo, and it usually happens in several steps as I explore the subject. I do this with pretty much every photo that I make, and it requires several test shots to look at how things are showing up in the frame.
When the light is as consistent as it was on the foggy day, all I had to do was work through the composition, making sure that the angle, perspective, and focus were all working out. That was all there was to it, which is why I was able to get that photo done in just a handful of frames.
Now, the first photo that I shared was a little different because the sunlight on the barn was changing with every passing moment as the clouds moved around the sun. The clouds in the background were also in constant motion which affected another important portion of the composition. I had to wait for the clouds to look right behind the barn as well as for the sunlight on the barn to look its best. Every time I felt that it would get no better, I fired off a frame while not changing anything else. This resulted in a lot of repeated frames of the exact same composition. The differences were in the cloud positioning and the quality and intensity of the light on the scene.
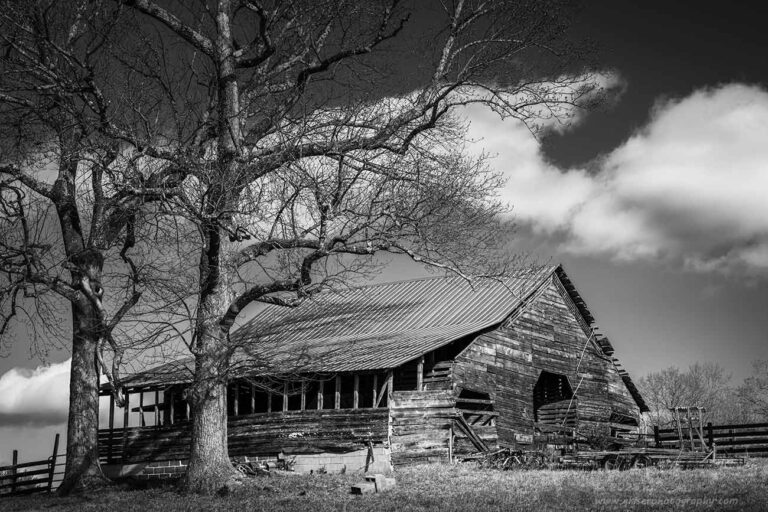
There was also another issue that I faced here, and that was the wind. When dealing with wind, you have two different issues to deal with. The first one was the issue that I had to deal with in the color photo of the barn. This is movement of the elements within your frame. When the wind would blow, the limbs would blur if the shutter speed wasn’t fast enough. So, in addition to watching the light and the clouds, I also had to keep in mind the movement of the trees and constantly consider what I needed to do to freeze that motion.
When I decided to go for a tighter shot of the barn, I swapped over to my longer telephoto lens which was kept at roughly the same exposure to keep the trees frozen. However, with the wind hitting the camera, the narrow focal length was starting to show signs of camera shake due to the weight of the camera now. For this follow-up composition, I had to keep all the previous things in mind, but add to it the consideration of waiting for a lull in the wind so that the camera would stabilize. This is probably the best example of getting it right in the field and spending the time and energy there rather than relying on software to fix it.
When I got home and started to edit the photos, I had culled this composition down to one where I really liked the lighting and felt that it was the strongest out of all of them. It wasn’t until I started to really process the image that I zoomed in enough to see an issue that I hadn’t noticed at the time of capture. The entire photo was very soft and showed signs of camera shake. This was seen on everything including the barn which should have been tack sharp. This tells me that the camera was being shaken by the wind at the time of capture. I could have gotten one of those Sharpen AI programs and likely have fixed that issue, but it would have been an AI generated version of what I had seen rather than a photo of the barn. The texture and wood that I have photographed here is like a fingerprint of this barn and it would have felt awkward to have cheated on that identification.
Fortunately though, I had spent the extra time to work the scene and work through the issues that I was facing. Since I knew that the wind would be causing vibrations in the camera, I had purposely shot extra frames to make sure that I had one that was sharp. I had captured several that were tack sharp, but one of those had nearly the same light quality that I had liked about the blurry one. That was the one that I ended up using and that you see above.
It was the experience of being out and capturing the barn on what could only be described as a beautiful day that I was enjoying. It wasn’t the time that I spent later on at the computer. The time processing is just part of the experience and the price that must be paid in order to get the photos to the level that I expect. However, there is nothing that says that I have to force myself to work a photo for hours and run it through multiple platforms to achieve the final result. If I can just spend a few more minutes in the field making sure that I have the most solid starting point to the final photo, then that will usually save me exponentially more time sitting in front of the computer.
There is also the added benefit of having fewer anomalies showing up in the final image. I think that there is a side effect of post processing that is forgotten these days since we all just look at images on a computer screen or another digital device. When looking at a full resolution photograph, like a large, printed image, there are digital anomalies that will show up where pixels have been manipulated. This could be in the form of noise, halos, or color fringing. In the case of generative fill, there will be some differences in textures, and you might see a fuzzy area around the filled area. There are ways of working with these issues, but they all take time and come with other side effects. The only way to really get a clean photograph in the end is to keep any adjustments to a minimum and be sparing with things like generative fill.
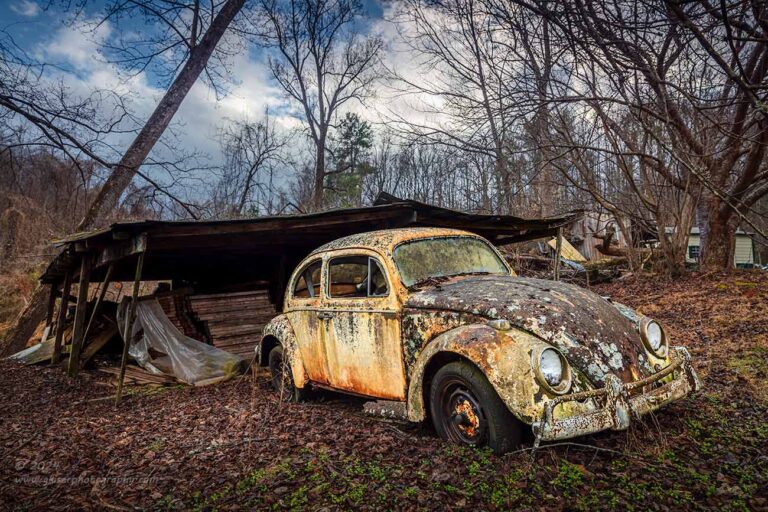
The best way to do that is to spend that time in the field making sure that the photo is as close to right as you can get it. The extreme of that concept is to shoot the scene as you intend to edit it. Take the photo above as an example of that. If there was a case for shooting a subject and placing it in an AI generated background, this would be it. Even to my eyes when I was first seeing this scene, it looked far too complex with way too many distractions. In all honesty, this composition took me three years to come up with after an initial failed attempt at capturing an overall shot of the VW.
I had to accept the clutter in the background, and I chose to embrace it as part of the composition. My first thought was to photograph this in the fog to soften the background, but I actually like this approach even better. The key to success was not the post processing, although that did play a significant part. What made this photo work was the focal length that I used to add visual weight to the car while having the background recede into the background. The blue tones from the sky and clouds above helped to balance out the yellow and essentially draw more attention to it while the landscape around carried more muted tones.
I spent a lot of time here as the light on the car was shifting slightly, but the clouds above were moving quickly and constantly offering different looks in the top half of the photo. I stuck with this for longer than I needed to just get the composition right because I wanted to make sure that I had the best combination of elements when I got home and started working on the final image.
It was the time that I spent out in the field that got the base image which only needed a few little tweaks to make work. I had kept in mind how I intended to edit this by keeping the exposure slightly underexposed to protect the sky even though I had a grad filter installed along with the polarizer for most of the frames. I wanted this shot to have plenty of dynamic range and even shot an HDR series to ensure that I had that ability should I need the extreme of HDR. Of course, you can read in the blog about how I discovered all kinds of issues with the branches after the HDR blend. Had I stopped with that series of exposures, I would have been left with an easy trick in post processing that could have been handled by the computer but would have given me a less than satisfactory end result. Because I had worked through all of the options in the field, I had a string of single exposures that were underexposed by nearly a full stop, even with the grad filter that allowed me another option for processing the image. By using this single frame capture, I was able to bring up the shadows to nearly the same level as the HDR, but with a touch more noise. I did some selective noise reduction in those areas and ultimately ended up with an image that was about 90% identical to the HDR blended image but had crisper details in the trees.
Spending that extra time in the field paid off here because looking at the scene, I was really thinking that an HDR blend was going to be my best bet. Had I assumed the computer would do a great job, I would have been left with an image that would have only been good for online posting. However, by working through my options in the field, I was left with an image that not only would make a stellar print, and I mean I can’t wait to see this one in large print, it also became one of my most significant images of 2024. That extra 10 minutes in the field made that possible, and there was no amount of computer manipulation that would have given a similar result.

The natural evolution of this argument is in response to a technique that I’ve heard so much about over the last couple of years. It is especially prevalent in landscape photography where you want sharp focus to be throughout the scene. The technique is called focus stacking, and it involves taking a series of exposures with slightly different focal points in each frame. You will then take these photos into post processing and blend them all together keeping the portions that are in focus. I have used this technique a time or two, but it is not one that I do often. In many situations, it just isn’t needed at all because the camera is capable of capturing everything in a single exposure if you know how and where to focus while maximizing your depth of field through your aperture choice. Additionally, I think that front to back sharpness is overrated in most cases.
Think about it, we don’t see with everything in perfect focus. Whatever we are looking directly at is what is in focus. The rest of the scene is soft. This is a natural way of seeing a scene. I think that the proponents of focus stacking want to give you the option of browsing the scene and having everything in focus for convenience, but in the end, the photo actually looks a little strange. That being said, I’m not here to argue the validity of focus stacking at all. If you want to use it in your photos, by all means, go for it. For the argument here today, I would humbly suggest that the time be better spent in the field getting that depth of field right along with your focusing distance.

What might take two minutes to set up in the field will allow you to avoid bringing three or more images home, doing a base edit on each of them, stacking them, blending them, fixing anomalies, and then finalizing the processing. No matter how good at this you are, there will be places where the images don’t fully line up because as you adjust the focus, the lens will breathe creating a slight variation in the focal length. These are not huge problems, but they do introduce an area where you might have problems in a large print. I had to deal with that in one of my coastal photos from a couple of years ago where I blended two different images for maximum sharpness. The sea grass didn’t fully line up and that caused some ghosting in places that had to be cleaned up, and because of the focus breathing there were some elements that rendered softer than they should have. What I should have done, looking back, is pick which element I wanted to focus on and let the other go soft. If I had shot this at f/18, or f/20, I think I could have just about gotten the entire scene in focus, but I could have controlled the softness of either the foreground or background through the aperture.
Had I spent more time in the field working through the issue, I would have had a single image to process when I got home rather than blending two different ones and creating more work for myself in front of the computer. At the time, I was really interested in the whole focus stacking technique and wanted to get better at it when the opportunities showed themselves. In my defense, it was all the rage and I felt that it was something that I needed to understand how to do. Since that time, I’ve seen less and less mention of it, and have had no want or desire to mess with it in my own photos. For me, it is just too cumbersome to work through, for very little return. I’ve had much more success going in the opposite direction and allowing my backgrounds to go soft by controlling the aperture and focal point in the field. This gives me a much greater sense of depth to a scene because focus is one of those visual tricks that will indicate distance in a two-dimensional image.
If you take the shot of the old truck above, this was shot around f/16 if memory serves. That is a fairly tight aperture and because of where I focused in the scene, I was able to get the entire truck tack sharp, and there is plenty of detail in the background, but it is only slightly soft indicating the distance that is involved. For me, this is much better than having the foreground and background in the same focus. I would rather use focus to identify the main subject rather than create a photo that looks two-dimensional just because I have the software that would allow it.
For me, the time is much better spent making these creative decisions in the field rather than rushing through the capture process just so I have five times the work when I get home. It isn’t that I can’t do these techniques, it is just a matter of I want to be engaged with the photo, and not the computer after the fact. There are many who feel that I am a dinosaur because I still use graduated ND filters which have been called a destructive technique in the field. I see their point because if there are trees or structures that protrude into the area that is being filtered, they will get darkened along with the sky. However, if you are shooting multiple frames and blending them in post, you will likely have a cleaner image in regards to exposure. Of course, you will also have those ghosting issues that I mentioned earlier to deal with.

Let’s take a look at this photo for a moment. It looks very evenly lit through the scene, almost painterly, but the reality of the situation was that I had a huge disparity in the exposure between the sky and the shadowed portions of the scene. For the record, the shadows all fell in the trees and under the bridge which made them rather deep. If you have ever shot a photograph that included a bright sky and the deep shadows under a structure, you will know that this is not something that a camera can actually resolve easily. This photo was the vision that I had for the image at the time of capture. I could have shot about five frames with about a stop difference between each one which would have given me a range that would have captured detail in both the shadows and in the clouds. However, I knew that it was windy that day and any attempt at blending exposures was going to result in all kinds of anomalies and artifacts which would ultimately degrade the image. What I chose to do was spend the time in the field with my filters. By using two stacked graduated filters that were soft transition ones, I was able to finesse the sky while allowing the trees to retain a bit of exposure. I knew that I was going to have to boost the exposure on the trees in post as well as do some noise reduction on them, but that would be easier to do in a uniform way rather than dealing with the spots of issues from the blending of the images. By using the two stacked filters in the field, I was able to get a single shot that worked by including the information needed to deal with the shadows as well as the highlights. The RAW image looked horrible, but the histogram told me that I had reduced the dynamic range of the scene to where my camera could deal with it all, and I would have workable information to arrive at this final photo.
When you are looking at this image, you aren’t seeing the fact that there were two graduated filters as well as a polarizer used here. You aren’t seeing the work I did in post to get the shadows to expose right while keeping the sky full of detail. I think that this photo took about 30 minutes to fully process from RAW, and took about that much time to capture. Had I rushed in the field, and just grabbed a series of images, I would have had to do the same edits, but would have had to include the blending process, and then the cleanup from that blending which would have easily taken more than an hour in post. The end result would not have been as technically clean as this image, but for the average viewer, there would be very little difference in the end result. For my satisfaction, I wanted to make it all as close to right in the field as I could, which is just what I did.

For those who are interested, this is what getting it right in camera actually looks like. You can see how deep in shadows the foreground was when compared to the sky, especially at the horizon. This is with a grad filter applied which was actually a reverse grad where the filter effect fades away at the top with the maximum effect in the middle of the filter which I have positioned right at the horizon. Of course, there was a bug that happened to be sitting on the filter that I missed when I was making the exposure because I was looking through the lens at f/2.8, while my shooting aperture was something like f/11. In other words, the bug was blurred out when I was looking through the camera, but with the deeper depth of field, it showed up. This was easy enough to remove, but I would have much rather avoided having to do that. The point is, this is another one of those photos where most photographers would bracket the image and then blend them all in post. In my mind, the tree would have moved which would have created all kinds of detail issues that would have to be addressed, or lived with. While that might be the route for others, I wanted to get this done right in camera which was just a matter of using filters on the lens and waiting for that right moment when the light was right. It might have added another 15 minutes to the capture, but I was outside and enjoying myself quite a bit.
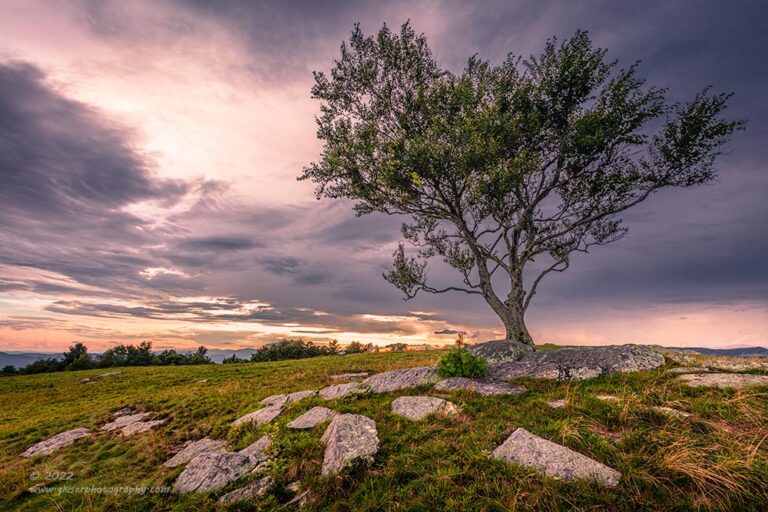
The end result of this photo turned into this after a little bit of post processing. Because I know my gear and what it is capable of, I had no worries that I could take the RAW file and end up with something just like this. I shot it for how I wanted to edit it as I keep saying. There were no multiple exposures to blend, I didn’t have to worry about branches ghosting which would soften the whole frame. All I had to worry about was getting a single frame captured as sharp as I could with all the exposure ingredients present. I didn’t rush in the field, and because of that, my time in Lightroom was limited after the fact.

I know it sounds like I am not in favor of blending images in post because I keep going back to the reasons why I don’t do it. There are plenty of times when that is the best way of making an image happen. If you take this one here for example, I did a three-image HDR blend in order to get the exposure right. Why did I opt for that and not for a single capture in the field? Well, there was no way to get it in a single capture, and that was after a bit of time trying. You see, the car was parked in a barn with no light falling on it. The barn had holes and there was an open door that I had included in the composition. Those openings to the outside world represented a difference in exposure of quite a few stops of light. If I arrived at an exposure that would allow detail to be seen in all aspects of my main subject, the outside light would be so blown out that it would become a distraction. If I exposed in a manner that would keep the outside light from blowing out, I would lose the detail in the car.
As you look at the photo above, you will see that there really isn’t much risk of movement due to breeze or anything. This is usually the the main question when I am blending images because of the ghosting effect that I keep mentioning. There was little to no risk of it here, and in order to get the photo that I wanted, my only option was to blend several different frames. I considered how much difference in exposures I was going to need and figured out the spread of the images before taking the series. I happened to be on a mentoring session at the time and I didn’t have the luxury of being able to spend a lot of time on my own photos, so I kind of rushed this process. However, the end result turned out really great and eventually made it into my significant list for 2022. So, there is a time and place for putting your effort into the post processing, but it was the decision that was made in the field as being the most likely to succeed while creating a cleaner image. That was time well spent in the field to have a full game plan in place for how the image was going to be treated.
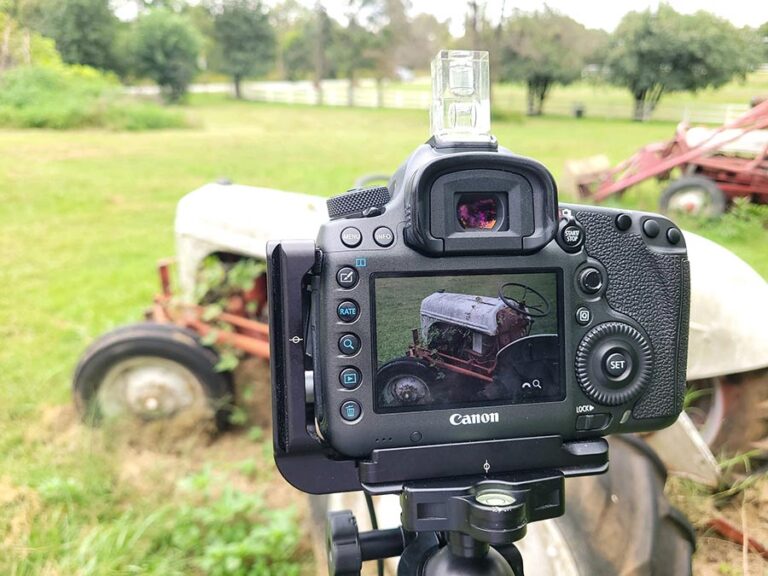
Another area where I think that photographers rush in the field is with cropping. I’ve seen this be the case with a lot of my workshop participants over the year as well as photographers that I follow on YouTube. They overshoot the image by a lot knowing that they will come in later and crop the image to where it is more visually appealing. While this isn’t too much of a problem if you are shooting with a 100mp camera, you are still wasting your money for having bought a sensor that size. Cropping should always be something that you do thoughtfully and with purpose. I’ve talked about choosing aspect ratios to compliment the composition many times before, and those changes are worth losing pixels for because it is an artistic choice which requires that sacrifice. What I am talking about here is just overshooting for the sake of speed and simplicity.
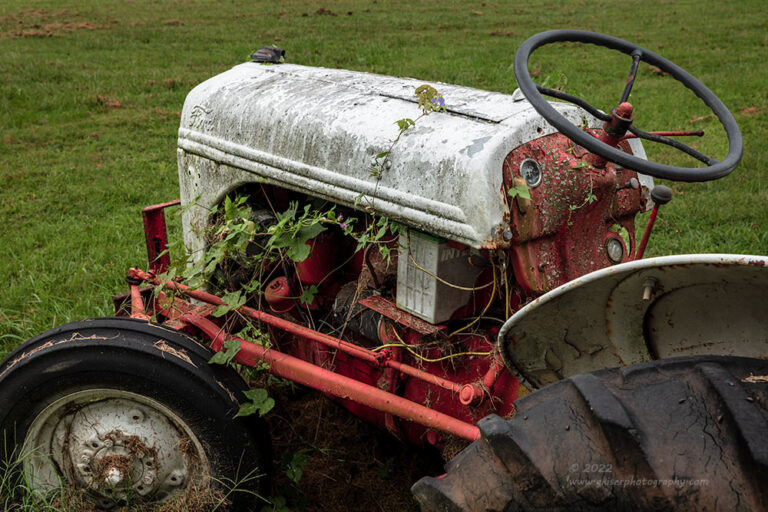
Take your time in the field and frame your photo exactly how you want it displayed. It doesn’t take long, but in the end you will have saved all the pixels and resolution that you have available in your camera. Take this photo of the tractor above. You can see that I didn’t really have a great location to shoot in, but I do love these old Ford tractors. I played around with lenses and compositions until I had this creative crop in the camera. It took some time, but had I shot the entire tractor, I would have gotten home and decided on just this composition and then had to remove about half or more of the pixels that had been used to capture the image. There is also the risk that your position might be slightly off for the crop that you want to have. Had I captured this scene from further to the left, I would have had the other tractor creeping into the shot once I cropped it down. By choosing the framing in the field, I was sure to get the right angle needed to make it work.
There are many distinctions between amateur photographers and those that would fall into the advanced enthusiast or professional category. One of those is the rate at which the photos are shot in the field. When we start out, we do a lot of spray and pray hoping that we will get something that we like. There isn’t much thought to the individual photos, but lots of thought given to post when you can crop and edit until you have something that works. The time in the field is quick, though I see so many new photographers shooting 1000 frames for an hour-long session. Of those photos, they will then go through and do presets and crops on most of them and deliver them all to the client. They will spend weeks or months on the edits, and you will see memes speaking to that very reality. This would be maddening for me and would make my goal of a quick turnaround unreachable. For my landscape and decay work, you will usually see the edited images and blog post that day, or the very next one. For my portrait clients, I promise a turnaround time of 48 hours for final images. The only way that I can do that is by thinking through to the final version of the photo while still making the capture. I will know what the photo will look like before I even press the button, and I will continue to make changes in the field, or studio, until I get something very close to that in the camera. I am still shooting like I did with the old Sony F-828 where I didn’t know how to process an image. However, now that I do know how to, I can use those skills to level up the photo rather than to salvage one after the capture. It is all a matter of where my time needs to be spent in order to make this whole process appealing to me.
For those of you who have my photos on your walls, you might not notice, or care where I had spent my time creating the photo, but the differences have prompted you to pick that photo which is on your wall. You connect with it, and that is because it is an honest image of something, or someone, that means something to you. The time that I have spent in the field to get it right shows through in the final photo. It is the problems that you don’t realize are missing which elevate the image, even if you wouldn’t necessarily notice the problems brought on from extreme post processing. I’ve seen plenty of gorgeous photographs which just don’t feel right when you really start to look at them. There are always little clues as to what has been done and changed to the original capture. For me, this is not something that I want present in my photographs. I want there to be more honesty in my photos whether it is a photo of an old car, or one of yourself.
While more and more people in the world are now claiming to be photographers, it seems that there are actually less and less “true” photographers out there, and more digital processors, or digital artists. I’m not knocking those who choose this route, but a photographer’s primary tool should be a camera, not a computer. Consider this scenario for a moment. I decide that I want to be a painter. I go out a buy a blank canvas and get a bunch of oil paints and brushes. I slap some oils on that canvas and create something that looks like a 5 year old got into the art supplies. I even draw a smiley face in the sun which is filling the top left corner of the page with awkward rays stretching out. Yeah, you know what I’m talking about, and have probably seen that very picture on a refrigerator at some point in your life. Now, I take a picture of that canvas with my phone and go into an AI program and say polish this original painting and make it look like a famous painting. I look through five different options and BANG, there it is. I download that version and have it digitally printed on a canvas to be hung on the wall. It is perfect, but am I a painter?
When the time comes that the actual capture of an image is no longer enough, and everything becomes the realm of the computer I think I will hang up my tools of the trade and retire from photography. I use the camera to express what I am feeling about a scene and there is no amount of computer programming that will ever be able to match that. Heck, even typing this blog entry out, I am thinking about the fact that I could just ask Chat GPT to do all of this for me. It would probably work to a point, but it would not be something from my soul and represent what I wanted to say. We are losing our individuality in the quest for streamlining what should be the primary focus of our creative existence. In the end, when we rely on computers to do the creating, we will start to see all creations looking very similar. I kind of hope to see that day while I am still a photographer because at that point, my work will stand out by a wide margin for the uniqueness of it all. As creatives, we must do better. We must embrace our vision and create accordingly.
Thank you for joining me for this Behind the Camera. I hope that it was informative and thought provoking. If you just enjoy looking at my photos, thank you and hopefully you will understand a bit more about how these photos have been created. If you are a photographer, I really hope you see the difference between the capture and the processing and make the decision which way you want to lean with a little more thought. I’m not aiming to change anyone, just get you thinking about what is at stake.
I’ll see you back here again next month with another installment and hopefully some more helpful information.
Until then….