…But should use them anyway.
Welcome back to another installment of my monthly Behind the Camera series. I’ll have to give credit for this month’s idea to Lisa Burch Wilmoth who is another photographer right in my area. She really came through for me since I was having a hard time getting motivated to come up with a topic for this entry. Not only did she come up with a great topic, and one that is actually near and dear to my heart, she came up with the title as well. I’m actually considering letting her write this one for me since she is off to such a great start.
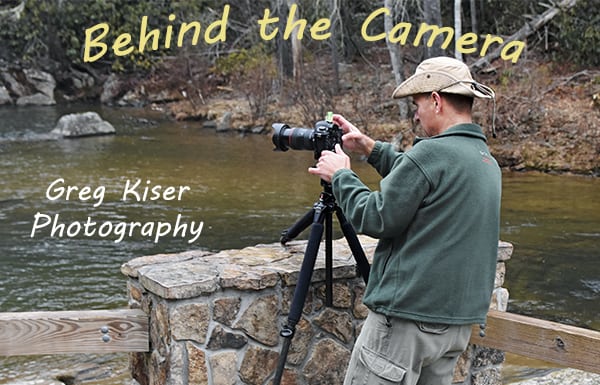
Anyway, let’s jump in and take a look at this one. More than one of you looked at the title of this one and cheered me on I’m sure. Tripods are a very hated tool for the photographer. There is a long list of reasons why we hate them so. The list on the other side of the argument is much smaller. You can tell by the banner on this entry where I fall, but why? I mean look at this list and tell me why I put up with a tripod for everything that I shoot with the exception of portraits?
Cons:
- They are bulky
- They are hard to carry when hiking
- They are expensive
- They can be complicated
- You mean the ballhead is a separate purchase?
- They take my ability to be creative away
- It slows down the process of taking a picture
- I want to be spontaneous with my photos
- I have image stabilization in my camera/lens
Pros:
- Tack sharp images
- Repeatable compositions
- It slows down the process of taking a picture (copied from the list above actually)
- Allows for longer shutter speeds
It would look like the cons win out by more than twice over the pros. Guess I’ve convinced myself to stop using the tripod after all. Thanks for joining me this month and I’ll see you back here again in another month.
Hang on, wait a minute!! There is more to the story here. I’ve been a photographer since 2005 and I’ve been using a tripod since….2005. The reason that I started using one way back then is still applicable today, but that reason has faded a little bit in terms of the technology that is available. However, I have found so many other reasons for using a tripod that even when technology eliminates that original need for a tripod I will probably still be using them. So what was that need? When I was getting started with photography and wanted to build a kit, I researched what I would need. All of the books that I read…you know, like an E-Book, but with pages. It was really dangerous, we got paper cuts and could have bled out back then! Anyway, they all said that to get that sharp image a tripod was a must. For a landscape photographer that generally shoots with aperture values of f/8 or smaller, the shutter speeds generally will creep down to where you can’t successfully handhold the camera without introducing camera shake.
For those that don’t know, a good rule of thumb for a sharp image is to take the reciprocal of the lens’ focal length in 35mm/full frame terms and make that your slowest shutter speed that can be hand held. For instance, if you are shooting with a 200mm focal length, you can safely handhold at 1/200th of a second or faster. Anything else would introduce blur from the camera movement. Yeah, that is a lot of math to have to do in the field and I wasn’t confident enough at the time to even know which end of the camera to point to the subject. What I got out of that bit of information was that if you didn’t use a tripod then your images would not be sharp. I wanted sharp images so I got a tripod. It was cheap one, and it fell apart within the first few months. I then got a more expensive one which fell apart within a year. I then got the one that I am still using today which I’ve had no problems with at all. I should have spent the money right the first time and saved myself spending more than double what I ended up spending in the end.
I can hear everyone right now talking to their computers in their smug little voices telling me that with Image Stabilization and Vibration Reduction technology my argument is invalid. I hear you, and don’t disagree with you. Even my early versions of IS lenses will allow me 2-4 stops of slower shutter speeds before camera movement becomes an issue. With the new In Body Image Stabilization (IBIS) which appears in many mirrorless cameras, you can mate them to lenses with their own image stabilization and then add those together for something like seven stops of stabilization. That is incredible and certainly will negate the need for a tripod. If that is your only reason for using a tripod then you are probably correct in that assessment. It is a very workable solution, but will require you to purchase the gear where that technology exists which is going to be much more expensive than the tripod ever thought about being.
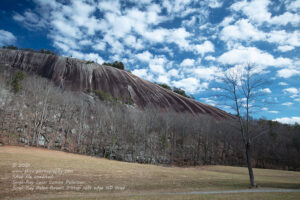
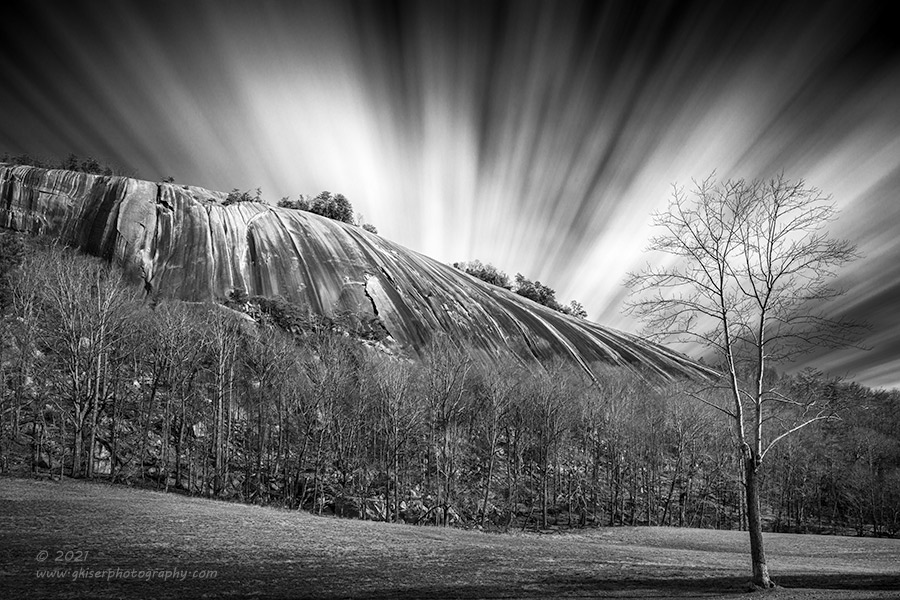
That brings me to my next point in the Pro Column. The chance to make repeatable compositions is one of those benefits that I learned by using a tripod through those early years. In the example above, I shot a series of images as I was making creative choices along the way on how I wanted to make the scene look. Had I been handholding the camera, each of these frames might have been different. I was able to get the composition set and locked in as I changed the combination of filters on the lens. Invariably, I would have gotten home and realized that I liked the composition better on a frame where the filter combination was wrong. Not having to worry about the composition after I get it set was a lifesaver with this particular photograph.
Maybe you aren’t dialing in a creative presentation of a scene and you are only intending on taking a simple exposure of the scene. Well, when you are handholding the camera, you are constantly having to watch the edges to make sure that you are framing the image just the way you want it. You are swaying a little bit all around and the framing will change as you are watching your edges. You are doing edge patrol in your images aren’t you? You get caught up in that, and the exposure and focus start to take second fiddle to the framing. There are too many variables at the time. What do you do, you overshoot the frame and include plenty of extra which you will crop out later to get that perfect composition. Good on you! You just threw away a portion of the pixels for no good reason in your image for the sake of correcting slight compositional mistakes. You have lessened the resolution of your camera and have downgraded what you have spent money on when it comes to being able to achieve a certain resolution. All of a sudden, a few hundred dollars on a tripod has saved the resolution of your camera and allowed you to achieve the perfect crop in camera at the scene so you don’t have to throw away pixels in post processing.
The repeatable quality here also works with fine tuning the composition. You can capture the image and then step back to evaluate it. You can then make subtle adjustments to the camera placement to change the relationships between elements. For instance, on a recent workshop that I conducted that was a big part of the teaching for the day was making subtle changes to a composition to better capture the story which was being created. It is hard to make those adjustments when you are handholding because you have to first find that starting position once again and then work from there for the change. This becomes a very aggravating part of the experience and ultimately you will not get the image as fine tuned as you would hope. You will also lose patience and abandon the scene before you have it perfected.

Advanced techniques in post processing also benefit from the repeatability that you gain with a tripod. Whether you are focus stacking an image to get insane depth of field, or you are blending multiple images as a High Dynamic Range (HDR) image, you will need images that stack perfectly on top of one another during the changes that you dial into the composition. Shooting panoramas also benefit from this as well, as you can keep the top and bottom framing the same while adjusting the left and right boarders of the image along the series of individual frames that will be stitched together in post later on.
When it comes to slowing the process down, this can actually be a very good thing in photography. In fact, that is one of the universal truths about medium format photography. Everyone that goes into that, or even large format photography talks about how this change actually slows them down. They are more cumbersome to work with, and many still require external light meters. If you are shooting film, the film is very expensive so you have to make all of the right choices before pressing the button. There is no spray and pray in these formats. The tripod will force you to think about your compositions in much the same way and it will give you the time to really consider the options that you have with a composition. You get to live with a photograph before you ever press the button. You have time to do that edge patrol and clean up the composition which saves time in post processing. You have the time to play with the exposure which is great because you have the composition locked in and it isn’t going anywhere. By slowing down the process, you have the ability to really create the image that you are after and not just hoping that it will turn out.
This is also a good time to mention that you get the ability to shoot in live view on a DSLR by using a tripod. This allows you to see a histogram as well as an exposure simulation based on white balance and exposure input. If you are doing this handheld, you are losing a very important part of the stability of the camera as it is no longer hooked into your eye socket giving another point of contact with your body. With the camera on the tripod, you can play with the exposure triangle at will while referring to the histogram all while the composition is locked in. This is the way that I love to shoot because the histogram is much more accurate than the light meter ever thought about being.
For those mirrorless users, this argument is not as valid because you can have a histogram in the viewfinder and the same information applied to the scene. It is smaller and you will start to get overburdened with information quickly doing this all handheld. You will also find that you will not have the same view of the scene so that edge patrol is nearly impossible in this method of shooting. Having the camera on a tripod will slow the process down and allow you to make minor tweaks regardless of mirrorless or DSLR which will improve your photography more than you can imagine. You can set the composition, and then bring up the tools to help with your exposure after the composition is finalized.

The last of my list of Pros comes in with allowing for a longer shutter speed. Obviously, when we think about long shutter speeds waterfalls come to mind. With exposures coming in at a half second to several seconds it is imperative you have a stable platform to shoot from. What you might not think about is that sunrise or sunset shot where you are wanting with a large depth of field. By stopping down the lens to f/8 or smaller in dim light, you are going to force a shutter speed into the several second category. But you have a camera with an ISO range of 100-250,000 and if you boost that ISO and use the image stabilization features so you can shoot in absolute darkness and get an image that looks like it is daylight. Yes you can….but look at all of that digital noise that you have introduced into the image. This is not a usable image for anything other than being a snapshot and a way of documenting that you were there. If you intend on presenting this image to anyone, or printing it out in way you will be very disappointed. By using a tripod, you are able to shoot at a cleaner ISO (one that has little to no noise) while going with a longer shutter speed. You will still get a sharp image as far as camera motion goes and one that you will feel comfortable printing out, or presenting to folks online to see.
I feel that the positives of using a tripod are well worth the tradeoff with the longer list of negatives. You will get a tack sharp image, with a repeatable quality between exposures, a slower workflow so you can handle the small details much easier, and you will be able to shoot at a slower shutter speed than you otherwise would. In my workflow, I will make several exposures of the same composition as the clouds change, or the lighting changes. I’m only able to do that because of the tripod. I am able to fine tune the exposure, as well as the composition through small changes without affecting the overall framing of the image. I’m able to make filter changes without affecting the composition that I have worked so hard for as well.
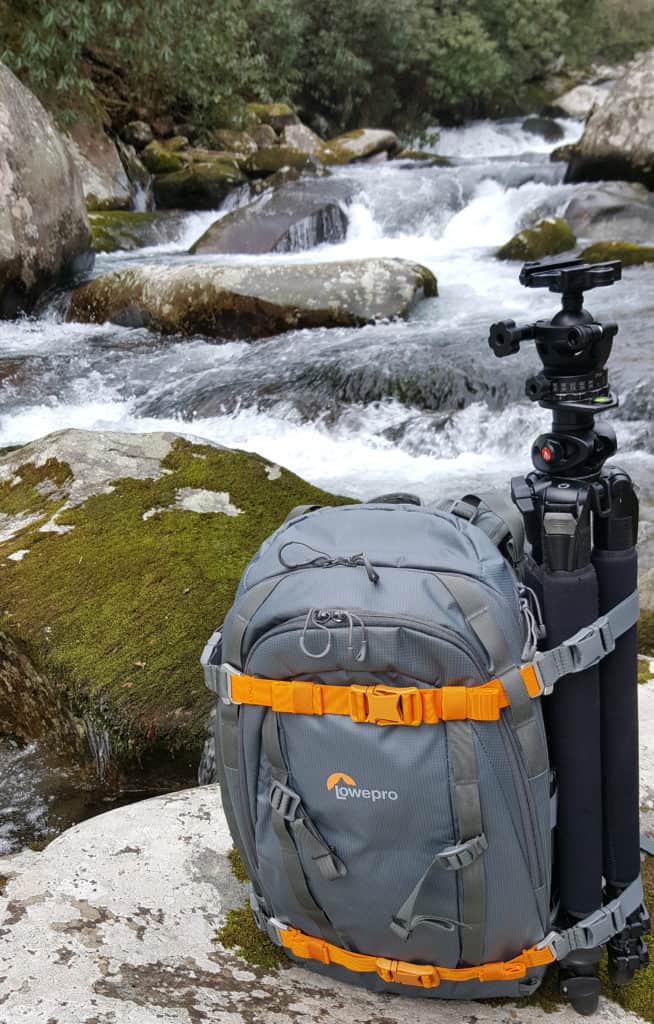
There is still the glaring reality that there are more reasons not to use a tripod than to use a tripod and I want to talk about those for a bit. I do acknowledge them as viable reasons, but I would like to offer some insight on to minimize those negatives and make your tripod something that you will not mind carrying with you and using. The first obstacle to overcome is the fact that they are bulky. As you can see from my Manfrotto 055 CX Pro above, it stands taller than my bag. There is no doubt that this is a bulky item and is the largest piece of equipment that I carry into the woods. I could have gotten it smaller by using a four section leg on it, but that starts to add chances of vibration to the tripod and a three section leg is much more stable. I have chosen the Lowepro Whistler BP350AW camera bag with the consideration of having a secure place to attach the tripod for those long hikes. This works great and there are many bags out there which will allow for a tripod of this size to be mounted to them.
There are also times when I don’t want the extra weight on my back and will just carry them in my hand. I’ve found that with the legs extended a bit, I can actually use the tripod as a hiking pole. Sure, it is not as convenient as a dedicated pole, but for those times I’m walking in areas that are bit unsteady, I can use the tripod to balance myself out. I can use it to check the depth of the water I am about to wade through, and I can poke through leaves to see where terra firma is located before stepping. Yes, the tripod is bulky, but I’ve found several uses for it outside of its intended design which makes it worth carrying.
Whether the tripod is carried in your hands, or mounted to a bag, you want to be aware of the weight. I’ve found that tripods and ballheads are very much like bicycles in that you can have your choice of two of the three options. You can have your choice of cheap, light, and well built. If you insist on cheap, you will give up ether light or well built. If you are like me and want light and well built, it won’t be cheap. If you opt for cheap and light, I can pretty much assure you that it will break in the first month of use. Carbon fiber is the best choice for a build material as it will be light, and surprisingly strong. It will minimize vibrations and not be as susceptible to temperature extremes. The head is the part where the most of the weight comes into play. The Acratech ballhead that I use, the GP-SS comes in at about 2.5LBS which is about what the tripod is on its own. The entire combination comes in at less weight than my all in one Slik tripod that I used for about a year before a leg broke. It isn’t a cheap option, but it is one that has put up with steady use for nearly a decade now.
When I teach workshops I like to share those times when it is good to spend money on gear as well as when to save the money. Everyone likes to throw money at the newest camera bodies that come around and that is one of the last places that you should be spending big bucks. The difference in quality comes in the stuff around the sensor. I always say that lenses are where the money needs to be spent first and foremost. Related to that is the filters which is why I use Singh-Ray filters. They don’t degrade the quality of my lenses and they keep the image true to what I know the rest of the gear is capable of. The last place I recommend that money is spent is on a tripod. The tripod makes a bigger difference in the quality of the image than the actual camera body because it gives you that stable platform to shoot from and the chance to have repeatable compositions. This will allow a much more polished image to result from the click of the button.
Now that I have started to convince you that a tripod is a good idea, you are starting to look at them and you are realizing that tripods can be very complex with how they are deployed. Add to that some of the cheaper ballheads as well as pan and tilt heads have more levers and dials than you can figure out. Sadly, the cheaper the gear, the more complex that it is. I guess it is cheaper to design something where individual functions are controlled by individual levers. They look more impressive and make the photographer feel more “professional.” The actuality of the situation is that the tripod is cumbersome to use and requires to many points of contact to be used seamlessly. This makes it to where you would rather not use something so complicated. I totally get that, I get frustrated choosing from five different knobs just to find out how to pan the camera over to right a little bit.

As you can see from my review on the Acratech head, this is very basic and easy to figure out. It is intuitive to use and efficient in the field…even in the dark. The tripod is also very simple with levers to secure the leg segments with a thumb lever to extend the legs out to a horizontal angle. There is a single knob that is responsible for releasing the center column to extend or to reposition at a 90 degree angle to get the camera down very low. The controls are simple on my setup and allow for a great deal of flexibility. You can see from this short video that I did a while back just how flexible a tripod like this will be in the field. It allowed a stable platform which allowed exposures of 20-30 seconds on this waterfall.

For those that say a tripod strips you of your creativity, I would like to say that a tripod will actually help you be more creative. By having your tripod mounted to a tripod, you have time to look at a scene and really study it. You can make slight changes and wait for the light to be just right without your arms going numb from holding the camera. You can get the shot that you think will work best and then you can improve on it whether it is by adding filters or changing the exposure triangle. Creativity comes the minute that you take the first shot and then start to think about how to make it better. By changing small aspects of the image, you are adding your personal touches to the scene and releasing your true creativity. Your image is not a knee jerk reaction, but a well thought out presentation of an idea.
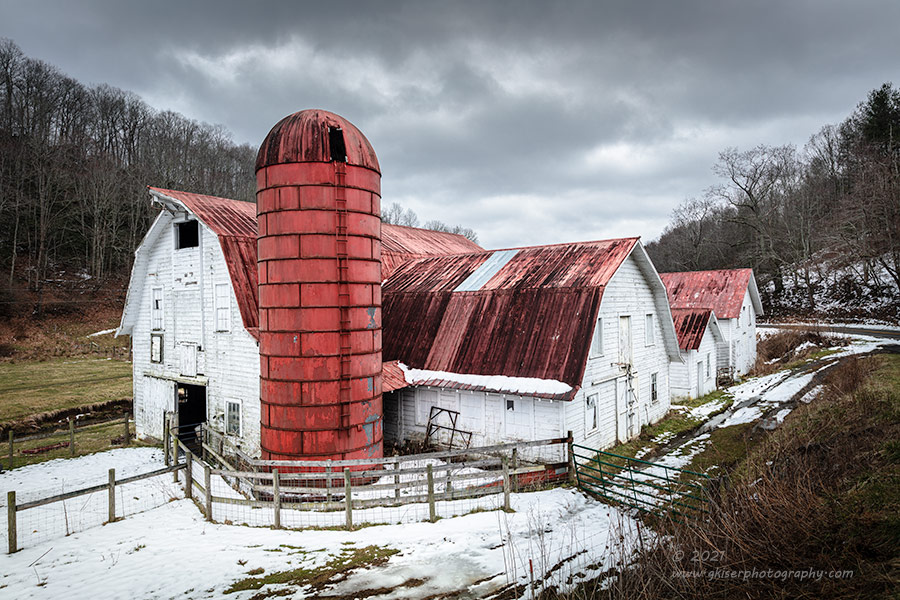
This is still one of my favorite pictures from this year and is the result of a lot of different variations on the composition. Had I gone with the first shot, there would have been things that I didn’t like about it when I got home. It was my first reaction to the scene that I had photographed. It was only after evaluating what I was seeing in the captured image that my creativity started to come through. I changed the composition slightly about a half dozen times or so until the fencing all fell into the right places. Then I waited until the clouds accentuated the elements in the frame. My creativity came in the form of taking control over the smallest details of the scene and picking the right time to capture the image.
Yes, a tripod will slow down your process because it takes a few minutes to set it up, but in that slowing of the process, you can really start to see the potential of the scene in front of you. The slowing is a mixed bag here and while it is cumbersome to start using, you will find that even during the setup, you are evaluating the composition and how the elements are coming together. Make that slowing of the process something that will benefit your photography just as if you are shooting with a large format view camera. You won’t miss nearly as much as you think, and you are likely to capture something even greater than what you initially saw.

Spontaneity is something that comes into play with being a landscape photographer from time to time. Usually, we are very slow in our process because things aren’t really happening that quick. You might feel that by using a tripod, you will lose the ability to react quickly to scenes as they develop. Once, you are fluid with the gear that you are using, you will be able to set up and be ready to shoot in a very short amount of time. In this example of a tree at Doughton Park, I had already finished shooting a broad scene here and had starting packing the camera up. I happened to be down low at the camera bag and I saw the light on this tree trunk at the boulders and decided that I wanted to capture the scene as it was right in front of me. I pulled the camera back out and loaded up my long lens and mounted it to the tripod. I found the place where I needed the camera to be and shot the image. The whole process took about 90 seconds and the tripod wasn’t really that much of the delay. I would have still had to find the location to place the camera even if I was hand holding it which was the majority of the time. It took longer to get the lens mounted and the camera turned on than to get it on the tripod and get it positioned once I found the location I was going to shoot from. In less than five minutes the sky had lost the texture and the shot was gone. I had seen it and reacted to it with plenty of time to capture it with the camera mounted to a tripod. I’ve captured rainbows and other lighting events which were fleeting all while mounted to a tripod. The trick is being in the right place at the right time, and even if you don’t use a tripod, if you aren’t there you won’t capture the scene. The tripod has nothing to do with spontaneity.
The one argument that does hold water for ditching the tripod is the advent of image stabilization. This is a wonderful feature and will allow you to handhold at very slow shutter speeds especially when you can mate lens based and body based systems for a combined approach. I don’t really have a rebuttal for this argument because the image stabilization has become very good over the years. Short of doing exposures in excess of a couple of seconds with a wide angle lens, you really could get away with not using a tripod. However, for saving yourself a matter of seconds on setting up the camera, you are giving up all of the other benefits which a tripod brings. You will get a sharp image, but you will have things creeping into the edges that you didn’t see which will force a crop, or cloning. You won’t be able to get that exact composition back if you are wanting to use additional filters, and you will find it hard to make slight changes to the composition to improve the image. I just don’t see how it is worth not using a tripod for those who are interested in creating the best image possible.

I probably haven’t convinced too many people here today to switch over to using a tripod all the time like I do and that really wasn’t my goal. What I was hoping would happen was that you would have a better understanding of what a tripod can do for your images. Maybe you will start to carry it with you a little bit more and think about using it a few more times. Who knows, over time, you might realize that it does make your images better while not really costing you the time that you thought that it might. The tripod is just a tool like any other part of your gear. It is up to you to learn how and when to use it for the best result, or even if you want to use it at all. I started out using it for the simple fact that I wanted sharp images which has turned into a very distant concern with the technology that is out there now. I don’t have the access to that technology to be fair and it is cost prohibitive for me. That is fine by me though because I have found many other reasons why I need a tripod in my workflow…possibly more now than when I started.
I would like to thank Lisa for this great topic and I do hope that you have benefited from some of my thoughts on the issue. If there is anything that you would like for me to discuss or any questions that you have about my photography, please feel free to ask. I’m always looking for new topics to talk about which are interesting for those reading.
I’ll see you next month!

Remember to use the code KISER10 to get 10% off your purchase